Showing posts with label canning. Show all posts

Food, Family, & Traditions

Tuesday, May 3, 2016
For the past couple of weeks, I have been baking and canning jellies and jams to take to our local farmer's market. Believe it or not, it has been a dream of mine to be able to bake and make items to sell. While I would really love to own a little restaurant, similar to what my dad owned, at this time the farmer's market is about all we can handle.

Food, Family, & Traditions www.HensleeFarmAdventures.com
Baked goods for the farmer's market

As I stood last night at my kitchen sink, looking out the window and stemming strawberries to make strawberry jalapeno preserves, I got a strong sense of déjà vu. I realized that the food itself was bringing back memories. Memories of my childhood, of when my mom and dad would can jams and jellies. When we would get together with my grandparents and make pies to go into the freezer for winter. The food connected me to my childhood. In fact if I stood there long enough I could imagine standing at my parents' kitchen sink, looking out their window, helping to get whatever produce was ready to either can or go into the freezer.

Food, Family, & Traditions www.HensleeFarmAdventures.com
Strawberry Jalapeno Preserves and Pepper Jelly

Tradition in our family and in many families can be found in the food that we eat and make. There are certain things that we always make on holidays. For Easter it is ham, deviled eggs, and my grandmother would always make angel food cake with strawberries. For the Fourth of July, growing up we always had watermelon and homemade ice cream. Thanksgiving of course means turkey, our family's special dressing (stuffing), and pumpkin pie. And of course on Christmas we would have homemade candies that was only made during that season.

Food, Family, & Traditions www.HensleeFarmAdventures.com
Homemade deviled eggs, a tradition at many of our family gatherings.

I try to carry on some of these traditions for my children, but I also try to start new traditions for them. They will grow up eating strawberries and pie crust for Easter, and for the Fourth of July, since my daughter is allergic to dairy, there is no homemade ice cream. Instead we stick to fruit kabobs and of course grilled hamburgers and hot dogs.  Thanksgiving we still have our traditional family meal, and for Christmas, I make several of the candies that I grew up with.

Food, Family, & Traditions www.HensleeFarmAdventures.com
Homemade buns using my dad's recipe that he used when he owned the Pastry Shop


One of the best gifts I have received was from my cousin Jim. To most people it would have no value, in fact it really has little monetary value, but to me it is worth everything. It is our grandmother's rolling pin. It still has the dough on it from the last time that she used it. She passed away in February of 1988, I was only 14 years old. When I look at that rolling pin, I think about her and her raisin pie and her stacked applesauce cake. I also think about how much she loved all of her grandchildren and how kind she was to us. I know that when Jim looked at the rolling pin, he had different memories of her, but still loving memories. He is older than me and while we didn't grow up together, we share what matters most, a grandmother, a rolling pin, and sweet memories.

Food, Family, & Traditions www.HensleeFarmAdventures.com
My grandmother's rolling pin.

So as I make the jams and jellies, as I bake my dad's famous hamburger buns that he served at his restaurant, I am making new memories and traditions, while still carrying forward the old. These memories are ones that my children can look back on and remember, fondly I hope. Memories that I hope they will carry on as they raise their children. Memories that are all founded in food.

What food traditions does your family have? Let me know in the comments below.

Homemade Grape Jelly (It's Easier Than You Think!)

Thursday, January 21, 2016
Our winter weather has finally hit.  After a very warm and rainy December, the snow and ice are here.  I guess I should have known that the warm weather was too good to be true.  And to be truthful, I really want a good snow and cold weather.  It will help with the garden come spring.  Snow will put nitrogen into the ground and the cold weather will help kill some of the bugs.

Even with the winter weather, I have been bitten by the canning bug.  I really didn't get to can much this past summer because of how horrible our garden did due to the massive amounts of rain we had. Our fall garden did very well, but not enough to can, just enough for us to eat as I picked it.

Some years back, my dad made the best apple jelly.  I asked him how he did it and he told me he used apple juice that he bought at the store.  I was shocked, I didn't even know at the time you could do that!  I was used to my parents making jellies, jams, and fruit butters from actual fruit that they either grew or bought from a farm.


Homemade Grape Jelly  www.hensleefarmadventures.com

Fast forward a few years and I have finally made jelly from juice.  I decided to make grape jelly because my family loves grape jelly and the kids eat a lot of peanut butter and jelly sandwiches.  I want to make sure that they jelly that they eat is as wholesome as a jelly can be.  So making it myself would not only ensure that, but would also save money in the long run.

I had all natural grape juice on hand and found the pectin I wanted to use which requires little to no sugar added.  I just can't fathom adding 7-8 cups of sugar to something that is already sweet!

So here it is, some of the easiest jelly I have ever made.

Ingredients Homemade Grape Jelly  www.hensleefarmadventures.com
Jelly ingredients
Pictured are the ingredients.  That's it.  That is all it took.  You can add in a cup of sugar if you like.  I didn't for my first batch.  Please note that I used Lite Fruit Pectin.  If you do not want to add sugar or very little sugar, or even a sugar substitute you must use a pectin that says it is for low to no sugar.

Put 4-5 cups of juice into a pot and bring to a gentle boil. I used 5 cups.

Grape juice Homemade Grape Jelly  www.hensleefarmadventures.com
Grape juice ready to cook.
Once boiling add in pectin.  Cook for 1 minute while stirring.  DO NOT OVERCOOK!  If you do, it breaks down the pectin and it will not jell.

Once you have cooked for 1 minute, skim off the foam that has formed on top.

Removed film Homemade Grape Jelly  www.hensleefarmadventures.com
This is the foam that I was able to take off the top.
Then ladle the juice into clean sterilized jars.  I used pints because we do use quite a bit of this at one time.  You could also use jelly jars.  I was able to get 2 1/2 pints from one batch.

Ready to can Homemade Grape Jelly  www.hensleefarmadventures.com
Ready to go into the water bath canner.
Put it in a water bath canner and process for 10 minutes.  Once processed, let sit for at least 24 hours to make sure that they have sealed.  If any have not sealed, put in the fridge immediately and use. We put the 1/2 pint jar in the fridge and are using that.

Like I said earlier the first batch I made was with no added sugar. The next batch I will make I will add sugar.  I decided that no sugar was going a little too far.  One cup of sugar should be enough to help give it some added flavor.

The jelly jelled very nicely.  I will absolutely use this method again.  In fact the pectin that I used has detailed instructions on how to make jelly using juice you have bought.  After grape, I will be making some apple jelly using store bought apple juice since that is one of my favorites!

Since I had the canner out and I had several jars cleaned and sterilized, I decided to can some other items.  I ended up canning spaghetti sauce and pizza sauce.  I love using Mrs. Wages brand seasonings because it is so easy (just add canned tomatoes if fresh are not available) and the seasonings are really good!  (I am not getting paid to say that.)  I really would suggest trying them.  The only thing that I have not tried of Mrs. Wages is their pickle seasonings.  I like my own version of dill, sweet and spicy, and bread and butter, so I don't see a need to buy the premade seasonings.

Canned goods Homemade Grape Jelly  www.hensleefarmadventures.com
Pizza sauce, grape jelly, and spaghetti sauce.
Remember that canning does not have to be just a summer thing.  You can can food at anytime of the year.  I realize it might not be with food out of your garden, but it is still better than store bought canned versions.

Do you can in the winter?


Canning Ring Pumpkins - A Craft Project!

Thursday, September 17, 2015

I am really excited about today's post.  I know, it isn't my usual recipe post, but it is a cool and easy craft post. And since I've been asked to do more craft posts, I thought this would be perfect.

I have seen something similar to this on Pinterest, and last night my sister texted me a picture of canning rings put together like this, but decorated for Christmas.  She said she thought it would be cute and I should do one for my blog.  I thought, hey why not?

The best part about this craft is that it cost me a whopping $0.10 per pumpkin to make. The only thing that cost were the decorative leaves and the zip ties. We actually already had the zip ties, but I thought I would go ahead and throw in their cost as well.

What helped with the cost was getting canning rings from my parents.  I had a feeling that they might have some and boy did I hit the jackpot.  What I love about them is that they are rusty and old looking.  But it wasn't my intention to leave them that way.

Bag full of wide mouth and regular mouth canning rings.
My plan was to spray paint the rings orange, in fact I had orange spray paint that I had bought for another project, but after I got home I realized that it had been used on a pine wood derby car.  So I looked through my spray paint, and decided to paint them a brown color.

My wonderful hubby helping out!
I thought that the brown would work and I really didn't want to have to wait another day, or spend more money on this.  I really wanted to be able to use what I had at home.  One thing I did purchase, was a bag of sparkly decorative leaves from the local Dollar Tree that I thought would go perfect as part of the decoration on the pumpkins.  After spray painting the rings, I started looking at the ones we had left.  And I kind of liked the way they looked.  Steve talked me into making one with the rings as is.

Wide mouth rings sans paint
That is when he took over the project and let me snap some pics.  It was kind of nice for a change! He made both a wide mouth sized pumpkin and a regular mouth sized pumpkin.  For the wide mouth size you will need between 18-20 rings.  For the regular mouth sized pumpkin you will need 15 rings.

Putting the rings together
You will want to put the rings together like the picture above.  Don't try to fan them out yet.  That will come later.

Once you have them together, the best thing to hold them is a zip tie.  Steve used two zip ties to make it large enough to go through all the rings.  You will need a pretty long zip tie.
Zip tying the rings together
Once you have the zip tie in place, you will need to work with the rings and get them to interlock with each other.
Make sure the rings are interlocking 
You may need to also adjust the zip tie and pull it tighter as you are interlocking and fanning out the rings.  Once you get it the way you want, then you should have a beautiful pumpkin shape.

My soon to be pumpkin.
I believe the one that I saw on Pinterest used a cinnamon stick for the pumpkin stem.  I looked through my cabinets and didn't find any cinnamon sticks, so again Steve came to my rescue and found me some actual sticks from our yard that I used as the stem.  I believe that I actually like the use of a real stick which adds to the rustic look of the rings.  I also added in one of the sparkly leaves for color and voila!
Super cute pumpkins!
After making these and leaving the rings as is, I really like them.  In fact I think that I like them better than the painted ones.  I actually haven't made a painted one yet, but I will just to see.  I also love that these are old and rusty and antique looking.  I think that they are perfect!

So comment below and let me know what you think about this easy and cute craft. 

Throw Back Thursday: Bread and Butter Pickles!

Thursday, July 23, 2015


Growing up, my mom would always make what she would call Refrigerator Pickles with the excess cucumbers we grew.  I loved these pickles!  Later on, I learned that they were basically just Bread and Butter Pickles.  The only difference is that my mom wouldn't can them.  She had a half gallon glass jar that she would save just especially to make her pickles. 

What is great is if you don't feel comfortable canning, you can always whip up a batch of these and put them in the fridge.  I have also seen recipes for dill versions as well as my favorite sweet and spicy! All of these can be put into the fridge to eat on.  They can last for several months in the fridge.  My mom's recipe says 9 months.  I have seen other recipes say 6 months, and some say 3.  I guess it depends on the type of pickle you are making.

For our family, we just don't have the space for a half gallon jar of pickles in our fridge.  However if you looked in our fridge right now, (I can't believe I'm admitting this) you would see a half gallon jar of dill pickles in there.  I know I am eating my own words, but honestly they were a gift. :-)

So back to the recipe.  As I mentioned in my Fried Green Tomatoes post, our garden is not doing that well.  I have been able to pick a few cucumbers, but not enough to be able to can.  Lucky for me one of our wonderful neighbors shared with us some of his cucumbers.  In fact he shared so many cucumbers that I decided to make a batch of pickles.  Now I already had dill, lime, and sweet and spicy in our pantry, so I thought I would get out my mom's recipe for Refrigerator Pickles and can them. 

So without further ado...here they are.
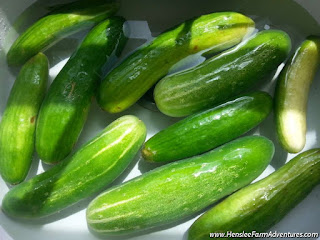
Aren't they beauts?
I did need to wash off the cucumbers, they were just slightly dirty.  They looked so pretty in my sink, I couldn't help but get a shot of them.  Just in case you were wondering, the picture above only shows a portion of the amount of cucumbers we were given.  Our neighbor was very generous!

After I washed them, I trimmed the ends and then sliced them.  This is where a mandolin slicer comes in pretty handy!

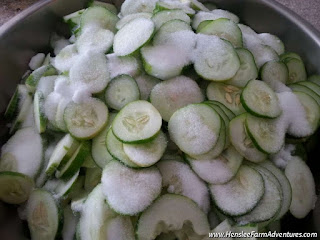
All salted and ready to sit
After slicing, you will need to put them in a non-reactive bowl.  I am using a stainless steel bowl, or you could use a glass bowl.  Let them sit for a couple of hours at least and draw off moisture.  While I was waiting for this process, I went ahead and sterilized my jars, washed my lids, and began cooking the liquid.

I completely forgot to take a picture of the liquid cooking, but you just mix together the vinegar, sugar, mustard seeds, celery seeds, and turmeric and bring to a boil.  Once it comes to a boil, lower heat and let simmer till ready to use.

After the two hours, you will need to drain off the water and rinse the cucumbers.  I did this in small batches. 
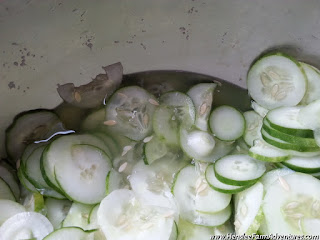
Some of the water I had to drain off
Once drained and rinsed, then pack the jars with cucumbers.  Pour the vinegar/sugar liquid over the cucumbers and remove any air bubbles.  Adjust with more liquid or cucumbers to within 1/2 inch of head space. 

Finish by processing for 10 minutes in a water bath canner.  I doubled this recipe because of the amount of cucumbers I had and ended up with 16 pints of pickles (say that 5 times fast). 

Can't wait to eat these with brown beans!

I am going to let them sit for a week or two, just to make sure that all the flavors meld together.  But as they sit on my buffet table, it is hard for me to walk past them without opening a jar! 

To get the printable version of this recipe click HERE.

Let me know what you think about the recipe, and let me know what your favorite kind of pickle is.
©HensleeFarmAdventures.com. Powered by Blogger.

Search This Blog

Back to Top