7 Reasons to Go to Your Local Farmer's Market

Thursday, April 21, 2016
I know that on Thursday I usually post a recipe. Well this week, I didn't have the time to get a recipe ready to share with you all. That doesn't mean that I wasn't cooking or baking, in fact I have done quite a bit this week. All my cooking and baking have been in preparation for our local farmer's market.

Our local farmer's market.

I have been an avid fan/shopper of our local farmer's market for over five years. In that time you get to know the vendors, you know the quality of their food and produce. I absolutely love when the farmer's market opens and I try to go every week. At the very least I try to get there every other week.

Well this year, I have decided to take a leap and become a vendor myself. I am excited and scared all at the same time. This has been a dream of mine for a long time. I have wanted to make things and sell them, but I have always thought up excuses as to why I couldn't.

Jams and Jellies I will be selling at my local farmer's market.

I was talking to a friend of mine who is great at motivating me and giving me pep talks. She talked about how to first have faith. No matter what God will take care of us if only we will believe. She also told me that if I never try, I will never know if I can succeed. She is absolutely right!

I thought I would share with you the reasons why you should go to your local farmer's market. Some of you probably have, but maybe there are a few who never have.
Eggs are a popular item at the farmer's market.

So here are my 7 reasons why you should go to your local farmer's market.


1.  Great Food!

The food that you buy at the farmer's market is fresh!  It hasn't been picked before it's ripe, to sit on a truck as it travels across country, only to sit (again!) on the shelf for who knows how long!  If it is baked goods, you know it has been baked within the last 24 hours.  You also get to try new things that you might not even see at a regular grocery store.  In fact I can't wait to get some more of the apple wood smoked salt one of the vendors sell. It is amazing!

2.  Great Price!

When I first started going to the market, I noticed that a lot of times the cost of food was higher than at the grocery store.  Not by much, just a few cents. At first my budget-trained mind kicked in and thought, I'm not going to pay that! But then I realized, I'm getting locally raised, organic, top quality food.  That few extra cents?  Worth it! And it is much cheaper than buying organic in a grocery store.  Plus you cut out the middleman. There is nothing better than buying straight from the grower, because...

3.  You Know Where Your Food Comes From

I love knowing where my food comes from. I love knowing that my food comes from a farm that is only a few miles down the road. I love knowing that the produce was picked less than 24 hours from the time that I purchase it. What to know where the food comes from? Ask questions, ask about the farm and their farming practices. They love to share that information with you, and then you will see the value in the items you buy.

4.  Reduces Carbon Foot Print

I touched on this in reason number one. My veggies and baked goods are not coming from across the country, or even from another country. They did not have to travel thousands of miles in a pollution emitting vehicle. There is also less packaging and less waste. This is a great and easy way to start your trek on becoming environmentally friendly! :-)

5.  Vendors Are Very Knowledgeable

Vendors are very knowledgeable about their product, they have to be. I got in on a conversation one year about pest control. One shopper was asking the grower what kind of insecticide he used. The answer? He doesn't! At least not a chemically based insecticide. That was music to my ears. But then he went on to give the buyer some options of how to take care of pests naturally. So have if you have a question, ask it! They are more than happy to answer.

6.  Your Money Goes Back Into Your Local Economy

This is so important! I am supporting local farmers. This money is going straight into my local economy, right back into my home town. I want my town to flurish and I want those small (read non-corporate) farms to prosper.

7.  You Get to Meet Some Great People

The vendors at the farmer's market are some of the most wonderful people that I have met! I love talking to them and getting to know them. The best part, is that they all seem like a big happy family. I have not heard one vendor say anything negative about another vendor. I love that! If someone runs out of an item, then they know where to send you so you can get it from someone else. Unlike the corporate world, they are not out to compete with each other, but to help each other.

I hope that I have convinced you to go to your local farmer's market. In fact I hope that you come and visit me and the other vendors at the first farmer's market of our season.

Do you already frequent your farmer's market?  Tell me in the comments below your favorite item to buy


.


DIY Burp Rags

Tuesday, April 19, 2016
My niece is expecting her second child, a boy, in May. For her first son, I was able to crochet a beautiful blanket. And I was thrilled when she used the blanket for her son's first professional pictures.

This time around however, I have not had time to crochet anything! In fact I wasn't even going to make her anything, I was just going to buy a present, but I started thinking that there must be something that I could make that was easy, cute, and practical.

DIY Burp Rags  www.HensleeFarmAdventures.com


Searching through pins on Pinterest, I found a couple of ideas and decided on both. One was an idea for a burp rag, and the other was a swaddling blanket. They both looked easy enough, and I thought I would share what my version of the burp rags with you.

For my version of this project, I really wanted to use items that I already had on hand, so I decided that a white terry cloth towel would make a great burp cloth. The thing that I love about the towel is that it is absorbent, but not bulky and it fits perfectly over your shoulder.

Since my niece is having a boy, I love the idea of appliqueing a tie on one side of the towel. I could have also tried my hand at a teddy bear, but decided that the tie would be easier. For a little girl, a butterfly would be adorable.

So here is my towel that I cut into thirds. You can cut yours into however many you want, based on the size of the towel and how big you want your burp rags. I used my mother-in-law's serger on the sides that were raw. You could also zigzag stitch them, or you could hem them as well. For me I'm all about ease and I love using a serger!

DIY Burp Rags  www.HensleeFarmAdventures.com
My towel, cut apart and serged.


Next you want to make your template for your tie or what you plan on appliqueing. Here is mine. I just grabbed a sheet of construction paper and free-handed it. The first one I made was too small. So I made a larger one and it worked better with the size of my burp rags.

DIY Burp Rags  www.HensleeFarmAdventures.com
My free-hand template...not too bad from someone who is not artistic!


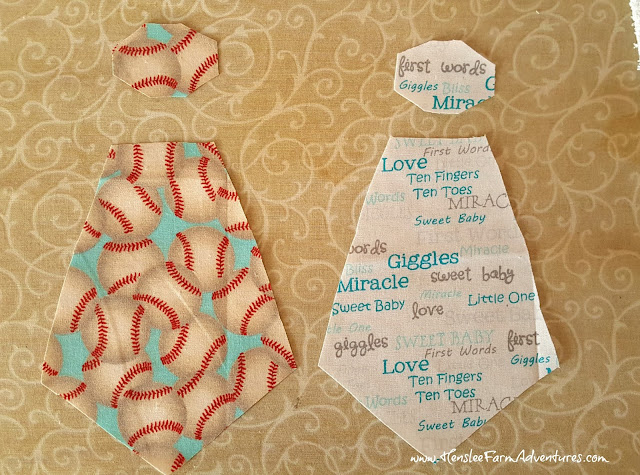
Then pick out your contrasting fabric. I was planning on using some that I already had, but I didn't have a lot of what would be considered "boys fabric." While I was at Wal-Mart, I found these cute fat quarters and since they were less than a $1.00 each, I decided to get them. I could have bought just one fat quarter and made the towels the same, but I couldn't decide between the fabrics. So I decided to get both. If I had bought just one, it would have yielded me three ties. So that means I have leftover material to make more in the future!

DIY Burp Rags  www.HensleeFarmAdventures.com
My ties, ready to be adhered to the towel.


Use the template to cut out your ties on your fabric and then use HeatnBond Lite to adhere it to the towel. Iron on the HeatnBond first to your ties. Make sure that you use the lite version, because you want to sew over it. All this does is stick it to the towel so it doesn't move, and it gives it a little substance as well.

DIY Burp Rags  www.HensleeFarmAdventures.com
Make sure you use the "lite" version.


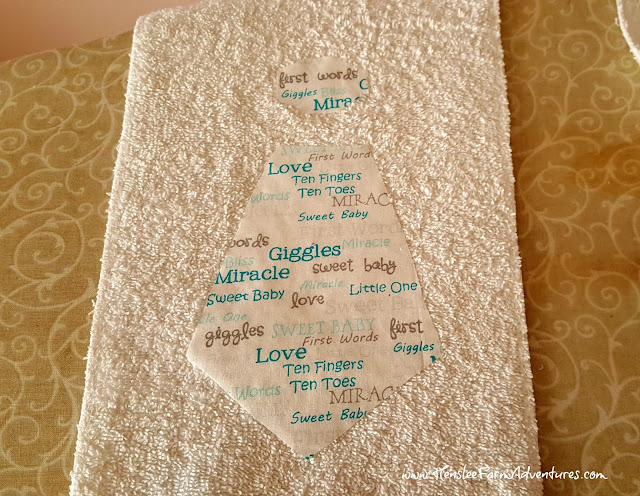
Once you have ironed the HeatnBond to your tie and you have it positioned onto the towel, then peel off the backing and iron the tie to the towel. If you are unsure about this, just follow the directions on the package, they are really easy. I positioned my tie, 2" from the bottom of the towel, and then left a 1" space between the bottom part of the tie and the top part. That gave me plenty of room for sewing around it.

DIY Burp Rags  www.HensleeFarmAdventures.com
Ready to sew around.


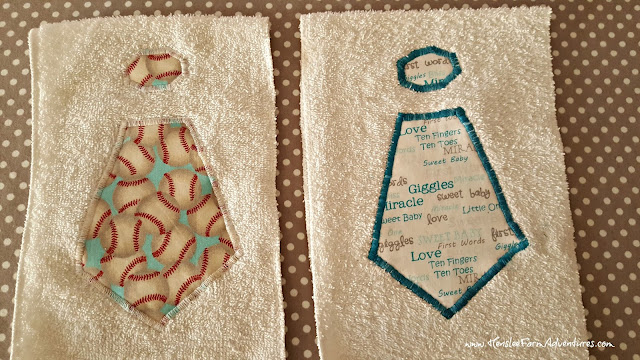
Once you have it ironed on, then you need to sew around the fabric using a zigzag stitch. The stitch was adjusted so that it is close together. The first one I did, which was the baseball one, was easy. In fact I should have known that it was too easy. My next one was of course the tie with the words on it, and I had some trouble with the thread catching. So while the second one isn't perfect, I finally finished it.

DIY Burp Rags  www.HensleeFarmAdventures.com
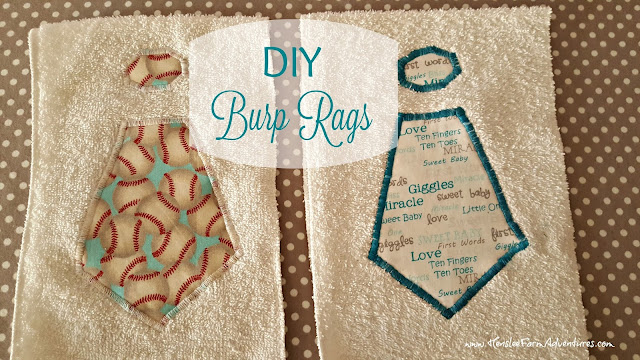
Finished project...not too shabby!


I thought they turned out pretty good. And they were easy enough a beginning sewer could definitely make these.

The best compliment that I got was from my sister-in-law. She said that they looked like they came from a specialty shop. That is really something coming from her, she is the craftiest person I know! She makes me some of the most amazing Christmas gifts!

So there you have it. A quick, easy, cute, and practical baby gift. I really wish I had found these before. Everyone would have been getting these great burp rags from me! :-)

Let me know in the comments below what you think about these.

Ooey, Gooey, Fudge Brownies

Thursday, April 14, 2016
You may be wondering why I am writing about brownies, thinking "didn't she say they were eating healthy?" Well yes I did say that, but every once in awhile it is good to have a treat. And when they are homemade instead of from a box, then they have the ability to be healthier depending on the ingredients you use.

Ooey, Gooey, Fudge Brownies  www.HensleeFarmAdventures.com


These brownies are ah-ma-zing! I got the recipe from my mother-in-law. They are the easiest, yummiest brownie I have ever made. Did I mention how scrumptious they are?

If you like fudgey brownies, then this is the recipe for you. The ease of the recipe and they way you start out reminds me of my Lazy Woman's Cobbler recipe. But my favorite part about this recipe, besides the chocolaty goodness, is that it is made with staples that most people already have in their kitchen!

The other thing that I like about this recipe is that it makes a full 9x13 pan full of brownies. You can't get that size from a box mix!

So I won't keep you waiting any longer, here is the fabulous recipe for brownies.

Ingredients:

  • 1 cup butter (2 sticks)
  • 2 cups of sugar
  • 6 tablespoons of cocoa
  • 1 1/2 cups flour
  • 4 eggs
  • 1 teaspoon vanilla
Ooey, Gooey, Fudge Brownies  www.HensleeFarmAdventures.com
Simple pantry staple ingredients. I love recipes like this!

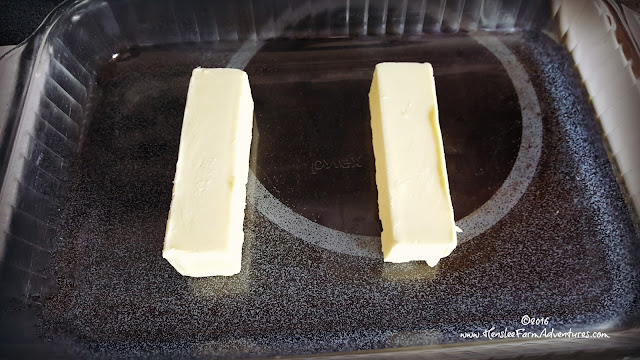
Preheat your oven to 350°F.  As your oven is preheating, put your two sticks of butter in your pan and put it in the oven to melt.

Ooey, Gooey, Fudge Brownies  www.HensleeFarmAdventures.com
Butter ready to be melted.

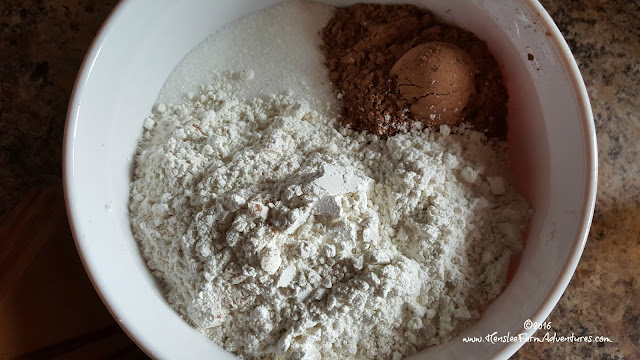
As you are waiting on the butter to melt, mix your dry ingredients together in a bowl.

Ooey, Gooey, Fudge Brownies  www.HensleeFarmAdventures.com
Dry ingredients. Be sure and mix well before adding melted butter.

Put your eggs in a separate bowl.  As you can see, I only have 3 eggs.  That is because those are duck eggs I am using.  They are huge so I only need 3 instead of 4 and the reason I love using duck eggs in baking is because they make your baked goods, lighter.  If you only have chicken eggs then use 4. I also added in the vanilla with the eggs after I beat them.

Ooey, Gooey, Fudge Brownies  www.HensleeFarmAdventures.com
The duck eggs. Great for baking!

Once the butter is melted, add it to the dry ingredients and mix.  The mixture may be a little hot, so instead of adding the eggs, take a little of the butter/dry ingredients mixture and add it to the eggs to temper them. Then add the eggs into the mixture. If you don't do this, you will end up with scrambled eggs.

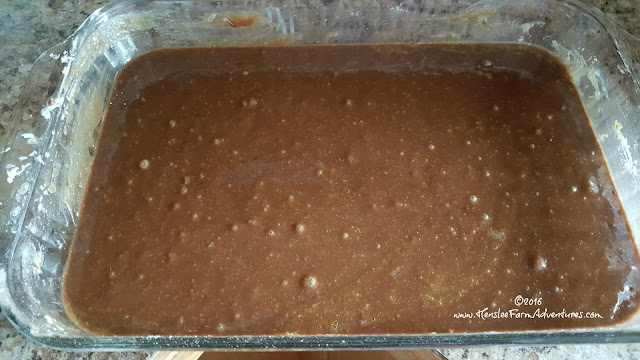
Put the mixture back into the 9x13 pan and bake for 30 minutes or until a toothpick inserted in the middle comes out clean.

Ooey, Gooey, Fudge Brownies  www.HensleeFarmAdventures.com
Ready for the oven,.

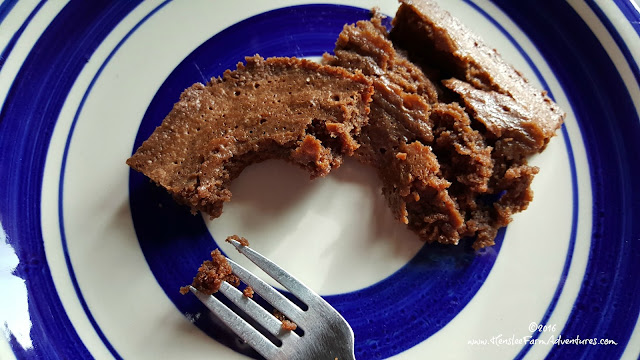
This next part is the hardest part of this recipe. Do your best to let cool, before cutting and eating. It was almost impossible for me to follow this step. In fact I went ahead and cut them while they were still warm, which means they fell apart a little. Really, I don't care, they were still delish!

Ooey, Gooey, Fudge Brownies  www.HensleeFarmAdventures.com
Why yes, I did take a big bite out of that piece. Yum yum!

The only thing better that I could think of would be to add a scoop of ice cream right on top!

The great thing about this recipe is that you can have add-ins to this mix. Like nuts? Add a cup of chopped pecans or walnuts in. Want it to be extra chocolaty? Add in some chocolate chips. I have added in the Andes mint chips before for mint chocolate brownies. So good!

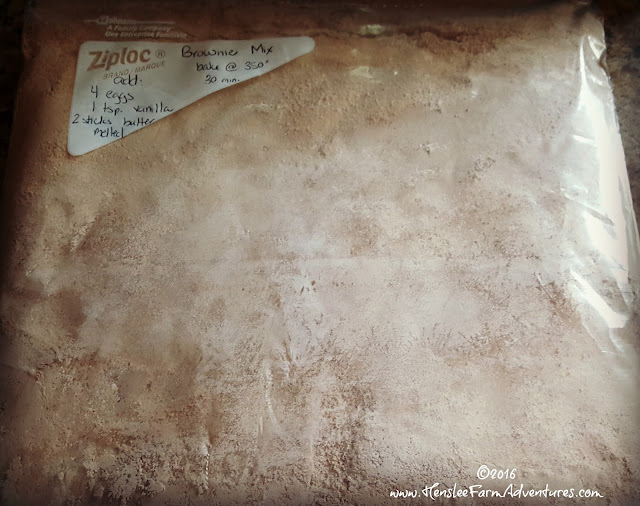
The other thing that you can do (to keep you from buying the box mix) is to mix up the dry ingredients and put them in a sealed bag ready to add the wet ingredients and bake. You've just made your own box mix! And it is so much better than the store bought stuff!

Ooey, Gooey, Fudge Brownies  www.HensleeFarmAdventures.com
Now I'm ready to make another batch.

Try out this recipe and let me know what you think! Cooking from scratch has never been so easy or so good!


Video - Night Life on the Farm

Monday, April 11, 2016
A lot of times we aren't able to do chores until night has already fallen. It seems like we have been so busy lately that by the time we get home, it is already dark out.

Last night was one of those times. Growing up I was always afraid of the dark.  I would never have dared stepped foot outside by myself at night time.  But as an adult it doesn't bother me.  And being on our farm and our property, I have always felt safe and secure...that is until last night.

Video - Night Life on the Farm  www.HensleeFarmAdventures.com
We only have two of the ducks pictured above.  The first one pictured was killed.

Steve and I decided to check on the ducks and look for any duck eggs that the ducks may have laid at the pond.  The ducks have been staying at the pond lately, even though we would rather they be in the chicken coop with the chickens to keep them safe. In fact if we can catch them when they are in the backyard in the evening, we will herd them into the coop.

Last night we had just made it down to the pond when I heard a high-pitched noise. I stopped dead in my tracks and asked Steve what that was. I had no sooner asked him, when the howling started. I can't even begin to tell you how close that howling was. I stood there paralyzed, the hair on the back of my neck raised, not knowing what to do.

It seemed like an eternity as we stood there listening to those blood curdling howls.  At one point I thought they might be after us. Steve told me to get out my camera and start filming to catch their howls. I tried to turn my camera on as fast as I could so I could catch it, but Abby our faithful border collie ran the coyotes off almost immediately.

Video - Night Life on the Farm  www.HensleeFarmAdventures.com
Abby, our sweet protector.

What was just a matter of seconds, seemed like an eternity.  I kept videoing and we kept searching for the eggs.  The ducks were swimming on the pond and seemed to not be disturbed at all by the sounds that had just happened. Abby stayed by our side until we got back to the house.

Here is the video as we go and search for the ducks and the eggs.


Want to see more videos about our family and life on the farm? Be sure and subscribe to our YouTube channel so you never miss a video.

One-Pan Sausage and Pasta: A Review

Thursday, April 7, 2016
Our journey to healthier eating is continuing. This week has been hard but only because I don't have a written meal plan. Seriously, the meal plan helped a ton last week, more than I really thought it would. The funny thing is that we didn't follow it to a tee, but just having meals written down, gave me a guide to follow.

This week, I didn't take the time to make a nightly meal plan and I am scrambling to figure out what to fix. The only thing that has saved us is that we still have plenty of healthy organic foods to choose from, so meals are pretty easy to whip together, even if I do have to stand in front of an open fridge door for five minutes!  :-)

I was trying to decide what to make for supper last night when I saw a Tasty video. Have you seen these videos? They always seen to show up right when you are realizing how hungry you are. Then they take a recipe that you might not otherwise try, and show you how to make it in a couple of minutes long video.  They make these recipes look so good and so easy! Thanks to these videos, anyone can be a chef!

One-Pan Sausage and Pasta: A Review  www.HensleeFarmAdventures.com
One-Pan Sausage and Pasta

The recipe video that caught my eye yesterday afternoon was for One-Pan Sausage and Pasta. I knew I had all the ingredients and thought it would be a perfect recipe to try. Plus it only takes 30 minutes from start to finish.  

Ingredients:
Here are the ingredients for the dish:

One-Pan Sausage and Pasta: A Review  www.HensleeFarmAdventures.com
The players for this meal, and that's white pepper in the container.

Notice, that all my ingredients are organic. Yes we are still doing organic. There are two ingredients that are missing from the picture above. One is water and the other is garlic. The recipe called for 4 cloves of garlic and I forgot that I used all my garlic for my bone broth. I decided to just used garlic powder instead.  Next time, real garlic cloves would be better.

The sausage the recipe called for was smoked andouille sausage, but I used sausage I purchased at Aldi. It is Kirkwood's Never Any! chicken sausage with tomatoes and basil. This sausage was perfect with this dish since it called for grape tomatoes and fresh basil. The sausage is fully cooked so I didn't have to worry about whether or not it was done, I just had to make sure and warm it through.  Side note: I love the Never Any! line from Aldi.  Their ham lunch meat is amazing and I can't wait to try the whole chicken that they now have available.

Making the Recipe:
To make the recipe, I sautéed the onions in olive oil first and sprinkled some garlic powder over them. Then I added in salt, then laid the spaghetti (a 1 pound box) in next, then continued with tomatoes, basil, and sausage. Once everything was in the pan, I added in 4 1/2 cups of water.
I let this come to a boil, turned down the heat to low, put a cover on the pan, and let simmer for 10 minutes.

One-Pan Sausage and Pasta: A Review  www.HensleeFarmAdventures.com
Beautiful tomatoes, basil, and sausage.

At this time, the recipe says that the water should be absorbed by the cooking spaghetti and the spaghetti should be at the al dente stage.  Mine was not.  I did need to cook it a little longer, but only a couple of minutes longer.

Then I added a little pepper (I used white pepper) and some Parmesan cheese and voilà

The first thing I noticed was how much spaghetti was in the pan.  That one pound box made a ton! Thankfully my parents came to supper last night, or we would be eating on this for days! Also it was a little void of flavor. I'm wondering if that was because of the switch in sausages.  

One-Pan Sausage and Pasta: A Review  www.HensleeFarmAdventures.com
Ready to cook.

What I Loved About This Recipe:
I loved the ease of this recipe. I loved that I could cook everything in one pot. And I loved that it didn't take very long for me to cook! In fact during 12 minutes that I had to let it simmer, I was able to make a nice side salad to go with our meal. 

What I Would Do Different:
I didn't care for all the pasta, so if I make this again, I would only use half of the one pound box.  And then of course, I would need to decrease my water as well.  I would try about 3 cups and see how that does.  I would also add in more veggies.  Some nice mushrooms and some colorful peppers would be amazing in this dish.  I would also add in some Italian herbs to kick things up a notch.

Overall Rating:
I would rate this recipe a B+ with the way that I made it last night.  Who knows it might have been better with the real garlic cloves and smoked andouille sausage.  But I think the real problem for me was the excess pasta and lack of veggies.  But of course that is my personal preference.  Do I recommend it?  Yes, it is a great recipe for the weeknight when you don't have a lot of time to cook and you want something good and this can rival take-out any day!

Funny, but I can't find the video from Tasty that I saw yesterday.  However, I do know that they based their recipe from another site.  So if you would like to get the recipe, I'm going to direct you there. Click here for the recipe.

Have you made any of these one pot pasta dishes?  Let me know what you think in the comments below!


Life and Death on the Farm

Tuesday, April 5, 2016
About a year ago, I wrote a post about farm life and if it really is worth all the trouble.  Fast forward a year and the troubles are happening again, but in a deadlier version.  But I will get to that a little later.

First I want to introduce you to our newest family members.  This is what I love about having a farm. The babies and the new family that we introduce on our farm. The new life that makes you feel so good and happy inside.

One of the things that I love about our public school is that in kindergarten and first grade, the classes get to hatch ducks and/or chickens.  They learn all about the process and the life cycle.  They get to see something that most do not get to witness, even in this rural area. I have never see children so excited.  Talk about a true hands-on learning experience.  That is something that they will always remember.

Aren't they cute?
The only thing is that once they chicks and ducks hatch, they need a place to go, We were lucky enough to be able to get 5 chicks from Carly's class to take home with us.  They are the cutest things and we get to experience raising chickens from the chick stage.  Before, we always bought pullets because we were afraid that we didn't have the time involved to take care of them.  But since we raised ducks up last year from babies, we thought we could do the same with the chicks.

We are hoping to get a couple of more ducks as well. There is a class that is currently trying to hatch some ducks and hopefully if they all hatch, we will get a couple of them.

But chicks aren't the only addition to our family. We have another one as well.

Carly has always wanted a bunny. From the time she was 4, she has been asking for one. We have always put her off saying that we didn't have a place for one and we didn't have the time to take care of it.

Well, this weekend we finally gave in. But there is a catch. She had to pay for the bunny, she has to take care of the bunny, and she has to do extra chores in order to help pay for feed.

Meet Rocky:

Our sweet, totally adorable, floppy-eared bunny. I'm in love!

Rocky is short for Rock Star.  That's right! We have a rock star living in our house. ;-)

We are not sure if it is a boy or girl, but it is the sweetest thing ever! This little bunny is so docile and loves to explore. I'm glad for this addition to our home. Steve and Carly will be building a rabbit hutch this summer so look for that post to be coming in the future.

Now for the bad.

We have lost a couple of our animals. First is was one of our guineas. It disappeared while we were away for the weekend. We even had Steve's daughter come and check on our animals. We came home to a pile of feathers.

With this many feathers you know the outcome can't be good.

The worst part was that four days later the guinea showed up in our yard dead. So now I'm wondering, did it get away from the original attack, only to come back home to be killed? I really thought that maybe one of our dogs had ended up killing it, but now I'm not so sure. They are rarely every aggressive to our birds, so it wouldn't be like them to kill one of them.

I posted a YouTube video of the sound of coyotes that run across our back field every night.  Well, the other morning, after Steve got up to go to work, he heard Abby (our border collie) going crazy. He got the spotlight out, and shined it into our backyard and just beyond the electric fence stood a coyote. As soon as the light hit it, Abby took off like a crazed and vicious animal (she is honestly so sweet) and tore into that coyote and drove it down past our creek.

This is one of the reasons why we have the dogs that we do. They are both stock dog breeds and very protective. While they may be part of our family, they do have a function on our farm, and that is to keep us and our animals safe.

We started talking about beefing up security. We need to redo the chicken run. The chickens can now get out and they roam free all day long. I love it, but it is no longer safe for them.

But the guinea is not the only one we lost. We also lost one of our ducks. Our one and only male duck. I didn't find a pile of feathers like I did with the guinea. It only took one...

This is the last thing I wanted to see.

I also found some paw prints.

One of the paw prints I found.

These are too large to belong to one of our dogs.

So now the hunt is on. Our first priority will be to drop everything and start working on our chicken pen. They are not going to be as happy, but they will still be alive. And this summer, we hope to get a chicken tractor built so they can still roam where there is fresh grass, but still be protected. And of course while we are home, they can roam free all over our yard.

So take a look at the paw print for me, and if you recognize it, let me know in the comments below what you think it is.  Is it a coyote? We also have bobcats around here as well.
©HensleeFarmAdventures.com. Powered by Blogger.

Search This Blog

Back to Top