Homemade (Easy!) Creamy Coleslaw

Thursday, July 14, 2016

I love when my garden starts producing.  There is nothing better than making delicious, wholesome recipes from food that you have grown yourself.  The next best thing is making those recipes from food that I have received as gifts from friends and family.

I was lucky enough to get some wonderful cabbage from my aunt and uncle the other day.  I did not grow any cabbage this year, so it was a treat! I decided to make some coleslaw and thought I would share with you my easy creamy coleslaw recipe. It is delicious!

Homemade (Easy!) Creamy Coleslaw  www.HensleFarmAdventures.com


Growing up, our family had a slight disagreement on the best way to make coleslaw.  It seems that when it comes down to it, there are two camps.  One is that the best slaw is made with mayonnaise, and the other is that the best slaw is made with vinegar.  My grandmother and mom almost always made the vinegar slaw, in fact that is the recipe that is in our family cookbook.  But my sister and I both like the mayonnaise version which is the recipe that I am sharing with you today.

Speaking of my sister, I remember when she was still living at home and she used to make slaw for a snack.  It was one of her favorite foods.  She wasn't much of a sweet eater.  She always did prefer homemade pickles, tomato juice, and slaw to any cakes or pies we had.  To this day, she still makes great slaw. 

So here is my version based on how my sister used to make it.

Homemade (Easy!) Creamy Coleslaw  www.HensleFarmAdventures.com
Ingredients, well almost all the ingredients
You can see from above that the ingredients are few, and include your basic staples. Okay, I know what you are thinking, there is vinegar in that picture. Well, there is a little vinegar in this dressing, but not as much as you would put in the vinegar-based slaw. 

While we are on the subject of vinegar, let's have a little chat about what kind of vinegar to use for your slaw. You can see above that I used my Brag's ACV. I absolutely love the flavor and love how good it is for you. If it was any other brand of ACV, I probably wouldn't use it in this recipe. You really do want a good tasting vinegar. What also would be good in this recipe would be a white wine vinegar. It is light and tangy and great in recipes such as these.

Also missing from this picture is a carrot. I like to shred a carrot up to put in my slaw. You don't have to, but if I have it on had, why not? And it seems that the dry mustard is also missing. Oh well.

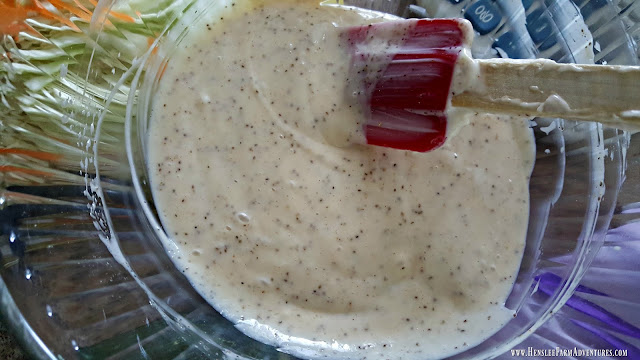
The first thing you want to do is make your dressing and let it sit while you are shredding your cabbage. It lets the flavors come together. In a medium bowl, mix together:
  • 1 cup of mayonnaise
  • 3 tablespoons of sugar
  • 2 tablespoons of vinegar
  • 2 teaspoons of celery seed (not salt!)
  • 1 teaspoon of season salt
  • 1 teaspoon of dry mustard
Homemade (Easy!) Creamy Coleslaw  www.HensleFarmAdventures.com
Coleslaw Dressing, so much better than store bought!
Once you mix the dressing ingredients together, put in the fridge.  Next, shred your cabbage. You can do this the old-fashioned way which is what I did, or you can use a food processor. For me, if I am just cutting up one head of cabbage, it isn't worth getting my food processor out. 

Homemade (Easy!) Creamy Coleslaw  www.HensleFarmAdventures.com
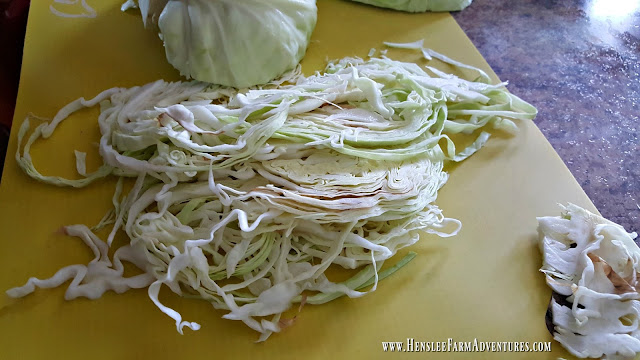
Long shreds, this is how I like it!
You can see above that I like to cut my cabbage in long pieces. I love it when it has been sitting in the dressing and you get a big fork-full and it is hanging off the fork. There is nothing better! I also like those long shreds because it stays on my sandwiches better. That's right, I love to use this slaw as a condiment! Feel free to slice or shred the cabbage the way you like it.

If you are using a carrot and/or onion this is the time to shred and dice those as well and put them in with the cabbage.

Next pour the dressing over the cabbage and toss so it is all coated, and put it back in the fridge to let the cabbage get a little wilted, from the dressing and soak up all the flavor. Don't worry, it will still have a little crunch to it!

Homemade (Easy!) Creamy Coleslaw  www.HensleFarmAdventures.com
This slaw is just screaming summertime!
You can see the yummy goodness. It truly is the right mix of sweet and tangy.  I love to eat this as a side, and as I mentioned above, I also love to put it on my hamburgers, my BBQ pork sandwiches, and of course brats!

Homemade (Easy!) Creamy Coleslaw  www.HensleFarmAdventures.com
This is what I call a slaw dog, with a side of grilled corn!

That's all there is to this delicious slaw recipe.  Looking for a printable version of the this recipe? Click HERE.

Let me know in the comments below what team you are on when it comes to slaw, Team Mayo or Team Vinegar.

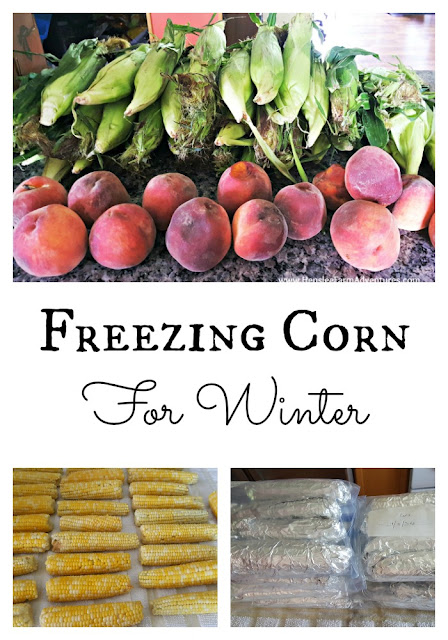
Freezing Corn for Winter

Tuesday, July 12, 2016
I absolutely love summer! And boy is it in full swing! I could do without the blazing temperatures and the humidity, which turns my naturally wavy hair into a frizzy mess (think 80's perm).  But I am loving time with my family, swimming in the pool, and one of my all time favorite summer time activities, putting up vegetables!

Yes, you read that right. I love preserving the food that we grow, whether that means freezing it or canning it. For me it brings back memories of getting together with my grandparents and sometimes my aunt and uncle, and sharing in the work. It was always so much fun, and after the day was done, we would split the food that was preserved between the families. All winter long we would enjoy the good food that we grew. It was almost like having a little taste of summer during the bleak cold winter days. I thought I would share with you how to preserve sweet corn on the cob so that you too can enjoy it all winter long!

Freezing Corn for Winter  www.HensleeFarmAdventures.com

First, I have something that I must confess. I didn't actually grow this corn. We have tried growing sweet corn for several years and we have just not had any luck. In fact the best year we had for corn was one where we were able to harvest 6 ears!

While I was excited about the 6 ears, I felt like a failure that I could not carry on our family tradition of freezing corn for winter. I grew up thinking that you could only preserve the food that came from your own garden. Somehow in my mind if you tried to preserve someone else's food it would rot, or magically disappear. I know, it sounds weird. But I have since learned that you CAN preserve any food! Imagine that! ;-)

I have to give a shout-out to the wonderful lady that grows the corn that I froze.  Her name is Sherri and she has a corn farm.  It is called Farm House Corn. It is absolutely wonderful corn, and she is the sweetest lady! What I love is that she only raises non-GMO corn and she uses no pesticides! I love it when you find a farmer that has the same ideals as you. Check-out her website, she is just starting her business (I am NOT getting paid to say any of this).

Now, back to freezing corn. I used to think that you could just wash your veggies and put them in a freezer bag and you are done.  With some veggies you can do this, but with others, corn being one of them, you have to blanch it first.

Blanching is where you partially cook vegetables, then dip them immediately into a cold water bath to stop the cooking process. Once the vegetables are blanched and dry, you can prepare them for the freezer.

The first step is to shuck the corn and remove the silks.  To remove the silks, scrub (not hard) with a vegetable brush while the corn is in cold water.

Freezing Corn for Winter  www.HensleeFarmAdventures.com
Beautiful corn, with slight blemishes. I love it! To me it means no pesticides.
Once the silks have been removed, cut off any bad places.  I thought I would share this picture with you.  The majority of the corn I got was pretty much perfect, however there were some that looked like the picture above. To me, that shows that pesticides are not being used. I just cut off the tops and we were good to go!

Freezing Corn for Winter  www.HensleeFarmAdventures.com
A treat for my chickens!
Next, bring a pot of water to boil and put in as many ears that will fit and boil for 6 minutes. Unfortunately, I do not have that big of a pot, so I had to boil my corn in batches of four.

Freezing Corn for Winter  www.HensleeFarmAdventures.com
Boiling corn.
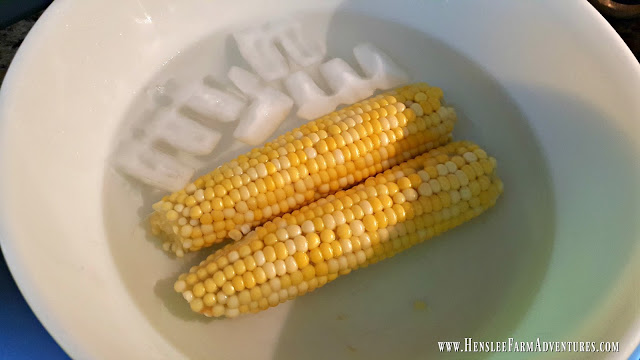
As soon as the 6 minutes are up, you need to immediately immerse the boiled corn in a bowl of ice water.

Freezing Corn for Winter  www.HensleeFarmAdventures.com
Ice water bath.
The ice water will stop the cooking process.  Isn't the corn a beautiful yellow?  And yes, that is two colors that you are seeing. This corn happens to be a bi-color corn.

Lay the corn out on clean kitchen towels to dry.

Freezing Corn for Winter  www.HensleeFarmAdventures.com
Beautiful corn! I believe that is a peach photo bombing this picture!
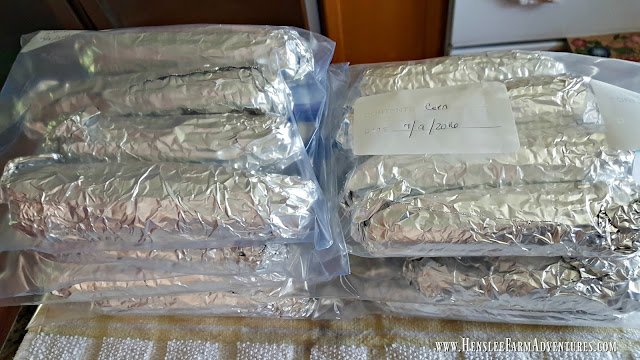
Once the corn is dry, you can roll it up in foil, and put it in freezer bags. After that all that is left to do is put it in the freezer!

Freezing Corn for Winter  www.HensleeFarmAdventures.com
Ready to freeze to eat this winter.
There really isn't much to getting corn ready to freeze. My kids love corn on the cob, and this winter, we will enjoy this corn. We can also thaw it and cut it off the cob and use it for stews and soups. It will give them a fresh from the garden taste! Trust me, after trying this, you won't want to buy canned corn again!

Be sure and let me know in the comments below what vegetables you preserve for winter.


©HensleeFarmAdventures.com. Powered by Blogger.

Search This Blog

Back to Top