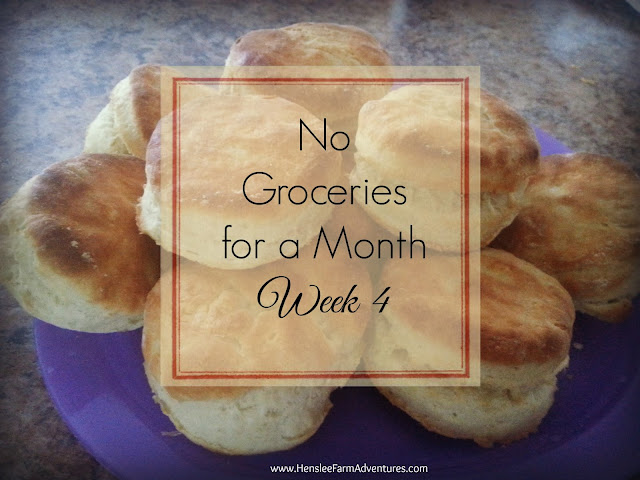
A Month of No Groceries: My November Food Challenge Week 4

Monday, November 30, 2015
No Groceries for a month week 4

Well the November food challenge of no groceries for a month is officially over.  This really has been an eye opener for me and my spending habits when it comes to food.  Here is how I did this last week of the challenge.

I did have to buy groceries this past week, but let me tell you why.  I put the turkey that my mom had purchased for our Thanksgiving feast in my fridge to thaw on Sunday of last week.  On Tuesday I went to put it in a brine and realized that the turkey had been thawing and dripping blood into my crisper drawers.  My veggies that I was going to use for the dressing had been marinating in turkey blood for at least a day.  Yuck!  I wasn't about to take any chances, so those veggies were thrown out, my fridge got a good cleaning, my turkey ended up in the brine, and I had to go and buy onions, carrots, and oranges that I used for our Thanksgiving meal.  I also ended up buying two loaves of bread for the dressing.  I had made bread, but I ran out of time and I got really nervous about having enough.  My mom had extra celery so she gave me hers and I didn't have to buy that.  I ended up spending less than $10.00 for what I had to replace.

Our meals this week were sporadic and consisted of quite a few sandwiches, ham and pbj, until the day of the feast.  Since then we have been eating leftovers.

I was really hoping that I could have made it through the month and tell you that I spent nothing on groceries. What I can tell you is that I spent less than $100.00 on groceries this month and for that I am extremely proud!  For groceries, we generally spend anywhere from $300.00 (on a slim month) to $500.00.  Our freezer also looks much better.  In fact I plan on taking inventory of what we have left and organizing it so I can access food better.  Our pantry has less food in it, but it is still a mess.  I do need to organize my pantry, but that will be a job for a cold snowy day.

I did learn some things while going through this process.  And I thought I would share what I learned with you.

Take Inventory
At the beginning of the month, take an inventory of what you have in your pantry and freezer.  Be sure and write down what you have on hand.  You might be surprised to find that you have multiples of an item.  My favorite inventory worksheets can be found HERE. Just scroll down till you see Cleaning & Organizing and you will find both the pantry inventory and the freezer inventory worksheets that are free!

Plan Meals
Once you have your inventory of your foods, then start planning your meals for the month.  This is a great time to sit down with the family and let them help plan the meals.  I know my kids have favorite meals that they always want me to make.  As I write down the meals I make notes of what I have on hand and what I will need.  I also make notes if it can be a slow cooker meal, or if it will take additional time to make (making it the perfect weekend meal).

Cook From Scratch
Cooking from scratch is a great way to save money, use up your stockpile of groceries AND eat healthy.  I love to cook from scratch, but unfortunately I'm not always home to be able to.  Some of my favorite things  to cook (or bake) are bread, cookies, and soups.  What I have found is that it doesn't take much extra time to make, you can control the ingredients that goes into the food, and it tastes so much better!

It's Okay to Make Mistakes
It is okay if you make a mistake.  It is okay if you have to go and buy groceries, when you didn't plan on it.  I experienced some stress because I wanted to be really successful in this challenge.  At first I thought that if I bought groceries, then I had failed.  That is not the case at all.  The savings my family experienced is enough for me to call this challenge a success. Plus I have the bonus of using food that might have ended up being thrown out instead of eaten.  So now I have learned not to be so hard on myself.  We all experience setbacks and we can always turn those setbacks into something positive.

So how did you guys do?  Did you make it through the month?  If any of you tried this challenge let me know in the comments below how your month ended. 
In Every Thing, Give Thanks

Thursday, November 26, 2015
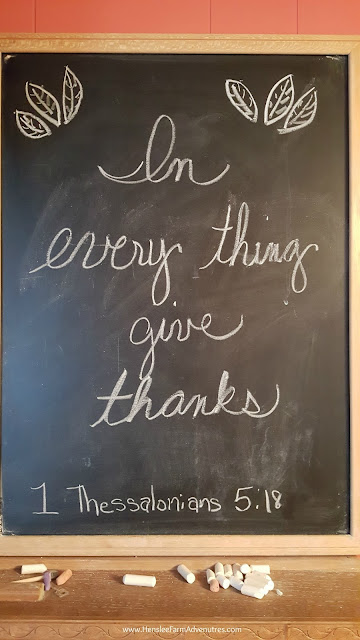
Give thanks

In every thing give thanks: for this is the will of God in Christ Jesus concerning you. 1 Thessalonians 5:18 (KJV)

The verse above is a good reminder that we need to give thanks for every thing that comes into our lives.  I recently listened to a sermon that talked about living a grateful life.  So many times we focus solely on the things that are going bad, and we forget to remember the blessings that God has given us.

I was doing this.  I was focusing on the little things, the things that didn't seem to be going right.  The fact that our siding was not getting up as fast as we hoped, the stress from my job, the fact that I am putting on a few pounds.  Instead what I should have been focusing on is the fact that we have a home to live in, I have a job that pays the bills and provides for my family, and we have plenty of food to eat.

Thanksgiving turkey
Turkey ready for the oven
God has blessed my family, and what better day to give thanks, than on Thanksgiving.  Today is a day to remember the wonderful blessings that we all have.  And if we have an over abundance of blessings?  Then, share with those who do not.

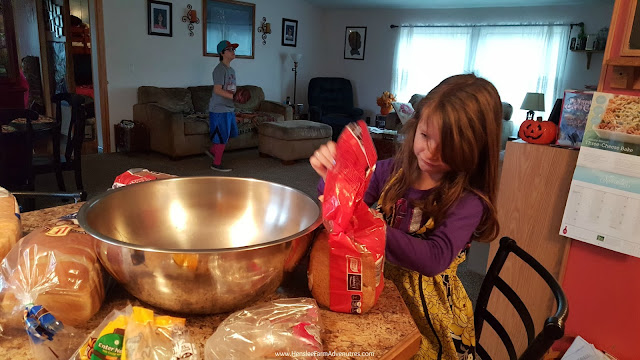
Making dressing for Thanksgiving
Carly getting the bread ready for the dressing
I started down that same old road this morning as I was getting the turkey ready to put in the oven and having Carly start on the dressing for me.  I didn't get all the ingredients that I wanted for the turkey, but that's okay.  It will still taste wonderful.  And I forgot to make the cornbread for our family's traditional dressing, but we have plenty of bread and it will still be good.

Remember God has blessed us.  I give all the glory to God for the family I have, the house we live in, and the food we eat.  He will always provide for his children.

O give thanks unto the Lord; for he is good; for his mercy endureth for ever. 1 Chronicles 16:34 (KJV)

From our family to yours, have a very happy Thanksgiving!

A Month of No Groceries: My November Food Challenge Week 3

Monday, November 23, 2015
No Groceries for a Month
Well, week 3 didn't go as planned.  I'll tell you more about that later.  The good news is that the meals we had were much better than week 2.  I was actually able to plan ahead and cook more!  Here is what we had.

Monday: Leftovers from take out we got on Sunday
Tuesday: Taco Soup (Recipe to come later)
Wednesday: Loaded Baked Potatoes
Thursday: Beans & Ham and Mac & Cheese
Friday: Beef and Bean Enchiladas
Saturday: Meatloaf, Mashed Potatoes, Peas, and Homemade Bread
Sunday: Clean out the Fridge Night!

I'm happy to report that the beef and bean enchiladas used the most leftovers of any of the meals.  I had leftover tortilla shells, leftover homemade enchilada sauce in the freezer, and leftover beans from the night before.

beef and bean enchiladas
Beef and Bean Enchiladas. Yummy goodness inside!

And then you can see our Sunday evening meal was a clean out the fridge night.  I wanted to make sure that all the leftovers from the meals we had this week were eaten and not taking up valuable space in the fridge since in just a couple of days it will be Thanksgiving!  Already the turkey (that my mom so graciously gave me) is in the fridge thawing and getting ready to be roasted on Thursday morning.

loaded baked potatoes
Our Wednesday night meal


Now for the bad news.  I did buy groceries this week.  I broke down and got some things that we really needed for meals and for Thanksgiving.  Here is a run down of what I ended up buying:
  • milk - $2.87
  • celery - $0.49
  • 2 lbs. carrots - $0.99
  • 10 lbs. potatoes - $1.49
  • corn - $2.00 (4 cans)
  • sharp cheddar cheese - $1.79 (block)
  • sliced ham - $3.29 (all natural)
  • cream cheese - $0.89
  • coffee creamer - $1.69
  • Cranberries - $0.99
  • mandarin oranges (I gave in to the cryings of my children, they love these!) - $3.56 (4 cans)
  • 3 lbs. sweet potatoes - $0.99
  • pumpkin - $1.78 (2 cans)
So for under $25.00 I was able to get a few groceries that helped supplement our meals, and will help make the recipes that I plan to serve for Thanksgiving.  While I was really hoping that I could get by without buying any groceries at all this month, I think this is pretty good.  Remember I did spend some the first week, and while I didn't give you a total on what I had spent that week, I will tell you now.  It was $18.00 for 4 items.  Those 4 items were purchased at Wal-Mart.  The items above I purchased at Aldi.  It makes a big difference.  So while I'm not happy that I bought groceries, at least I did save money on them.

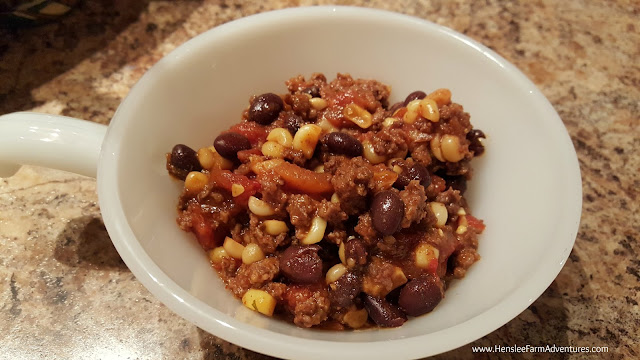
taco soup
Tuesday's meal, taco soup, yummy!

This week is going to be tricky with making meals.  I don't want to make big meals that we will have lots of leftovers due to Thanksgiving coming up.  I don't want to take up space in my fridge now that it is cleaned out, but I do want to continue to cook our meals.  I guess you will have to wait and see how we do this week, and see what kinds of meals I can come up with for my family, and hopefully resist the urge to buy any more!

So tell me, how did you guys do this week?

Throw Back Thursday: Goulash

Thursday, November 19, 2015
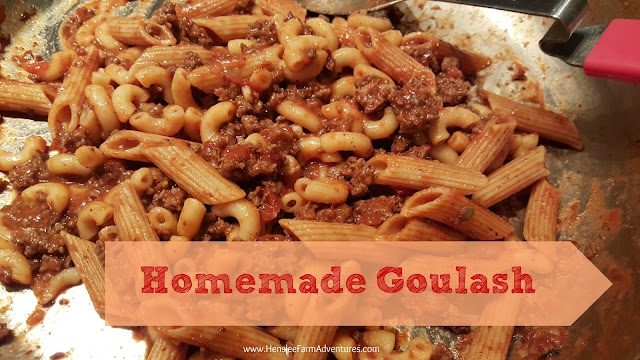
Homemade Goulash

I love today's post, because I get to share with you one of my family's favorite meals.  In fact, I believe this is probably the most requested meal that I get from my family.  It is also a dish that I grew up with, and one that is easy to make, and budget friendly!

My mom always called this goulash.  I know that there are other variations of goulash and I have tried a couple of those recipes, but I always come back to the variation that I grew up with. Well, kind of.  My mom made her goulash with hamburger meat, diced onions, elbow macaroni, and home canned tomato juice.  For us, I use my home canned pasta sauce so that there is a thicker sauce that already has spices added.

goulash ingredients
Goulash ingredients, yep that's all there is!
You can see from the picture above that there really isn't much to it.  The ingredients I use are:

  • 1 pound hamburger meat (this would be good with ground deer meat for you hunters out there)
  • 1 to 1 1/2 cups dry pasta, we prefer elbow macaroni, cooked according to package directions
  • 1 jar pasta sauce of your choice

For this recipe, we like to use elbow macaroni, but when I made it this time, I didn't have enough. You can see in my picture of the finished recipe that there is also penne pasta thrown in as well.  Remember this is my no grocery month, so I had to use what I had on hand.  The bowl in the picture has my homemade pasta sauce in it.  I opened a jar to use some for pizza, and needed to use the leftover sauce for something else.  This was the perfect dish to do that!

To make the goulash:

  1. Cook pasta according to package directions 
  2. While the pasta is boiling, brown 1 lb. of hamburger meat.
  3. After the hamburger meat is cooked through and chunked - my husband loves bigger chunks - add any spices you like.  I add a little minced onion (remember I'm using already seasoned sauce).
  4. Pour the pasta sauce in with the hamburger meat and let it simmer on low heat.
  5. When the pasta is done (I cook it to al dente), drain the pasta and add it to the sauce.

 And that's it!

Goulash
There almost wasn't any left to get a picture of it!
Once I finished cooking this batch, I set the pan on the table and went to get my camera to take a picture.  When I came back, there was hardly any left!  I had to scrap together a small pile just to get a picture. That is how much my family loves this dish!

I like to serve this with a salad and homemade french bread.  Of course some nights, we don't even bother with a veggie or bread, we just grab a big bowl of this pasta dish and enjoy.  This is comfort food at its finest!

Let me know in the comments below what you think of this recipe, and let me know if you have made this recipe before!


DIY Teacher Gift for Christmas!

Wednesday, November 18, 2015

I am so excited that I finally get to share with you a DIY Christmas gift!  I had really wanted to start sharing my gift series with you sooner, but it seems like life always has other plans.

For the first Christmas gift post, I thought I would share one of my favorite ones to make. It is a cool gift for a teacher.  This is something that I have given to my kids' teachers in the past and they always love it!

I have family members that are teachers, and their usual gift they receive is something like hand lotion, soaps, or a coffee mug. Instead of giving them the usual items, give them this wonderful little goodies box that can be personalized in a way that can include items that teachers need in their everyday use at school, as well as include some nice treats.  So without further ado, here is how I made these.

Teacher Gift Boxes Items
Items I used to make the boxes


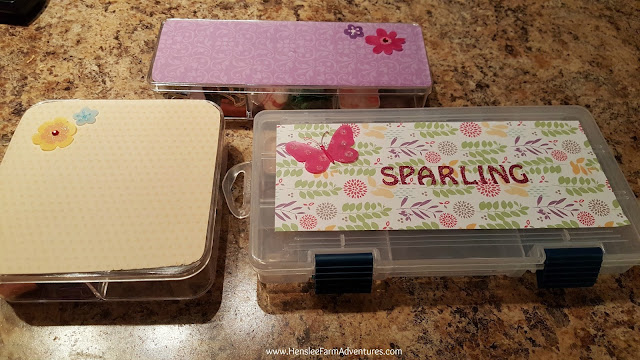
You'll want to start with the box.  In the past I have purchased small tackle boxes from Wal-Mart that are around $3.00 per box.  They are great because you can customize the size of the compartments inside.  The boxes are sturdy, and they can continue to use them for small desk supplies.

Then one day while I was at Target and I found these great plastic boxes for only $1.00!  I loved these and picked up a couple, one rectangular, and one square.  Of course you can't change the size of the compartments inside, but for the price, these are perfect!

The magnets and the pretty alligator clips I got from Wal-Mart, the rest of the supplies I purchased from Dollar Tree.  I loved the fact that our Dollar Tree had some pretty paper that I could use to decorate the lid of the box and the best part is that it had an adhesive backing!  How easy!  Before I had always used scrapbook paper and a glue runner.

Adhesive Scrapbook Paper
Adhesive paper.  If you look real close, you can see where I scored it to put on top of a box.
The first thing I did was to make a mark, or score the paper to the size of the top of the box I was using.  You can see in the picture above the crease of where I need to cut the paper to size.  You could also be more exact and measure, and I even thought about getting out my rotary cutter, but to be honest, I was a little lazy.

After I cut the paper to size, I peeled off the backing and stuck it onto the lid of the box.  Here is where I had some trouble.  I found out that once it sticks, it sticks!  There is no re-positioning this paper, so you have to be very careful.

Once I got the paper on the box lid, I then decorated it with stickers and glitter letters.  This is where to get the kids involved so they can customize their own teacher's box.  I usually put the teacher's name on the lid as well as some stickers.  For this project, I used what I already had on hand.  It just so happens that I had leftover glitter letter stickers and some 3-D stickers that I had purchased from the Dollar Tree for the Back to School Backpack Craft.

Decorated Teacher Gift Boxes
Here are all three boxes, decorated.
Next, comes the fun part of putting the goodies inside.  I used some items that I already had on hand, paperclips, staples, and pencil lead, and then added in the decorative magnets, alligator clips, and of course the candy!

Goodies inside the smaller decorative boxes
Inside the smaller boxes
You can see that in the square box, there were four compartments.  Besides the school supplies and candy, I decided to add in some tea.  For the rectangular box, there were only three compartments so I wasn't able to add as much.  The one good thing about these compartments though is that they are deep, so I can double up on items and fit more things in.

Goodies inside the bigger decorative boxes
Inside the bigger box
As you can see the bigger box has more compartments and they are adjustable as well.  I have several different things that a teacher may need.  You can customize this however you like.  If you know there is something special that the teacher needs or likes to use, then you can throw that in there as well.  I do plan on adding a few more items before I give these to our teachers this year.

Ideas on what to add to the compartments (provided by my Aunt Linda, a retired teacher...thank you!)
  • Post-It Notes
  • Chapstick
  • Nail File
  • Nail Clippers
  • Stamp pad
  • Emergency Sewing Kit
  • Safety Pins
  • Gift Card (Amazon or iTunes)

One thing to remember when you are making teacher gifts, don't forget the special teachers!  That would include music, art, gym, computer, and whatever else your school might have.  They too deserve a great Christmas gift!

Decorated Teacher Goodies Box


I hope you all enjoyed the first in a series of DIY Christmas gifts.  Let me know in the comments below what you think of this idea.


A Month of No Groceries: My November Food Challenge Week 2

Tuesday, November 17, 2015
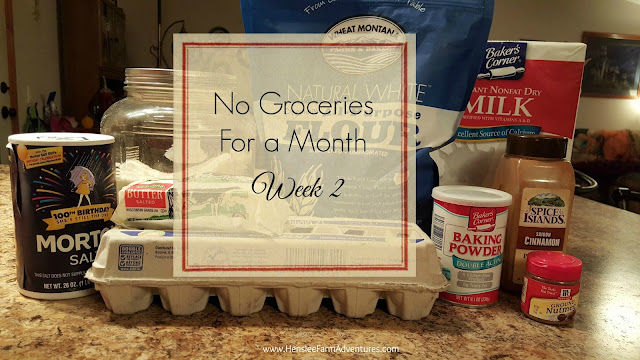
No Groceries for a Month Week 2

We have just finished week 2 of no groceries and I can tell you that it is getting harder.  I can also tell you that life is getting busier as you can probably tell since this post is late.

The good news is we did NOT buy any groceries this week. The bad news is that we did eat out a couple of times. The reason we got take-out  is because this weekend we were working hard on putting siding on our house. Since it was just Steve and I putting on the siding, I wasn't able to take the time off to make meals. Plus by the time we called it a day from putting up siding, we were both exhausted!

Abby and Carly
This picture was too cute not to share, plus you can see the mess behind them from the siding project
What bothers me about the meals we bought, was the money we spent.  We could have used the money spent to purchase enough groceries for at least 1 week probably longer. :-/  What I should have done was plan ahead and had something in the crock pot, or fixed a meal ahead that would have been easy to reheat.  However the way last week went, that just didn't happen.

My lack of planning was the real issue this weekend.  I now realize that I need to plan ahead.  I have always been horrible at meal planning.  Even if I do plan ahead, I don't stick with it.  

As for meals this week, it has been interesting to say the least.  This week was probably one of the most stressful weeks I have had in a long time.  Not due to the no groceries, but to other things that were going on.

Monday: Kids ate at my sister's house; Steve and I ate pbj
Tuesday: I honestly don't even remember
Wednesday: Crock pot chicken (big fail) turned chicken tacos
Thursday: Goulash (family recipe coming soon)
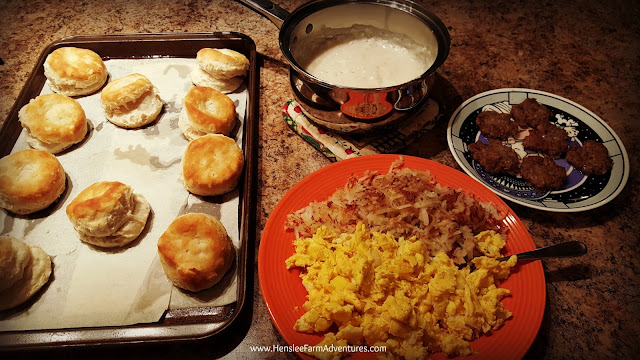
Friday: scrambled eggs, hashbrowns, sausage, gravy, & biscuits (honestly the best meal this week)

As you can see we had some issues this week with the meals.  On Monday, the kids ate at my sister's house. Actually I had a couple of bites (alright more than a couple!) of her chicken and dumplings.  They were delish!  I definitely need to get her recipe.

Tuesday I honestly cannot remember what we had.  Wednesday I took one of my freezer chicken meals and put it in the crock pot.  It did not turn out well.  This is the second time I have fixed it and the second time that it was horrible.  I will not be making brown sugar chicken again!  I ended up shredding the chicken and used some tortilla shells we had to make chicken tacos.

goulash
Goulash - our family's recipe
 
Thursday I made my family's recipe for goulash.  The kids had been asking for this one.  They love it!  I will be sharing that recipe with you very soon.  And Friday it was breakfast for supper.  Really it was my favorite meal.  I love breakfast!

Breakfast for supper, eggs, hashbrowns, sausage, gravy, biscuits
Our yummy breakfast for supper!

My goals for this week are meal planning and making some meals ahead so that they will be easy to heat up. Even though we do not have activities this week we do have siding to finish installing so long as the weather cooperates.  Hopefully this week will be a little easier and I can do more cooking!

So for those of you doing this challenge, how did you do?  Let me know in the comments below.


Throw Back Thursday: French Breakfast Puffs

Wednesday, November 11, 2015
French Breakfast Puffs

It's finally recipe time again!  I wanted to share with you a quick and easy breakfast recipe for two reasons. The first is that I love muffins or in this case puffs for breakfast.  They are easy to make and they taste so good.  It is a quick breakfast that you can eat on the go, which is usually what I have to do.

The second reason is because we are in the middle of a no buying grocery month (read about my November Food challenge), and I am in need of something for breakfast.  Lunch is usually left-overs from the night before, and supper is planned and taken care of, but breakfast is another story!

I remembered that my mom used to make these muffins that were spicy.  Not spicy in the sense that they were hot, but spicy in the sense that they were very flavorful with cinnamon and nutmeg.  And during fall, these are two of my favorite flavors.

I found her recipe and whipped up a batch so that finally, I will have something besides toast for breakfast! Here is the super easy recipe.

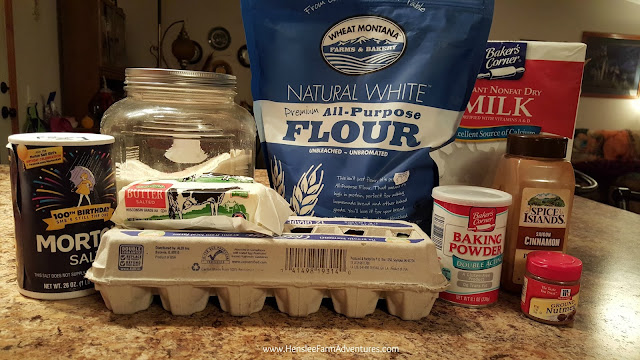
French Breakfast Puffs Ingredients
French breakfast puff ingredients

You can see the ingredients above. They are your basic staples.  I thought about throwing in a banana, but I was just too tired to start experimenting.  So maybe next time I'll mix things up a little.  Notice that also I am using powdered milk instead of regular milk.  This again goes back to the no buying groceries this month and we are out of milk.

First mix together 1/3 cup melted butter, 1/2 cup sugar, and 1 large egg until well blended.

My butter, sugar, and egg mixture, all mixed up!

Next, in a separate bowl, mix together 1 1/2 cups all purpose flour, 1 1/2 teaspoons baking powder, 1/2 teaspoon of salt, and 1/4 teaspoon of ground nutmeg. 

Alternately add the flour mixture and the milk into the butter mixture, starting and ending with the flour mixture.  This is where I goofed.  I didn't read far enough down on my mom's recipe and just dumped the whole flour ensemble into the butter mixture.  There was nothing I could do, but just pour in the milk and mix it all together.  Don't do what I did, because as you can see in my finished muffins, they didn't have a nice rise to them.  They tasted great, but they weren't as pretty.

My goof, don't just throw the flour mixture in there.  I meant to put it in a separate bowl.

Then beat at low speed until blended after each of the flour/milk additions.  Spoon batter into greased muffin pan filling 2/3 full.  I filled a large muffin pan a little less than this so I could stretch the batter and get 12 muffins out of it.  You can also make mini muffins as well.

Before you put these little gems in the oven to bake, don't forget the topping.  Mix together, 2 tablespoons of melted butter, 1/4 cup of sugar, and 1/2 teaspoon of sugar.  After putting the batter into the muffin pan, spoon the topping on top.

French Breakfast Puffs Ready to Bake
Ready for the oven!

Bake in a 350°F preheated oven for 20-25 minutes for large muffins or 14-16 minutes for mini muffins.

These are so good.  If you like nutmeg, you will love these!  They especially go well with a cup of coffee or hot breakfast tea.  They actually remind me of a coffee cake, a nice moist cake-like consistency, with a sweet crunchy top, which I love!
These were so good for breakfast, with my coffee.

If you want a printable version of the recipe, you can get it HERE.

I hope you try these!  Please let me know in the comments what you think about this recipe!

DIY Porch Railing

Tuesday, November 10, 2015
DIY Porch Railing

We have moved on to our next project in our steps to beautify our home.  We have purchased siding and now we are waiting for it to come in and be delivered.  In the mean time, Steve decided to update our front porch railings.

Our front porch and back decks are a real sore spot with me.  In fact they are a sore spot with Steve as well.  When we had our mobile home moved onto our land, it just so happened that our insurance company decided to make a surprise inspection.  When they saw that we had no porches or decks in front of the doors...well you can imagine.  We were given one month to rectify the situation.  

This seems like a long time, but when we both have full time jobs, and two small children to take care of, it's not as easy as you think.  We decided to go the easy route and buy deck kits for all three entrances.  Before that decision was made and before the insurance gave us an ultimatum, we had actually been drawing up plans, and dreaming of the deck that we wanted to build, but at this time we knew we had to put our dream deck on hold.  

We had to build our decks during some of the hottest days of July.  I'll never forget trying to dig for footings for the deck.  There actually was no digging.  We kept hitting rock.  It was almost impossible, it was extremely hot, and the deck kit ended up being a lot uglier than I thought it would. We did our best and we got three decks built in just a little under 4 weeks.

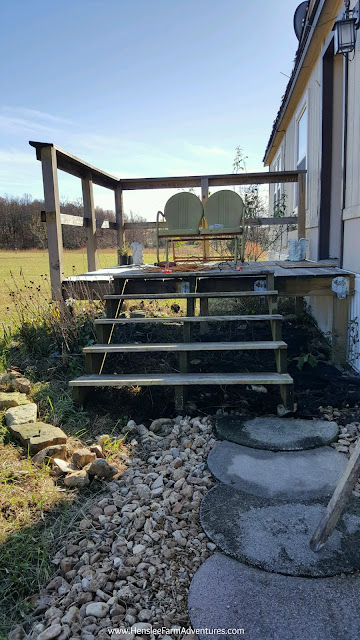
Porch railing before
The porch railing before.  Steve started dismantling it before taking a picture.
The biggest issue with me and those decks are the railings.  You can see in the picture above, just how ugly the railings are.  In preparation for our new siding, the railings on the front porch had to be removed.  I have asked Steve for a couple of years to change out the railings in front.  There was another issue with those railings that I hated besides the way they looked.  If we ever sat on our front porch, those railings were right at my eye level!  I couldn't see anything except ugly railing! So they had to go, and while Steve was more than happy to do that, something had always come up that was more important.  Now that the railings are removed, Steve decided to take the time to build new ones.

In this process we also decided to move the stairs to the middle of the porch rather than against the house. Weeds would grow between the house and the stairs and it was almost impossible to keep them cleared out!  The picture above shows the new placement of the stairs.

Determining Porch Railing Height
Determining railing height so I could actually see over them!
Since we are planning on painting the deck and railings white, we was able to use scrap lumber that he already had.  He knew (and got my okay) that he wanted to make X's along the front, but he wasn't sure how he was going to do it.

Close up of front porch railing
Close up of the X's we both liked!
He said that he tried laying the boards different ways in order to make one big X  in each of the sections, but when it didn't look good, he decided to make a couple of X's in each section.  If you look closely below, you can see that he actually made two V's.  An upward V on the frontside of the railing and a downward V on the backside of the railing. 

Close up of inside of railing and you can see how he constructed it.
When I saw the picture, I fell in love.  It looked so good and I am so happy with it.  It is not completely put together, as you can see above, he will wait until the siding is up and then put the porch back together and secure all the X's back in, plus he wanted to make sure I was 100% happy with it before making it permanent.  Smart man!

Front view of porch railing, and view of how desperately we need siding!
I can hardly wait for the siding to go up and to share that with you, but also for the new porch railing as well. I love that this project cost us ZERO DOLLARS because we were able to use lumber from an old deck that we dismantled.  It is great that we can use what we already have on hand to help make our place more beautiful.

Let me know below what you think of the porch railings!

A Month of No Groceries: My November Food Challenge Week 1

Monday, November 9, 2015
No Groceries for a Month Week One


Well, the first week of buying no groceries has passed.  If you haven't read my post about my November food challenge, the you can read it here, but basically the challenge is to go through a whole month without buying groceries.

Actually this week was not as bad as I had thought it would be.  The excitement of the challenge was there to keep me going.  Normally, I live for Wednesdays where I can read the grocery store ads and see what is on sale that week.  And now that the holidays are nearing, there is usually some pretty cool baking supplies that are available that aren't available at other times of the year.  Or at least they are harder to find.  But I was good, and didn't look at the ads until Friday, when my curiosity got the better of me.  Old habits die hard I guess.  Still there was nothing in those ads that tempted me. 

Another thing that helped a lot this week was the fact that we were able to stay home every night!  That hasn't happened in a couple of months.  But football and cheerleading are over for the time being.  Nothing starts again until the middle of January.  We do have church on Sundays and cub scouts on Mondays, but the rest of our days are our own.

Being able to stay home during the evenings this week, allowed me to fix supper every night.  It wasn't always a grand meal, but we were able to use up some food from our freezer and pantry.

Here is the real kicker.  Even though we didn't buy any food (see below for a few exceptions), we did receive some food.  A friend whose son has started taking piano lessons from me brought us some deer meat, and some bierocks that she makes which are awesome!  I put those in the freezer and I can take one of those to lunch when I don't have anything else!  We also received some fresh veggies from my mother-in-law.  She had bought some for a party she was having and she didn't want the left-overs so we ended up with them as well.  We also received a gift of a very nice beef roast from some friends of ours. 

What amazes me is how blessed we are that even though we aren't buying food, we still receive it.  This same thing happened to us last year, during a no-spend month.  God does provide!

I want to share with you our meals that we had this week.  For a couple of meals, I was able to use left-overs and turn them into something else for another meal.  I love it when it works out like that!  Also, please don't judge on some of these meals.  I am going to be better about adding in veggies or fruit.  There are a couple that after I looked at them, are not the healthiest, but hey, we ate!  Here they are:

Monday: Porcini Mushroom Tortellini, roasted green beans, peaches
Tuesday: Pork chops, stuffing, and beets
Wednesday: Hamburgers, fried eggs, and tator tots
Thursday: Pork roast, mashed potatoes and gravy, crescent rolls
Friday: Hamburger pizza (from leftover hamburger) and BBQ Pulled Pork Pizza (from left-over pork roast)
Saturday: SOS (slop on a shingle) This was made from leftover gravy from breakfast and leftover hamburger and roasted turnips
Sunday: Beans and Ham with cornbread and slaw.

BBQ Pulled Pork Pizzq
BBQ Pulled Pork Pizza - made from leftover pork roast.
It wasn't until Friday that I started making things from scratch, and making due with what I had.  I really wanted to make a BBQ pork pizza, but we didn't have pizza crust and we didn't have shredded cheese.  So I found a somewhat quick pizza crust recipe on Pinterest. The one I usually use takes 1 1/2 hours rising time.  I did not have that much time.  While we didn't have shredded cheese or sprinkle cheese as we call it in our house, we did have sliced cheese that I cut up into little squares and used.  The crust turned out great, and no one was the wiser when it came to the cheese!

Hamburger Pizza
The kids devoured the hamburger pizza before I could take a picture.
As for Saturday's meal, that morning I had made biscuits and gravy for breakfast.  I usually don't cook breakfast except for on weekends.  We ended up with left-over gravy and I still had a hamburger patty left-over which gave me the idea for SOS, or as my husband says slop on a shingle.  Actually that first "s" stands for something else, but I will leave that up to your imagination.

SOS Slop on a Shingle
SOS or Slop on a Shingle as we call it.

I also made two loaves of white bread to put the hamburger gravy on.  I really was afraid that this meal was going to be a flop.  Growing up we would have it every once in a while.  In my early twenties, I used to fix it quite a bit because it was inexpensive and easy.  I didn't know how Steve and the kids would react to it.  To my surprise, they loved it!

Homemade White Bread
Homemade white bread...my favorite!

So the big question is, did we buy any groceries?  Well...kinda.  When I made the pizza crust on Friday, I realized that I didn't have that much yeast.  And then I used almost all of what I had left on Saturday for the bread.  So Sunday we went to Wal-Mart and we bought yeast, as well as coffee creamer, Pepsi (my husband's addiction), and potato chips (also my husband's addiction).  If it was up to me alone, I would have bought the yeast and that would have been all.  But I'll admit since my husband wanted the coffee creamer, I will enjoy that as well.  As for the Pepsi and the chips, well they are all his.

I'm hoping that the second week goes a little better and that I will be able to tell you that we bought no groceries!  On a positive note, my mom has a turkey for Thanksgiving, so we won't have to buy one!  I'll be getting a turkey from her to cook for our festivities.

So did you decide to do this challenge?  If so, comment below and let me know how your week went.


Our Kitchen's New Window Trim

Thursday, November 5, 2015

We are on a mission to update our place.  We had really wanted to build a house and had even gone as far as talking to a builder.  But where we are right now in our lives, we decided that the best thing to do would be to postpone that idea and work on our home.

We currently live in a mobile home, and square footage-wise it is bigger than the bungalow that we moved from.  However our bungalow had a ton of built in storage that I miss.  A lot!  Steve has promised to build me some built-in book shelves this winter and I can hardly wait!  But in the mean time, we have set out to beautify the place a little bit.

I showed you pictures of our front door that I painted and our french door in the back that had to be completely taken out due to rotting headers and footers.  It looks so much better!  We will also be putting new siding on due to our present siding being rotten in more places than what we originally thought.  We also hope to take out the underpinning and put in a rock or a decorative cement block foundation.  And Steve has already built one shutter to see if we would like it.  We did!  It should look a lot better when all of that happens!  I can't wait to share those projects with you!

Our latest beautification project was made possible by Pinterest.  I can just imagine what Steve does whenever he gets a notification that I have sent him a pin.  9 times out of 10 it means more work for him.  What is so wonderful is that I don't ever hear him complain about it.  He may tell me why it wouldn't work, or wouldn't be possible for us, but he is always open to new ideas and will at least give them serious thought.  Thanks honey!

This specific pin was for trim work around windows. We had new windows installed early this year and it was a very good decision!  Our utility bill went down, in the first month by $100.00!  It has stayed down every month since, so they will eventually pay for themselves in the long run.  So with new windows, we really needed new trim.  The trim that we had around some of the windows was just the wood corner round. On our kitchen window it was the plastic corner round.  Needless to say, it did not look good.  We took it down and for months, our kitchen window has been trim-less.

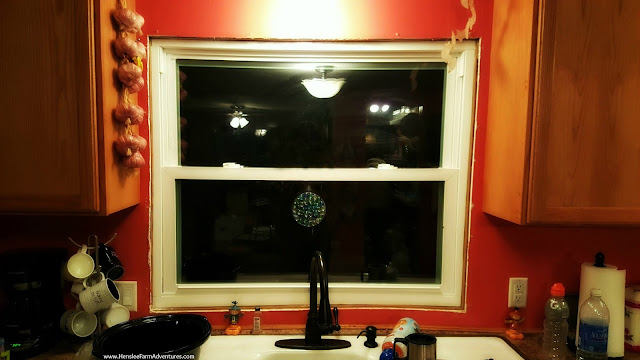
Kitchen window with no trim
No trim, messy kitchen, and picture taken at night equals one ugly mess!
 I sent Steve several pictures of trims that I liked and we agreed and what we wanted.  We didn't follow one pin over another, we just took ideas and measurements and went with what we liked and what would work for our window.

Now comes the simple living, self-reliant part...we used lumber we already had on hand.  That's what I love about this!  It didn't cost us a dime.  Now if we want to do more windows, which we do, we will have to buy some lumber.  But for this first window, we didn't have to.

You may notice in the picture that the drywall below the window is bowed up.  The people that installed the window was supposed to fix that, but they didn't.  We weren't real happy with that and Steve was toying with the idea of removing the window, fixing the frame and then reinstalling it.  Neither of us really wanted to do that.  Well with the trim that we choose, we were able to hide the fact that it was not level.

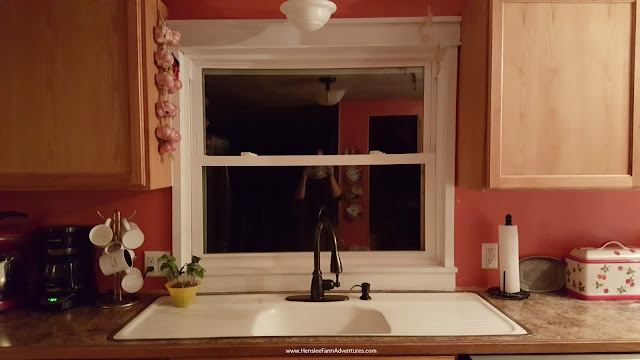
Kitchen window after trim added
Clean kitchen, pretty trim, picture still at night equals much prettier site!
I love the trim work that he did.  The best part is that it has a ledge!  It is not a big ledge, but just big enough I could put a small plant on it.  Steve is planning on tackling the other windows on the days that he can't work on the outside of our house.  Slowly but surely, our place will become beautiful once again.

Let me know in the comments below what you think about the trim.


My November Food Challenge: A Month of No Groceries

Tuesday, November 3, 2015
My November Food Challenge No Groceries

I can hardly believe that it is already November! October is always one of those months that is filled with football games, birthday parties, and Halloween festivities.  With all those activities, the month tends to fly by.  This year was no exception. 

With all of the events and activities there was very little time for me to cook for my family. We have gotten into the rut of either grabbing fast food on the way to or from an activity, or we just plain and simple eat junk! The couple of meals I did make tasted so good. It made me realize how much I have missed eating real home cooked meals. Our fall garden did very well so those home cooked meals included such things as spinach and green beans and will soon include turnips and peas as well. There is nothing as good as fresh veggies from the garden! 

Pantry
Our very messy pantry!
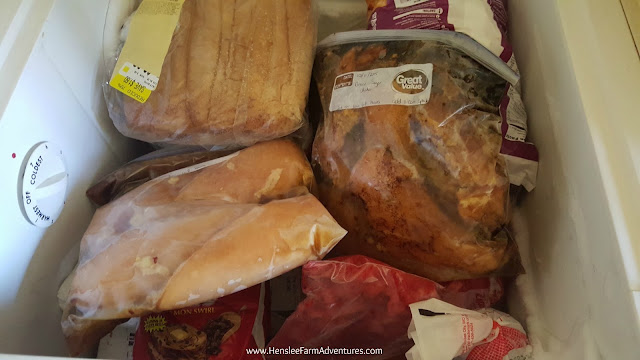
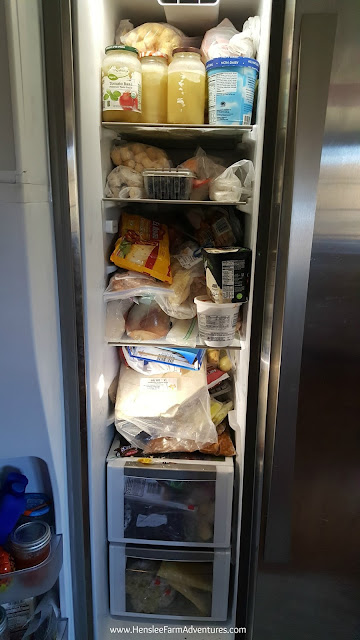
As I was trying to figure out some ideas for meals for this week I was looking through the pantry and freezer and the amount of food we have is astonishing. My first thought was that I really needed to organize my pantry. Then I realized I don't need to organize it, I need to use it! The same goes for our fridge/freezer and our deep freeze.


Deep Freezer
Our deep freeze...this is only the surface.
That's when I had a great idea! Why not go a whole month without buying groceries? I was so excited about the prospect of not going grocery shopping. I looked and we have plenty of staples...flour, sugar, eggs (thanks to our ducks), potatoes, onions, etc. We have meat in the freezer from the cow we butchered, and even some pork leftover. We could actually do this!

I went to go tell Steve my great idea and then it hit me...Thanksgiving! I completely forgot about Thanksgiving. And we are hosting this year. I don't have a turkey in the freezer. But I do have pumpkin for pie, and I have cranberries for sauce, and I can make bread for stuffing.  I started thinking, maybe I can make this work. 

Fridge Freezer
Our fridge freezer, it is pretty packed!
After telling Steve my plan he agreed that we could do this and that we needed to. The savings from not buying food could go towards purchasing siding for our house which we desperately need. It would also allow us to use the food we already have, and not let it go to waste where we would eventually throw it away.  I hate to waste food!

In my thoughts about how this would take place, I started thinking about how we might need to make some exceptions, or what I needed to get, just in case.  Those kinds of thoughts are what have gotten us in this food hoard mess in the first place!  I am not going grocery shopping.  If I run out of bread, I'll bake more.  If I run out of milk, I have powdered.  We have lots of grains, we have veggies from the garden, and we have meat and eggs.  WE CAN DO THIS! 

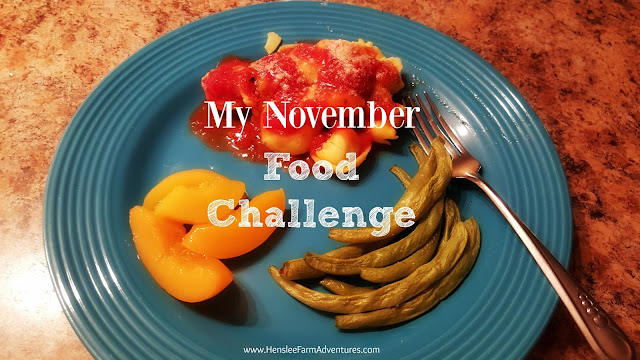
So this month, I will be keeping you posted on how this challenge is going every Monday.  In fact this post was supposed to be published yesterday, but life happens!  I will even let you know some of the meals that we have made, and I will start with what we ate last night.  We had Porchini mushroom tortelloni in my homemade canned marinara sauce, roasted green beans from our garden, and canned peaches for dessert.  It was Meatless Monday for us.  The family loved it and there were just enough leftovers for lunch the next day!

Porcini tortellini, green beans, peaches
Our "blue plate" special meal.
I want to stress that this is NOT a no spend month, this is simply a no grocery month.  Do you hoard food?  Would you like to try this challenge yourself?  If so, let me know in the comments below!

Read my post on how we did with this challenge during Week 1
Read my post on how we did with this challenge during Week 2
Read my post on how we did with this challenge during Week 3
Read my post on how we did with this challenge during Week 4
©HensleeFarmAdventures.com. Powered by Blogger.

Search This Blog

Back to Top