Showing posts with label recipes. Show all posts

Homemade Applesauce!

Monday, October 9, 2017
This summer has been crazy!  Wait, it's fall?  Already?  In fact it's October you say? I can't believe how fast this year is flying by. Actually fall is my favorite season, all pumpkin spice and everything nice.  At least it is my favorite until spring comes along then spring is my favorite season, everything new again and flowers blooming, gardens being planted.  Ah, yes, I'm a fickle one.

But back to fall.  What could be more fall-like than warm comfort foods and spices in the air?  Baking and cooking, now that it is cooler weather is something that I love to do, and one of my favorite things to make during the fall is applesauce.


Applesauce has to be one of the easiest things you can make.  There are only two ingredients you need; apples and a little water.  Of course you can always add in cinnamon to spice things up (we always do) or even apple pie spice.  And if you want to give it a deeper flavor, you can add in apple cider instead of the water.

The most important thing to do however is to start with good quality apples.  This is really what makes the applesauce.  Growing up my parents had several apple trees.  The one that they always used for making stewed apples (a chunkier version of applesauce), apple butter, and apple pie filling was a variety called Grimes Golden.  It cooked up beautifully, was sweet without needing much, if any, sugar added and it didn't have a mealy texture.

Blooms on one of our apple trees

Never heard of this apple?  Well I am not surprised, and if you have, then you rock! You really can't find this apple in stores today.  It is an heirloom variety and was first introduced in the 1830s.  It is considered a "parent" of the Golden Delicious apple among many other apples that are popular today.

Ok, enough of the history lesson!

To make homemade applesauce, first use apples that are good for cooking, and are on the sweet side.  If you use Granny Smith (which it is perfectly acceptable to do), then you will need some sugar added.  I prefer not to add any sugar.  Good varieties to use are: Golden Delicious, Fuji, and McIntosh.  These aren't the only ones you can use, but I wanted to list just a few that are readily available in the stores.  You can use just about any apple, just be cautious however, because apples like Red Delicious can be mealy in their texture and aren't the best for cooking.

Peeled and cored apples ready to be cooked


Once you have your apples, you will need to start peeling and coring all the apples.  It is best to purchase a peeler, especially if you want to continue to make applesauce, or you can do it by hand.  Don't throw out those peels and cores!  You can save them and make some amazing apple jelly or apple syrup!

Apple peels and cores that will become jelly


Put your peeled and cored apples in a big pot, a stock pot is perfect for this!  Add a little water, or apple cider.  Depending on how many apples, you can use 1 cup to 2 cups. For the 1/2 bushel I was cooking, I used 2 cups.  You don't need a lot of liquid as the apples will cook down, you just need something to keep them from burning on the bottom.  Put the heat on low to medium low and let them cook, stirring occasionally. Keep an eye on them and if you need to add more liquid, you can.

Once they have cooked down to the consistency that you like add in any spices that you wish.  We love cinnamon in ours.  You can also have your apples go au natural if you choose.  We also love to leave our applesauce a little chunky.  If you want a smooth consistency, you can use an immersion blender, or use a regular blender, just do it in batches.

Homemade applesauce, looks so good!

  
After it is all cooked down and to the consistency you like, you can preserve them by canning them, which is what we do. You can also let the applesauce cool and then put them in freezer safe containers to freeze. Or the best option you can eat it immediately!  If you decide to can them, you can do this using a water bath.  Just be sure and follow safe canning procedures.

Pint jars just going into a waterbath


There is absolutely nothing better than homemade applesauce.  If you have never made anything from scratch, this is one of the easiest recipes you can start with.  And I guarantee, once you start making your own, you will never want to buy pre-made again.

Let me know in the comments below if you have ever made homemade applesauce, and if you have, let me know how you make yours.
  

A New Year, and a New Recipe!

Friday, January 6, 2017
Happy New Year! I can't believe how long it has been since my last post! Time and life got away from me for awhile, but I am back and here to stay. There is a lot to catch you up on, and while I would love to do it all in this post, it would make it a very long post!

To start things off again I thought I would share a recipe. To be honest, this is not my recipe, I'll point you all in the direction of where I got it, but I will share how I like to "dress it up" and make it my own.


A cold snowy morning on the farm.

 The recipe that I want to share is porridge! Specifically millet porridge. Is there anything better on a cold winter's morning than porridge? Just the sound of it warms me inside. It is so Dicken's, so Oliver-ish (please sir, may I have some more?).  Usually our family eats oatmeal. We all like oatmeal except for my husband... he loves it. In fact my husband has an attraction for oatmeal that borders on the insane. Growing up he had to have it every morning for breakfast. As for me, I couldn't stand oatmeal when I was little. It was a texture thing. However, as I have gotten older (and cooked it myself) I began to like it, but I am pretty picky on the consistency of oatmeal. I like it creamy and more like mush (soft), while my husband likes his chewy. Nevertheless, we have been able to push past this disagreement and somehow make our marriage work.

Millet Porridge


Until recently I had never had millet. We were at our friend's house for a New Year's eve party and we started discussing ancient grains. I know what you are thinking, and yes, it was quite the wild party! ;-) My daughter Carly has bowel issues. We thought it was just dairy and now it may be wheat as well. Our friends (who are amazing I might add) gave us several different grains to try that are all gluten free. We ended up bringing home millet, sorghum, amaranth, and teff. (Check-out my instagram @hollihen to see a picture of the sorghum we popped that night).

The ancient grains we got from our friends.


Of course I started looking up recipes right away, plus looking at the recipes on the packages to see how I could cook these. These grains can be used in just about anyway you can possibly imagine. I decided to go easy the first time and make some porridge out of the millet. What a great way to start! I am completely in love and now I have a better understanding of the relationship that my husband has with oatmeal. I might just end up having the same relationship with millet porridge.

The recipe that I used for basic porridge I found over at the site  Delicious as it Looks. The ingredients are very simple: millet, water, milk, and salt.  For our family I used almond milk. Our poor girl can't even digest the lactose free milk, so almond it is.  For the salt, I use pink Himalayan salt.

Millet toasting in the pan, so pretty!


Here is what I did a little differently.  First I toasted the millet in the pan.  It helps give it a nutty flavor. I then added the liquid and brought to a boil.

Water and milk added, and I promise the millet is in there too.


Then I turned down the heat and let it cook covered for 25 minutes as directed.

I love my cast iron pans!

You can see what it looked like after I took the cover off.  It was a little too liquidy for my tastes, so I continued to cook for an additional 5 minutes with the cover off.

After cooking for 25 minutes, this is before I let it thicken up a little.
  It really does thicken up quite quick and when you let it stand, it will continue to thicken.

I first put a pat of butter in the porridge and let it melt.  I had to sample this and it was the most creamy, yummy, thing I have ever eaten. BUT while it was good just like that, I had to put in my own add-ins.

Walnuts, banana, and pure maple syrup... yum, yum!


I added in sliced banana, chopped walnuts, and then drizzled maple syrup over the top.  It was to die for! I can't even begin to tell you how yummy this was! I am so glad I made a huge pot of this.  I put the left-overs in the fridge and I plan to eat some more for breakfast the rest of the week.

The finished product. So good!!


Another good add-in idea would be chopped apples, cinnamon, pecans, and honey.

I am so glad that our dear friends gave us this grain, and I am so glad to find the recipe and my new found love affair with millet porridge!

Tell me...have you ever tried millet porridge?  If so what do you add to it?


Homemade (Easy!) Creamy Coleslaw

Thursday, July 14, 2016

I love when my garden starts producing.  There is nothing better than making delicious, wholesome recipes from food that you have grown yourself.  The next best thing is making those recipes from food that I have received as gifts from friends and family.

I was lucky enough to get some wonderful cabbage from my aunt and uncle the other day.  I did not grow any cabbage this year, so it was a treat! I decided to make some coleslaw and thought I would share with you my easy creamy coleslaw recipe. It is delicious!

Homemade (Easy!) Creamy Coleslaw  www.HensleFarmAdventures.com


Growing up, our family had a slight disagreement on the best way to make coleslaw.  It seems that when it comes down to it, there are two camps.  One is that the best slaw is made with mayonnaise, and the other is that the best slaw is made with vinegar.  My grandmother and mom almost always made the vinegar slaw, in fact that is the recipe that is in our family cookbook.  But my sister and I both like the mayonnaise version which is the recipe that I am sharing with you today.

Speaking of my sister, I remember when she was still living at home and she used to make slaw for a snack.  It was one of her favorite foods.  She wasn't much of a sweet eater.  She always did prefer homemade pickles, tomato juice, and slaw to any cakes or pies we had.  To this day, she still makes great slaw. 

So here is my version based on how my sister used to make it.

Homemade (Easy!) Creamy Coleslaw  www.HensleFarmAdventures.com
Ingredients, well almost all the ingredients
You can see from above that the ingredients are few, and include your basic staples. Okay, I know what you are thinking, there is vinegar in that picture. Well, there is a little vinegar in this dressing, but not as much as you would put in the vinegar-based slaw. 

While we are on the subject of vinegar, let's have a little chat about what kind of vinegar to use for your slaw. You can see above that I used my Brag's ACV. I absolutely love the flavor and love how good it is for you. If it was any other brand of ACV, I probably wouldn't use it in this recipe. You really do want a good tasting vinegar. What also would be good in this recipe would be a white wine vinegar. It is light and tangy and great in recipes such as these.

Also missing from this picture is a carrot. I like to shred a carrot up to put in my slaw. You don't have to, but if I have it on had, why not? And it seems that the dry mustard is also missing. Oh well.

The first thing you want to do is make your dressing and let it sit while you are shredding your cabbage. It lets the flavors come together. In a medium bowl, mix together:
  • 1 cup of mayonnaise
  • 3 tablespoons of sugar
  • 2 tablespoons of vinegar
  • 2 teaspoons of celery seed (not salt!)
  • 1 teaspoon of season salt
  • 1 teaspoon of dry mustard
Homemade (Easy!) Creamy Coleslaw  www.HensleFarmAdventures.com
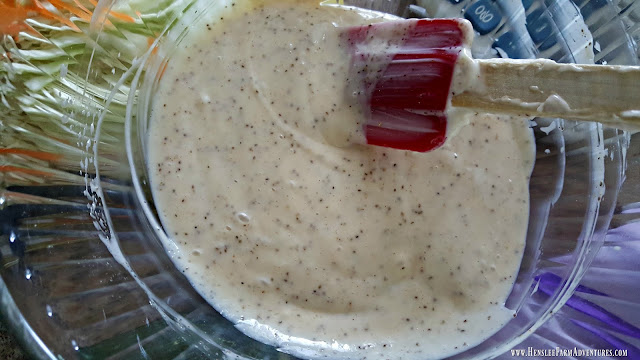
Coleslaw Dressing, so much better than store bought!
Once you mix the dressing ingredients together, put in the fridge.  Next, shred your cabbage. You can do this the old-fashioned way which is what I did, or you can use a food processor. For me, if I am just cutting up one head of cabbage, it isn't worth getting my food processor out. 


Homemade (Easy!) Creamy Coleslaw  www.HensleFarmAdventures.com
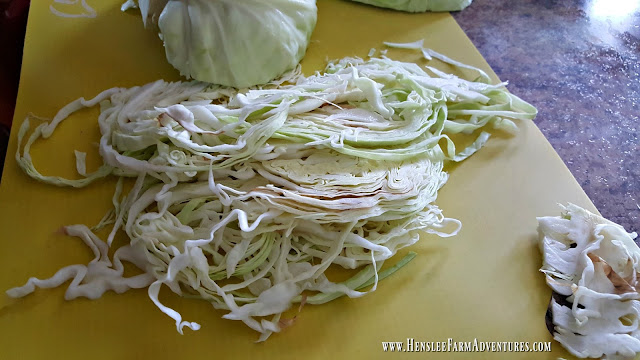
Long shreds, this is how I like it!
You can see above that I like to cut my cabbage in long pieces. I love it when it has been sitting in the dressing and you get a big fork-full and it is hanging off the fork. There is nothing better! I also like those long shreds because it stays on my sandwiches better. That's right, I love to use this slaw as a condiment! Feel free to slice or shred the cabbage the way you like it.

If you are using a carrot and/or onion this is the time to shred and dice those as well and put them in with the cabbage.

Next pour the dressing over the cabbage and toss so it is all coated, and put it back in the fridge to let the cabbage get a little wilted, from the dressing and soak up all the flavor. Don't worry, it will still have a little crunch to it!

Homemade (Easy!) Creamy Coleslaw  www.HensleFarmAdventures.com
This slaw is just screaming summertime!
You can see the yummy goodness. It truly is the right mix of sweet and tangy.  I love to eat this as a side, and as I mentioned above, I also love to put it on my hamburgers, my BBQ pork sandwiches, and of course brats!

Homemade (Easy!) Creamy Coleslaw  www.HensleFarmAdventures.com
This is what I call a slaw dog, with a side of grilled corn!

That's all there is to this delicious slaw recipe.  Looking for a printable version of the this recipe? Click HERE.

Let me know in the comments below what team you are on when it comes to slaw, Team Mayo or Team Vinegar.

Mulberry Cobbler

Tuesday, May 31, 2016
I'm back! Wow, I can't believe how long I have gone without a post.  This farmers' market gig is wonderful, but it has taken up more of my time than I initially thought it would. But to be completely honest, I have loved it, and so has Mr. HFA! We have met the best people, customers and other vendors. It really has been a great experience and one that we are going to continue for the rest of this summer.
Speaking of meeting great people, we were fortunate enough to become friends with another vendor. She does wonderful woodworking and makes some great homemade noodles that she sells. They invited us over this past weekend to pick cherries and mulberries. We were excited at the thought of getting both as we do not have either on our farm.
We were able to pick a bucket of cherries and a bucket of mulberries. This weekend, I made a mulberry cobbler using my mother-in-law's blackberry cobbler recipe. I thought it would be perfect to share with you.

Mulberry Cobbler  www.hensleefarmadventures.com


This recipe is so easy!  It is not your regular cobbler.  Growing up I had one grandmother that would make cobbler that had a cake-like crust which was yummy. The other grandmother would make her cobbler using pie crust, which was equally good!  I have found that there are several different ways to make cobbler, and I have not met a cobbler yet that I do not get a long with! For this recipe, it uses a crumb-like topping which makes it very easy and very fast to put together.

Mulberry Cobbler  www.hensleefarmadventures.com
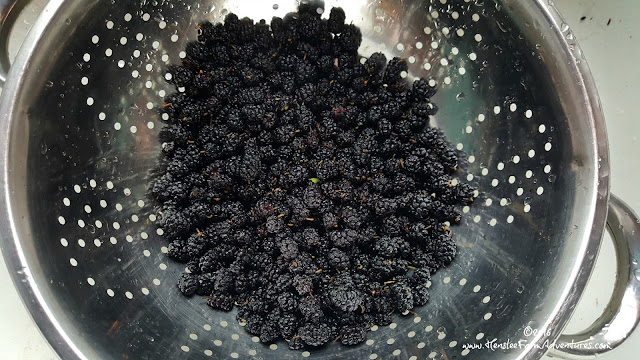
Beautiful berries. These were so sweet and juicy!

Preheat your oven to 375°F. Next you need to wash your mulberries. Aren't these beautiful? They look a lot like a blackberry. I have to say that I had a hard time not eating them as I was picking them!

After they are washed, put them in an 8x8 dish and put 1 tablespoon of lemon juice over them, then set them aside.

Mulberry Cobbler  www.hensleefarmadventures.com
Ingredients. I am missing the butter.

Then mix together 1 large egg, 1 cup of flour, and 1 cup of sugar. Mix until it resembles crumbs, like below.

Mulberry Cobbler  www.hensleefarmadventures.com
Make sure that you mix it up until it resembles crumbs.

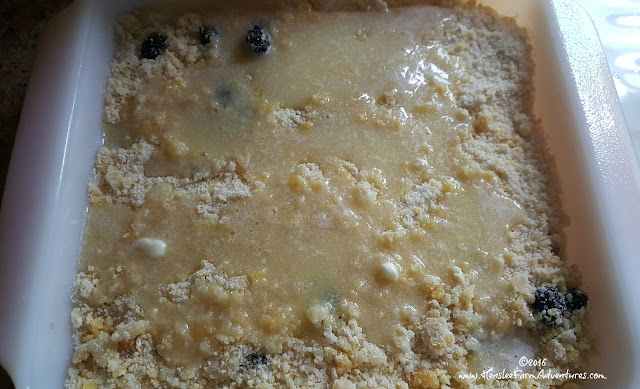
Take this mixture and pour over the berries, making sure that it is even and they are covered. Next, melt 6 tablespoons of butter and pour over the flour mixture that you just put on your berries. (Sorry I forgot to include butter in the ingredients picture above).

Mulberry Cobbler  www.hensleefarmadventures.com
Flour mixture is on berries, and then butter is poured on top of that.

Put this into your preheated oven and bake for 35 minutes or until it is golden brown.

Mulberry Cobbler  www.hensleefarmadventures.com
A beautiful golden brown. This looks delicious!

Doesn't this look amazing? It was hard to keep from diving right into this dessert, but we somehow managed to show some restraint and were able to wait until after supper for this special treat.

Mulberry Cobbler  www.hensleefarmadventures.com
This looks so good, but it really needs a friend.

I spooned some out into a bowl, but then I decided that while it looked good, it looked lonely. So what makes cobbler better? Well...


Mulberry Cobbler  www.hensleefarmadventures.com
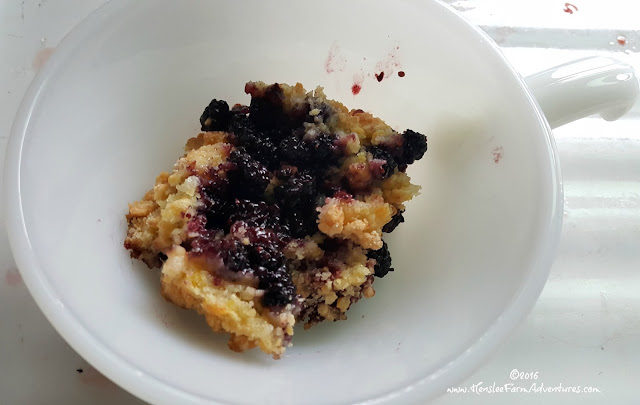
Now my cobbler is happy! Cobbler and ice cream, what a treat!

Vanilla ice cream! The only thing that could make this any better is if that ice cream were home made. But alas, we can't have everything!

As you can see the recipe is super simple, and super quick. The perfect dessert for when you are having company and don't want to spend a lot of time in the kitchen. This dessert would also work well with blackberries, raspberries, and blueberries.

Would you like a printed version of the recipe? Click here.

Let me know what think about the recipe in the comments below! Also how do you use your mulberries?

Pickled Radishes

Thursday, May 5, 2016
Have you ever had one of those days? You know the kind where nothing goes right? Well that is how I have been feeling for the past couple of weeks! It is almost the end of the school year and my ability to multitask as a full-time mother, librarian, and blogger just isn't working. I've missed out on field trips, have forgotten to return paperwork and missed some blog posts. All I can say is thank goodness for my husband,  Mr. HFA (that's short for Henslee Farm Adventures in case you're wondering ;-) ). If it wasn't for him I would have lost my mind a long time ago!

Pickled Radishes www.hensleefarmadventures.com


My new venture, since I don't have enough on my plate, is of course selling goods at our local farmer's market (Read about why you should support your local farmer's market). Sometimes I wonder what I got myself into, but to tell you the truth I absolutely love it! The best part is that I have made some new friends.

Pickled Radishes www.hensleefarmadventures.com
Drew enjoying one of Rema's purple radishes at the farmer's market.

One of my new friends is Rema from Ford Family Farms. She grows heirloom vegetables, is very knowledgeable about her veggies, and has a great sense of humor! Talking to her has been a great learning experience for me. Whether she realizes it or not, I am learning more about seed germination and what works and doesn't work. I have had bad luck with heirloom seeds in the past because let's face it, they are finicky. However after hearing how she does it, I am willing to try it again! But gardening tips is not all she has given me, last week she gave me a beautiful bunch of heirloom radishes.

Pickled Radishes www.hensleefarmadventures.com
Aren't they gorgeous? Ah, produce love.

While I love getting produce, any kind of produce, I wasn't sure what to do with them. Growing up, my parents always grew radishes and they were one of the first items to come out of our garden along with green onions and leaf lettuce. But we never did anything with them except eat them raw and put them in salads. Rema suggested making pickles out of them. Pickling them sounded wonderful! I love pickled anything. Now to find a recipe.

I found several recipes out there, but what I found interesting is that no two are alike. Some used honey, some used maple syrup, some used sugar.  Some had pepper flakes, some had fennel.  Still others used white wine vinegar, or apple cider vinegar, or even just plain white distilled vinegar. It seemed like this was a recipe that truly could be tailored to fit whatever a person liked. 

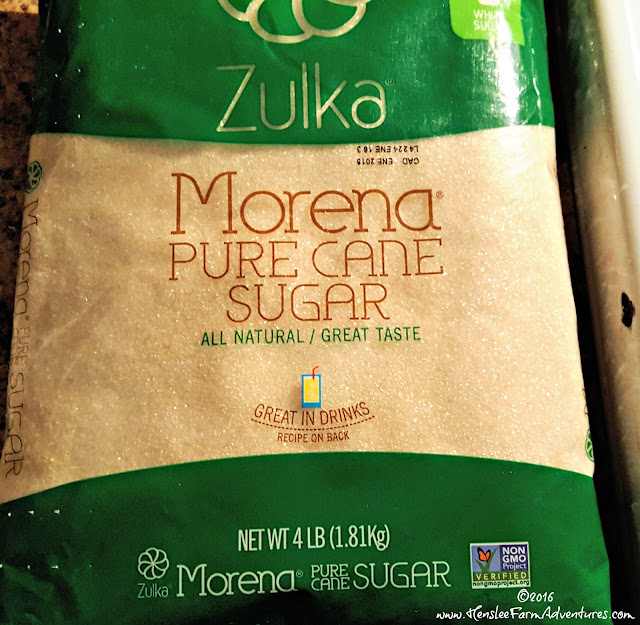
I want to say a little something on the sugar that I use. I do not typically use refined white sugar. You hardly ever get to see the sugar I do use, because I pour my sugar into a glass container which I have at my "baking station" in my kitchen. The sugar I do use is a pure cane sugar which has gone through very little processing. It is not bleached white, although in certain pictures it does look white. It is also non-GMO, AND I can get it at our local Aldi store!

Pickled Radishes www.hensleefarmadventures.com
Non-GMO sugar, nothing wrong with that!

After much debate on which way I should go, I thought I would base the recipe on my sweet and spicy pickles, which are ah-maz-ing I might add.  I might share that recipe with you later this summer when the cukes are ready. With the amount of radishes I had, I was able to make 3 pint jars. I did process them in a water bath canner to preserve them. 

Pickled Radishes www.hensleefarmadventures.com
Ingredients minus the salt, pepper, and garlic cloves. Oops!

So here is my recipe:
  • 2 big bunches of radishes
  • 1 1/2 cups water
  • 1 1/2 cups apple cider vinegar (white wine vinegar would be great too)
  • 1/4 cup sugar
  • 2 teaspoons of red pepper flakes (more or less to taste)
  • 1 teaspoon of pepper (I used white pepper)
  • 1 teaspoon of salt (I used kosher)
  • Garlic cloves (one per jar), optional
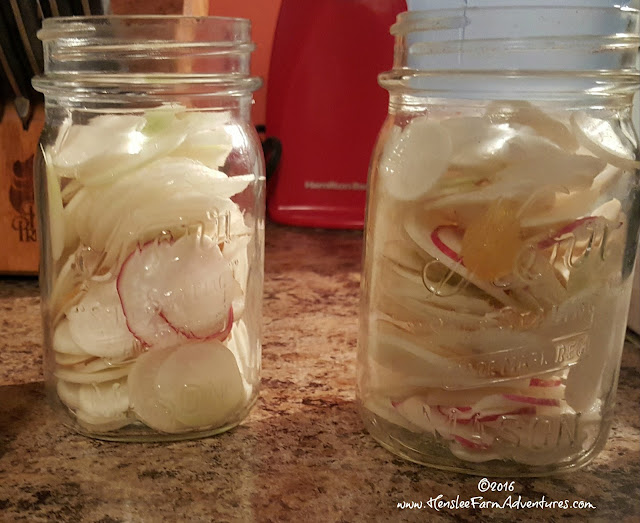
Slice radishes thin. This is where I used my mandolin slicer and it did a lovely job! They were sliced thin and it took no time to do it. If you don't have one, I would suggest getting one, it makes life easier! Once your radishes are sliced, put them in clean and sterilized jars. If you are using garlic, then add in the cloves of garlic too. I used garlic as we love it!

Pickled Radishes www.hensleefarmadventures.com
Thinly sliced in the jar, just waiting for the brine.

Put the rest of your ingredients into a pan and heat until the sugar dissolves. Poor liquid over the radishes, wipe off the rim of the jar and place a flat and ring on the jar, fingertip tight. Process in a water bath canner, 20 minutes for pint jars.

Pickled Radishes www.hensleefarmadventures.com
Pickled and ready to eat!


That's it! If you don't want to can it, you can simply place it in the fridge and let set for 24 hours for the flavors to meld. *NOTE: If you do can this, keep in mind that when you process these it will intensify the heat of the red pepper flakes. If you do not like it that spicy, then decrease the amount of pepper flakes that you use.

These radishes are a hot, tangy, slightly sweet, wonder! I can't believe that I have never had these until now! And I can't wait to grill some burgers and put these bad boys on top instead of my regular pickles. Talk about kicking it up a notch!

So try these out and let me know what you think. And comment below if you have ever made pickled radishes before.

Ooey, Gooey, Fudge Brownies

Thursday, April 14, 2016
You may be wondering why I am writing about brownies, thinking "didn't she say they were eating healthy?" Well yes I did say that, but every once in awhile it is good to have a treat. And when they are homemade instead of from a box, then they have the ability to be healthier depending on the ingredients you use.

Ooey, Gooey, Fudge Brownies  www.HensleeFarmAdventures.com


These brownies are ah-ma-zing! I got the recipe from my mother-in-law. They are the easiest, yummiest brownie I have ever made. Did I mention how scrumptious they are?

If you like fudgey brownies, then this is the recipe for you. The ease of the recipe and they way you start out reminds me of my Lazy Woman's Cobbler recipe. But my favorite part about this recipe, besides the chocolaty goodness, is that it is made with staples that most people already have in their kitchen!

The other thing that I like about this recipe is that it makes a full 9x13 pan full of brownies. You can't get that size from a box mix!

So I won't keep you waiting any longer, here is the fabulous recipe for brownies.

Ingredients:

  • 1 cup butter (2 sticks)
  • 2 cups of sugar
  • 6 tablespoons of cocoa
  • 1 1/2 cups flour
  • 4 eggs
  • 1 teaspoon vanilla
Ooey, Gooey, Fudge Brownies  www.HensleeFarmAdventures.com
Simple pantry staple ingredients. I love recipes like this!

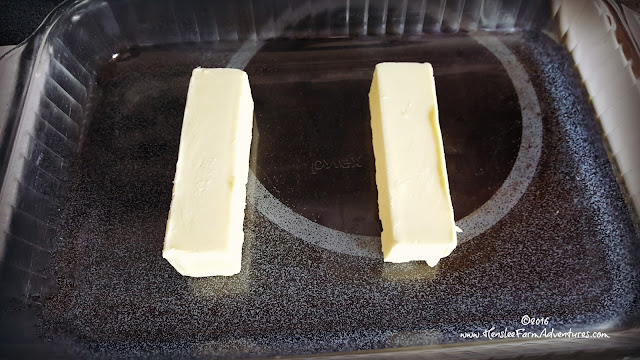
Preheat your oven to 350°F.  As your oven is preheating, put your two sticks of butter in your pan and put it in the oven to melt.

Ooey, Gooey, Fudge Brownies  www.HensleeFarmAdventures.com
Butter ready to be melted.

As you are waiting on the butter to melt, mix your dry ingredients together in a bowl.

Ooey, Gooey, Fudge Brownies  www.HensleeFarmAdventures.com
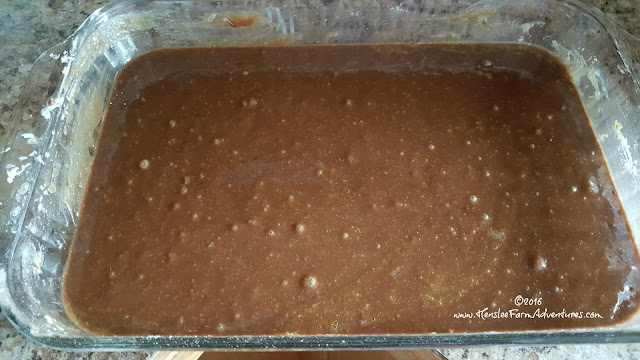
Dry ingredients. Be sure and mix well before adding melted butter.

Put your eggs in a separate bowl.  As you can see, I only have 3 eggs.  That is because those are duck eggs I am using.  They are huge so I only need 3 instead of 4 and the reason I love using duck eggs in baking is because they make your baked goods, lighter.  If you only have chicken eggs then use 4. I also added in the vanilla with the eggs after I beat them.

Ooey, Gooey, Fudge Brownies  www.HensleeFarmAdventures.com
The duck eggs. Great for baking!

Once the butter is melted, add it to the dry ingredients and mix.  The mixture may be a little hot, so instead of adding the eggs, take a little of the butter/dry ingredients mixture and add it to the eggs to temper them. Then add the eggs into the mixture. If you don't do this, you will end up with scrambled eggs.

Put the mixture back into the 9x13 pan and bake for 30 minutes or until a toothpick inserted in the middle comes out clean.

Ooey, Gooey, Fudge Brownies  www.HensleeFarmAdventures.com
Ready for the oven,.

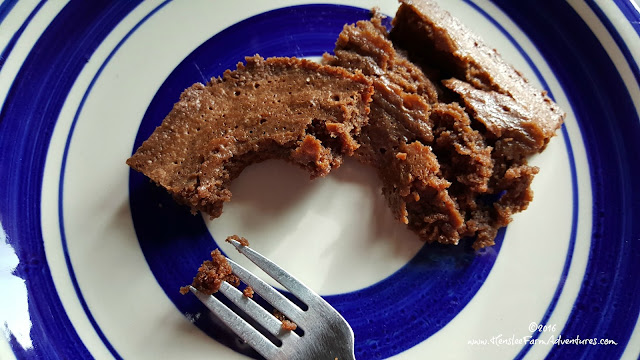
This next part is the hardest part of this recipe. Do your best to let cool, before cutting and eating. It was almost impossible for me to follow this step. In fact I went ahead and cut them while they were still warm, which means they fell apart a little. Really, I don't care, they were still delish!

Ooey, Gooey, Fudge Brownies  www.HensleeFarmAdventures.com
Why yes, I did take a big bite out of that piece. Yum yum!

The only thing better that I could think of would be to add a scoop of ice cream right on top!

The great thing about this recipe is that you can have add-ins to this mix. Like nuts? Add a cup of chopped pecans or walnuts in. Want it to be extra chocolaty? Add in some chocolate chips. I have added in the Andes mint chips before for mint chocolate brownies. So good!

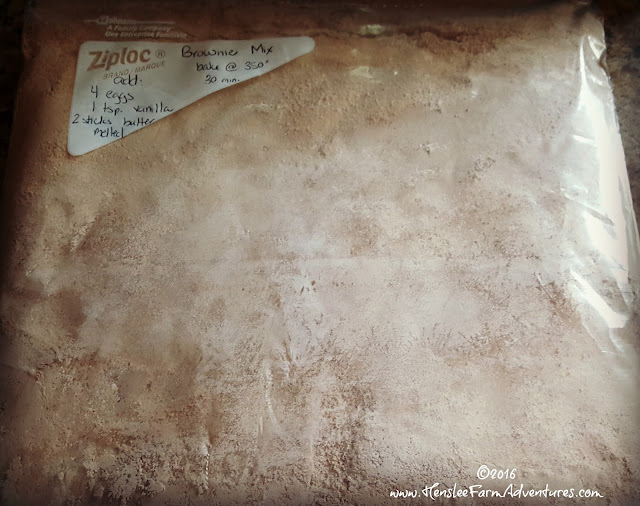
The other thing that you can do (to keep you from buying the box mix) is to mix up the dry ingredients and put them in a sealed bag ready to add the wet ingredients and bake. You've just made your own box mix! And it is so much better than the store bought stuff!

Ooey, Gooey, Fudge Brownies  www.HensleeFarmAdventures.com
Now I'm ready to make another batch.

Try out this recipe and let me know what you think! Cooking from scratch has never been so easy or so good!


One-Pan Sausage and Pasta: A Review

Thursday, April 7, 2016
Our journey to healthier eating is continuing. This week has been hard but only because I don't have a written meal plan. Seriously, the meal plan helped a ton last week, more than I really thought it would. The funny thing is that we didn't follow it to a tee, but just having meals written down, gave me a guide to follow.

This week, I didn't take the time to make a nightly meal plan and I am scrambling to figure out what to fix. The only thing that has saved us is that we still have plenty of healthy organic foods to choose from, so meals are pretty easy to whip together, even if I do have to stand in front of an open fridge door for five minutes!  :-)

I was trying to decide what to make for supper last night when I saw a Tasty video. Have you seen these videos? They always seen to show up right when you are realizing how hungry you are. Then they take a recipe that you might not otherwise try, and show you how to make it in a couple of minutes long video.  They make these recipes look so good and so easy! Thanks to these videos, anyone can be a chef!

One-Pan Sausage and Pasta: A Review  www.HensleeFarmAdventures.com
One-Pan Sausage and Pasta

The recipe video that caught my eye yesterday afternoon was for One-Pan Sausage and Pasta. I knew I had all the ingredients and thought it would be a perfect recipe to try. Plus it only takes 30 minutes from start to finish.  

Ingredients:
Here are the ingredients for the dish:

One-Pan Sausage and Pasta: A Review  www.HensleeFarmAdventures.com
The players for this meal, and that's white pepper in the container.

Notice, that all my ingredients are organic. Yes we are still doing organic. There are two ingredients that are missing from the picture above. One is water and the other is garlic. The recipe called for 4 cloves of garlic and I forgot that I used all my garlic for my bone broth. I decided to just used garlic powder instead.  Next time, real garlic cloves would be better.

The sausage the recipe called for was smoked andouille sausage, but I used sausage I purchased at Aldi. It is Kirkwood's Never Any! chicken sausage with tomatoes and basil. This sausage was perfect with this dish since it called for grape tomatoes and fresh basil. The sausage is fully cooked so I didn't have to worry about whether or not it was done, I just had to make sure and warm it through.  Side note: I love the Never Any! line from Aldi.  Their ham lunch meat is amazing and I can't wait to try the whole chicken that they now have available.

Making the Recipe:
To make the recipe, I sautéed the onions in olive oil first and sprinkled some garlic powder over them. Then I added in salt, then laid the spaghetti (a 1 pound box) in next, then continued with tomatoes, basil, and sausage. Once everything was in the pan, I added in 4 1/2 cups of water.
I let this come to a boil, turned down the heat to low, put a cover on the pan, and let simmer for 10 minutes.

One-Pan Sausage and Pasta: A Review  www.HensleeFarmAdventures.com
Beautiful tomatoes, basil, and sausage.

At this time, the recipe says that the water should be absorbed by the cooking spaghetti and the spaghetti should be at the al dente stage.  Mine was not.  I did need to cook it a little longer, but only a couple of minutes longer.

Then I added a little pepper (I used white pepper) and some Parmesan cheese and voilà

The first thing I noticed was how much spaghetti was in the pan.  That one pound box made a ton! Thankfully my parents came to supper last night, or we would be eating on this for days! Also it was a little void of flavor. I'm wondering if that was because of the switch in sausages.  

One-Pan Sausage and Pasta: A Review  www.HensleeFarmAdventures.com
Ready to cook.

What I Loved About This Recipe:
I loved the ease of this recipe. I loved that I could cook everything in one pot. And I loved that it didn't take very long for me to cook! In fact during 12 minutes that I had to let it simmer, I was able to make a nice side salad to go with our meal. 

What I Would Do Different:
I didn't care for all the pasta, so if I make this again, I would only use half of the one pound box.  And then of course, I would need to decrease my water as well.  I would try about 3 cups and see how that does.  I would also add in more veggies.  Some nice mushrooms and some colorful peppers would be amazing in this dish.  I would also add in some Italian herbs to kick things up a notch.

Overall Rating:
I would rate this recipe a B+ with the way that I made it last night.  Who knows it might have been better with the real garlic cloves and smoked andouille sausage.  But I think the real problem for me was the excess pasta and lack of veggies.  But of course that is my personal preference.  Do I recommend it?  Yes, it is a great recipe for the weeknight when you don't have a lot of time to cook and you want something good and this can rival take-out any day!

Funny, but I can't find the video from Tasty that I saw yesterday.  However, I do know that they based their recipe from another site.  So if you would like to get the recipe, I'm going to direct you there. Click here for the recipe.

Have you made any of these one pot pasta dishes?  Let me know what you think in the comments below!


Happy National Pancake Day! (A Great Gluten-Free Recipe)

Tuesday, March 8, 2016
Happy National Pancake Day!  In our family we love pancakes!  Drew especially loves pancakes and asks for them every weekend for breakfast.  We don't always get to eat them every weekend, but we do try and have them a couple of times a month.

Gluten Free Pancakes   www.HensleeFarmAdventures.com

When we can't have them for breakfast, we have no problem making them for dinner.  They are an easy and quick meal to make and we try and balance out their cake-y goodness by adding in a protein and healthy fruit.  For dinner, we try and make them more savory and still enjoy veggies on the side!

I have a little secret to share.  When it comes to making plain old honest-to-goodness pancakes, Steve is the winner.  Every time!  His pancakes are truly the best and I have yet to be able to duplicate their fluffy, golden goodness.  However, when it comes to flavored pancakes, I'm the winner!  

I thought I would share with you a recipe for pancakes that is a little different.  This is a gluten-free recipe.  Most gluten-free pancake recipes use coconut flour, rice flour, or almond meal, but mine use something different...garbanzo bean flour!

Yep, you read that right, garbanzo bean flour.  It is one of the best flours I have used.  You can substitute 7/8 of garbanzo bean flour for every 1 cup of wheat flour with the same results.  That is almost a 1:1 ratio!  That makes it very easy when it comes to subbing it for recipes.  You can also use garbanzo bean flour in conjunction with other flours to make a gluten-free flour mixture.

This flour works very well in cake and quick bread recipes.  The first time I had this type of flour was when my friend Amy made a chocolate brownie, marshmallow, to die-for dessert!  In fact she is the one that turned me on to this type of flour.  

Never heard of this type of flour before?  Ever heard of gram flour?  It's the same thing! It is also known as chickpea flour. This type of flour is high in protein and fiber. And even though it has double (don't worry it still isn't that much) fat as whole wheat flour, 70% of the fat you find in this flour is from healthy unsaturated fats.  Those are the kind that you want to help lower your cholesterol.  It also is rich in calcium, magnesium, potassium, zinc, iron, phosphorus, manganese, selenium, and copper. 

You can also use this type of flour to help thicken sauces and gravies.  That is great when you are adhering to a gluten free diet. Ready for the recipe?  Well here it is!

Gluten Free Pancakes   www.HensleeFarmAdventures.com
Another recipe with mainly pantry staples for ingredients.  If you want to use regular flour feel free!

The ingredients you need are:

  • 2 cups of garbanzo bean flour
  • 3 teaspoons of baking powder
  • 1 teaspoon of salt
  • 1 tablespoon of sugar
  • 1 cup of milk
  • 2 eggs
  • 1 teaspoon of vanilla
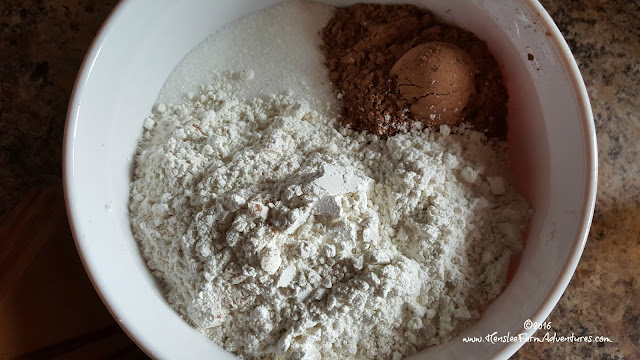
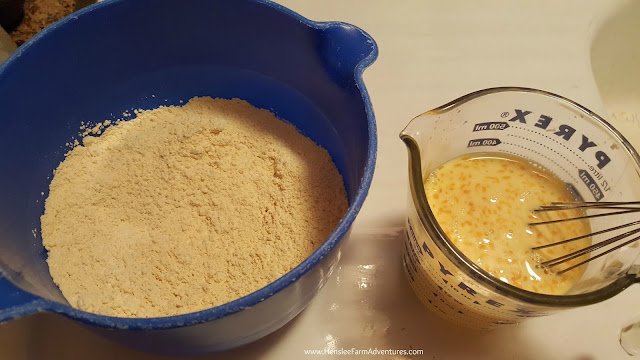
First mix the dry ingredients together in a bowl.  In a separate bowl, mix together the wet ingredients. I like to use my measuring cup to mix the wet ingredients together as you can see below.

Gluten Free Pancakes   www.HensleeFarmAdventures.com
Wet and dry ingredients
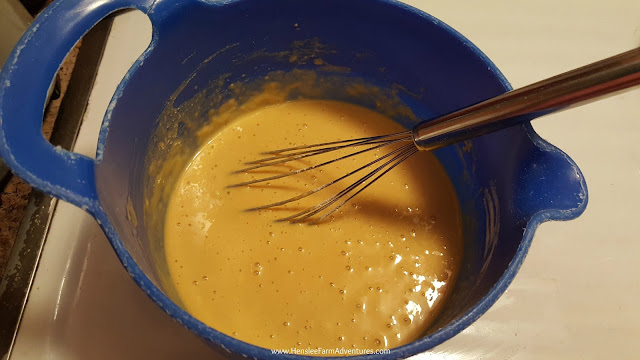
Next add the wet ingredients into the dry ingredients and mix until just incorporated.  You really don't want to over mix this just as you would a normal pancake recipe.

Gluten Free Pancakes   www.HensleeFarmAdventures.com
Ingredients all incorporated
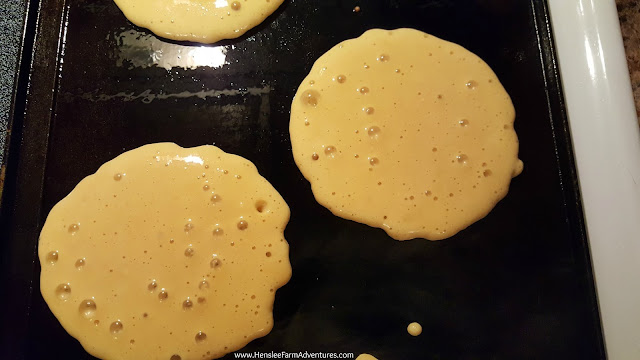
Place the batter on a hot griddle.  You can use whatever you like to grease the griddle, butter, coconut oil, olive oil. I use whatever I have on hand.  I also use a 1/4 cup measuring cup to measure out my batter so that the pancakes are roughly the same size.

Gluten Free Pancakes   www.HensleeFarmAdventures.com
Ready to flip!
Cook them until they have bubbles and the outer edges are starting to dry out, like the picture above. Then flip to the other side.

Gluten Free Pancakes   www.HensleeFarmAdventures.com
A beautiful golden brown!
Cook for an additional 30 seconds to a minute and then remove.  These pancakes cook up so nice and have a gorgeous golden brown color.

Gluten Free Pancakes   www.HensleeFarmAdventures.com
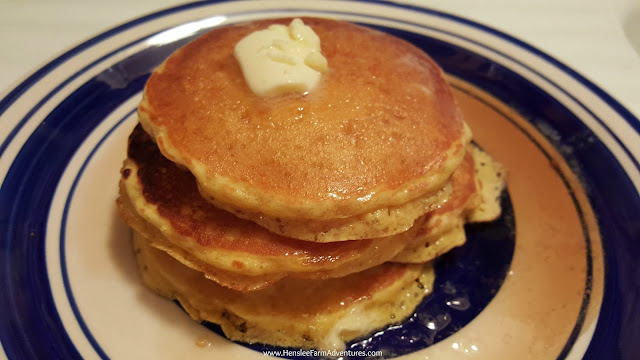
My mouth is watering!
The only thing that I would add to this recipe is a little cinnamon.  I did not add that to my recipe because I know not everyone likes cinnamon.  I did sprinkle some on top after the fact and it was ah-ma-zing!

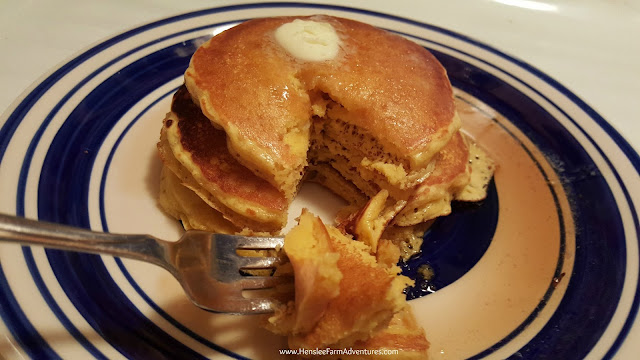
Gluten Free Pancakes   www.HensleeFarmAdventures.com
Ready for a bite!
These pancakes are so easy to make and so delicious!  They would also be scrumptious with chocolate chips or blueberries added.  My kids loved them and I didn't mention the fact that they were gluten free, OR that they were made from beans!

Want a clean copy of the recipe to print out?  Click HERE.

Need a great and economical syrup recipe for your pancakes?  Then visit my post on how to make your own pancake syrup.  It is yummy and not too sweet!

Don't have time to make pancakes?  Then you are in luck!  Today IHOP is giving away one free short stack of Buttermilk Pancakes per customer.  You can find out more information here.

Have you used garbanzo bean flour before?  Let me know in the comments below!  I would love to hear your stories!!
©HensleeFarmAdventures.com. Powered by Blogger.

Search This Blog

Back to Top