Showing posts with label holidays. Show all posts

The Problem with Valentine's Day

Wednesday, February 15, 2017
I humbly bring you this post, the day after Valentine's day to address something that has been weighing on my mind. And I also want to speak to the women out there that are degrading all the men that have chosen not to buy into the commercialization of Valentine's day.

I first want to say that I am a romantic type of girl. I love getting flowers and chocolates and being taken out for a nice dinner. I love spending time with my husband and going on dates with him. I say that because I don't want you to get me wrong when you read what I have written.  I am not against the idea of Valentine's day.


However, I think that Valentine's day has become overrated and too commercialized. It has now become a competition with who gets the most flowers, or the finest chocolates.  For our kids, it is who can create the most extreme Valentine box for the school party, or who gets flowers, balloons, and/or candy bouquets when they are in the 1st grade!

When I went to my daughter's school yesterday, I was shocked at all the bouquets of flowers, balloons, candy, and stuffed animals that were there waiting for the child to whom they were sent to be picked up. I just thought to myself, what has this day become?

When I was in school, we made our Valentine card holder in art class, and it was usually made out of construction paper, was almost always in the shape of a heart, and just big enough to hold the small paper Valentine's that we would bring for each other. And what about candy? Well, that was usually given to us by our teacher...in fact 9 times out of 10 it would be a box of conversation hearts.


As a child, I never received anything else. I didn't need to receive anything else. Parents' giving their children these ornate bouquets of flowers, candy, and soda are setting them up for a lifetime of expectation that will inevitably one day let them down. (Not to mention starting them on a road to poor health).

But what I really want to address is the fact that I have seen women take men to task because they do not want to get their wives or girlfriends something on Valentine's day. In fact I have seen these men berated in front of others because of this. Really? Did these women ever once ask why these men did not want to get something? Do you think it might be because the money needs to go to groceries rather than flowers? Or perhaps he is saving up to buy something bigger for her birthday or Christmas. In fact there are some that are more than likely still paying off Christmas bills.

Have you ever asked yourself if it is really that important for men to give gifts on Valentine's Day?


And what about women?  Why is all the blame laid upon men?  Don't men deserve to receive a Valentine's gift? If we are going to force men to give a gift, then shouldn't it be reciprocal? In fact this isn't supposed to be a day just for women. This is a day to show your love for one another, so...

Here is my answer: Valentine's day should be about love and mutual respect for one another.

This year is the first in the 15 years that my husband and I have been together (3 dating, 12 married) that he did not give me a bouquet of flowers or a box of chocolates on Valentine's day.  In fact I didn't even get a card from him! How horrible is that, right? Wrong. My husband works hard every day of the year to show me his love.  He does this by helping me with the housework. In fact, he is a much better cleaner than I am. He helps with the kids without my prodding. He listens to me when I need to vent. He holds me when I am feeling blue. And he makes me laugh when I desperately need a good laugh.

My husband shows me love every day of the year, not just on Valentine's day.

I tried to tell him this, to say that this was more important than gifts, but he kept saying, but..but..

No, I said. I would rather have a husband that shows me respect and love everyday of the year, than a husband who gives me flowers on Valentine's day out of obligation.

Women...when you start hounding men about not buying gifts on Valentine's day, stop and ask them how they treat their women the rest of the year. And women, start asking yourselves how you treat your men every day of the year. If you are berating each other into buying flowers and chocolate out of obligation, then the gesture doesn't mean jack!

So how did I celebrate Valentine's day? On the Friday before, I volunteered at my son's school for their Valentine fest, I ate lunch with him. I spent time with him. On Valentine's day, I ate lunch with my daughter at school, and I went to her Valentine's party. I spent time with her. 

That evening, I cooked a special meal, and made homemade brownies in a shape of a heart. I loved on my family and I spent time with them.

And how did my husband celebrate Valentine's day? By showing me love in all that he does. Every. Single. Day.


7 Tips to Making New Year's Resolutions That Last

Friday, January 1, 2016
For several years I have been like so many and have made resolutions at the beginning of the year.  And just like a lot of those that made resolutions, most if not all were soon forgotten.

The other night we were watching an older Phineas and Ferb episode. Doofenshmirtz was (of course) trying to take over the tri-state area during New Year's eve. He made a resolutioninator that changed everyone's resolution to follow him as a leader. *Spoiler Alert* At the end the resolutions of the people were changed to follow him but it only lasted for a minute. The plan didn't work because people never keep their resolutions.

While the ending was funny, it was kind of sad at the same time. Most people make resolutions every year, but very few follow through on them. I started thinking about how I treat my resolutions and thought I would share with you 7 tips to follow to make your New Year's resolutions last.

7 Tips to Making New Year's Resolutions That Last www.HensleeFarmAdventures.com


1. Don't Make Resolutions
Wow, that was pretty easy. End of post, right? Not quite. A couple of years ago I stopped making resolutions. Why make resolutions that I was not keeping? In fact, there were some that wouldn't even last a month! Instead I make yearly goals.  There is something about calling it a goal that makes it seem more attainable.  And it's safe to say that we have all achieved at least one goal in our lives. In fact I think setting goals is more important than resolutions so for the rest of the post, I'm only going to refer to resolutions as goals.

2. Don't Set Yourself Up For Failure
There is nothing wrong with dreaming big.  We have our dreams here at Henslee Farm that we know some day we will achieve. But for the time being, I need to focus on the little things. The things that I know can be accomplished. We want to become debt free. Is that something that we can accomplish this year? Not unless a big wind-fall comes our way. However I can create a goal of paying off three debts. I know that is attainable and it is a step toward the bigger goal down the road.

3. Don't Be Too Specific
Sometimes being too specific can set us up for failure. One of your goals may be to become healthier.  If your goal is to exercise every Monday, Tuesday, and Wednesday for 45 minutes each day, chances are something may happen that you wouldn't always be able to follow that schedule.  Instead you could say that you want to increase your amount of exercise to 3 days per week. That goal gives you some wiggle room with the days and the amount of time you exercise.

4. Find an Accountability Partner
Find yourself someone that can hold you accountable. It might be a spouse, a friend, or a sibling. Share your goals with them. In fact if it is your spouse it is important to work together to have some shared goals.  If someone else knows about your goals it is easier to stick with them.

5. Put Them on Display
I'm sure you have heard of the saying out of sight, out of mind. Don't write your goals down and then put them away where you won't see them or will forget about them. Put them in a place where you can see them on a daily basis. It might be on the fridge, the bathroom mirror, beside your bed. Just somewhere that you can see your goals and be reminded of them.

6. Do a Periodic Review
When I create goals for my job, I review them after 3-6 months. I look at what I have accomplished,  what still needs to be done, and what if anything needs to be tweaked. You should be doing the same for your personal goals. Just like you put them on display to remind yourself of them, be sure and take a good hard look at them and see where you are in accomplishing them. It is okay to make adjustments to them. Life always throws us curves and it is important to be flexible. That is another reason why #3 above is important.

7. Celebrate Your Accomplishments
It is important to celebrate and focus on the goals you were able to complete. Even if you were only able to complete a part of a goal that is awesome. Don't focus on what you didn't do. Cut yourself some slack and realize that completing any goal or part of a goal is awesome. Not completing a goal this year does not mean you can never complete it. If you want to continue it just roll it forward into the next year, or maybe it is not something that is important to you anymore.  That's okay!  Look at what you did accomplish!

I thought I would share some of my goals that affect you guys for the 2016 year.
  • I want to post on a more regular schedule. The holidays really threw me off.
  • I want to include more posts on home improvement. We will be doing several projects this year that I can share with you all.
  • I want to include more craft posts using recycled material.  Okay that one is specific, but I'm hoping with the leftover material from our building projects, I'll be able to transform some things into crafts.
  • I want to provide some free printables for you guys to use.
  • And the big one is I want to work on an ebook that will be available by the end of 2016 or beginning of 2017.
I hope that your family has a wonderful 2016 and that you accomplish your goals for this year.  I also hope that you will continue to come back and read and comment.  Speaking of comments...please share with me some of your goals for 2016 in the comments below.

Happy New Year!

A Good and Sad Christmas

Monday, December 28, 2015

I hope your Christmas was a good one. We did have a good Christmas but we also had something sad to happen as well.  I'll get to the sad part a little later.  I know it has been a week since my last post, but I spent the last week with my kids (in some cases taking care of sick tummies), getting ready for Christmas and watching the days fly by.  Before I knew it, Christmas was here and gone, and I didn't even get all my Christmas cards mailed!  It was just one of those years.

As for our Christmas we started off with the kids being sick a couple of days before. I was afraid that it might spill over into the holidays but we were lucky, they did get well before the Christmas festivities started. We started our celebration with a trip to Grandma's house where the tradition is to make homemade cashew chicken. I was helping with cooking the chicken when I accidentally broke a coffee mug  (I was drinking coffee while cooking) and I sliced my finger on one of the broken shards. 

I cut it pretty deep and it wouldn't stop bleeding. I had been putting pressure on it and holding it above my heart, but it didn't help. I knew I needed a stitch or two but that meant driving 30 miles and missing the first of three family Christmas celebrations. Luckily Steve came to my rescue and looked up on Pinterest ways to stop bleeding. The one we chose to try was sugar. We found out that sugar is an antiseptic and also helps the blood with clotting. To our relief, it actually works! I held my finger in some sugar that Steve had in his palm and while it didn't completely stop the bleeding it did slow it down enough to bandage it. And though I was in pain,  I did get out of doing the dishes.

I thought I would share some of our Christmas traditions with you. We always open our presents with our kids on Christmas morning but about four years ago I started taking one gift for the kids to Grandma's house for them to open. That gift is new footie pajamas. The kids have come to expect it and in fact they ask to make sure that I have bought them new pajamas and they can open them Christmas eve. I think even if we didn't go to Grandma's house I would still have pj's for them to open and of course they love to put them on immediately.

We have also cut down on the gifts we get for our kids. I try to follow the rule of one thing they want, one thing they need, one thing to wear, one thing to read.  What I have noticed is that with less presents, we can spend a little more and get quality and the kids can focus more on what they received, since they aren't as overwhelmed.

After Opening Christmas Presents
The aftermath of unwrapping presents.
For both of our extended families we have ceased buying gifts for each other, instead we made a rule several years back that we would make gifts. These have been some of my favorite gifts to receive. 
This year I received homemade vanilla from my oldest sister, homemade bath products from my middle sister, a beautiful hand embroidered team towel from my oldest niece, and a hand painted picture from my youngest niece courtesy of her 18 month old.  We also received a hand painted picture from our grandsons, and once I get it framed both paintings will be hung in our house. I love artwork from the kids. 

Handmade Christmas Gifts
Handmade gifts we received.
My sister-in-law who usually makes me something from scrapbook items (she has made me a photo book and other things in the past) broke with tradition and bought me a set of silver measuring spoons with the initial H in the middle. I didn't mind, as they are beautiful! 

Initial silver measuring spoons
I really do love the homemade gifts and if you haven't tried it with your family, I would suggest you do.  We made candles our of vegetable shortening this year.  We used crayons to color them and essential oils to make them smell good.  They honestly didn't work out as I had planned, so I am working on improving them so I can share with you what works and what doesn't in case you want to try making them.

making candles for Christmas
Making candles for Christmas
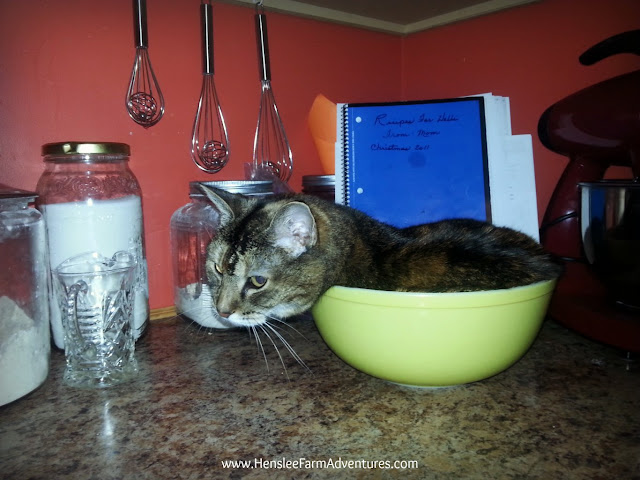
Now for the sad part. We lost a member of our family.  My cat Tippy passed away the day after Christmas.  I knew this time was soon to come.  Her health was not the greatest and she was 18 1/2 years old.  That made her 90 in cat years.  I got her as a stray when she was a little kitten in August of 1997 and she has been with me ever since.  The kids were sad of course and Carly used one of her Christmas gifts, a book writing kit, to write a book about Tippy.  I thought it was very sweet.  My heart was sad at losing Tippy, but I know she does not suffer and we will always have great memories of her.

Tippy the cat
She loved to lay in boxes, bowls, or anything she could squeeze herself into.
I hope that you all had a fabulous Christmas.  I hope you kept the old traditions and made new ones. I hope that you hugged your family tight and enjoyed the greatest gift of all, Jesus.  

Let me know in the comments some of your family traditions.

25 Days of Giving Update and a Cookie Recipe!

Wednesday, December 16, 2015
Well my December challenge has been more of a challenge for me than I originally thought.  I mentioned in one of my previous posts that the giving part was not going as planned.  To be honest I'm not sure what I really thought would happen with this challenge.  I guess I was thinking that everyday I would be volunteering or donating items to a charity, giving money, and making the world a better place.

What I have found is that it is the small giving that can mean so much.  I do believe that it is important to donate food and gifts to families in need, and that I have done.  I also believe that it is important to support your favorite charities with monetary donations.  That I have done also, but it is the little things that sometimes we forget to do that can make giving easy, and life so much better.

Some of these things I am talking about include:

  • Allow someone to go in front of you in the check-out line for absolutely no reason.
  • Pay for the person behind you in the drive-in lane at a restaurant.
  • Volunteer to help when asked.
  • Hold the door open for the person behind you.
  • Smile and say hello to people you don't know.
  • When your child has to bring money in for a class party, give extra in case a student can't afford it.
  • If you shop at ALDI, give your cart to someone without asking for the quarter.
  • Instead of yelling at the person who just cut you off in traffic, pray for them instead to get to their destination safely.
Doing all of these and more can really make a difference.  This is giving of the best kind...the giving of kindness and it can make someone's life a little brighter.

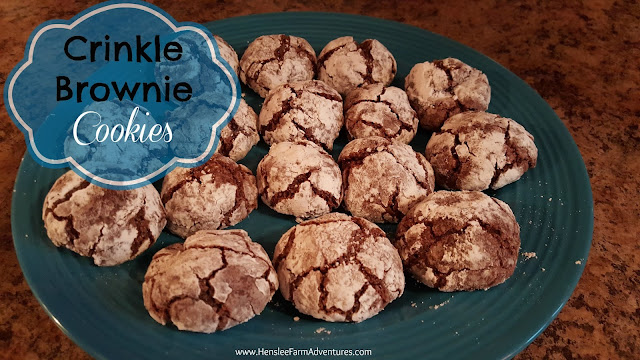
Now for the cookie recipe.  This recipe is one that I made based on a recipe that I found at Eating on a Dime.  I needed a good recipe for our church's cookie reception and it needed to be quick, easy, one that I had all the ingredients for, and something different than chocolate chip.

Crinkle Brownie Cookies

This recipe I found sounded great! Plus they were quick to make and easy.  The one problem is that it called for a brownie mix, and I don't normally use store bought mixes.  In fact I make my brownies from scratch (I see another recipe post in the near future).  So I decided to use my brownie recipe to make a "mix" and I had to tweak a few other things, but I was able to make these delicious cookies from scratch and they were just as easy as using a store bought mix.  

So this is what you have been waiting for the ingredients:
  • 2 1/2 cups of flour
  • 1/2 cup of cocoa
  • 2 cups of sugar
  • 1/2 teaspoon of baking powder
  • 1/2 teaspoon of salt
  • 3 eggs
  • 1/3 cup of oil
  • 1 teaspoon vanilla 
  • 1/2 cup of 
First sift the dry ingredients together.  If you don't have a sifter (really you should) just put the dry ingredients in a bowl and whisk together well.  Next add in the wet ingredients.  I did not add the wet ingredients together and then combine, I just threw the eggs, oil, and vanilla right into the dry ingredients.


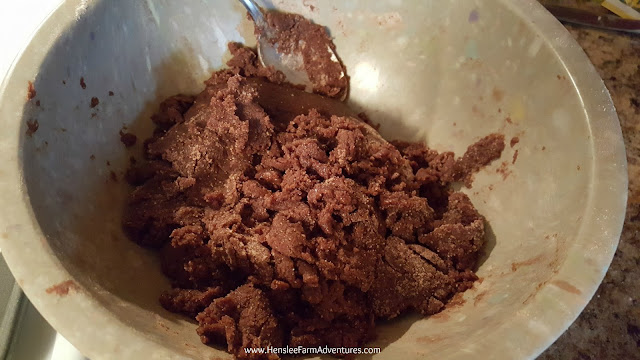
Cookie batter
You can see how thick it is!
Then mix this all together.  I will say that I started mixing this with a spoon.  I knew it was going to be thick, but this is super thick.  I soon abandoned the spoon and dove right in with my hand.


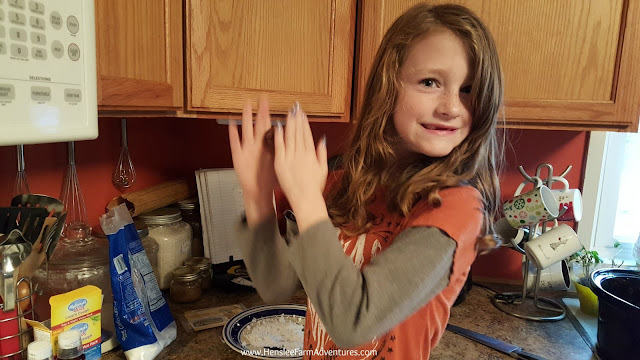
Rolling the dough
Carly making the cookie balls...please forgive my messy kitchen!
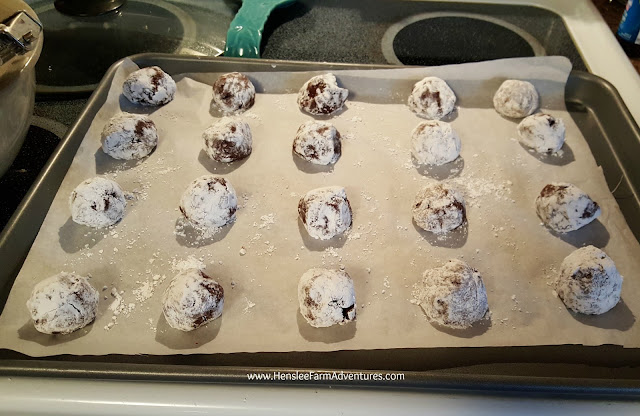
Once it is mixed well, start making balls with the dough.  I used my cookie scoop to get uniform cookies.  Then roll the dough ball into powdered sugar.  This is where my little girl helped.  She loved making the dough into balls and rolling them into the powdered sugar.  And I love being able to cook with her and pass on my knowledge!

Rolling the dough balls in powdered sugar
Carly rolling the balls in powdered sugar.


Once you are done, then bake them in a preheated 350°F oven.  The original recipe said for 8-10 minutes, but her cookies must have been much smaller than mine, or perhaps my oven temperature is a little off.  Not sure, but I had to bake my cookies for at least 18 minutes before they were done.  I would suggest to start checking them around the 10 minute mark.

Cookies ready to bake
Ready for the oven.
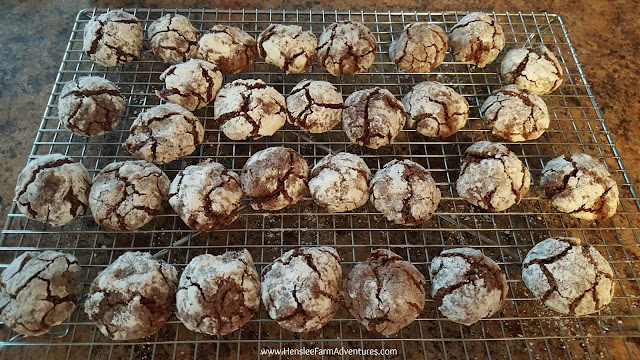
 The cookies were a huge hit at our church function and they were soon gone.  I was so glad that I saved a few for us at home.  I will definitely be making these cookies again.  They would be perfect for a cookie exchange or if you are planning on making some treats as gifts during the holidays.

Crinkle Brownie Cookies cooling
Cooling on the rack, it was hard to keep everybody out of them!


I hope you enjoyed this recipe and if you try it, please let me know in the comments below what you think.

If you would like a printable version of the recipe, click HERE.


25 Days of Giving: A December Challenge

Tuesday, December 1, 2015
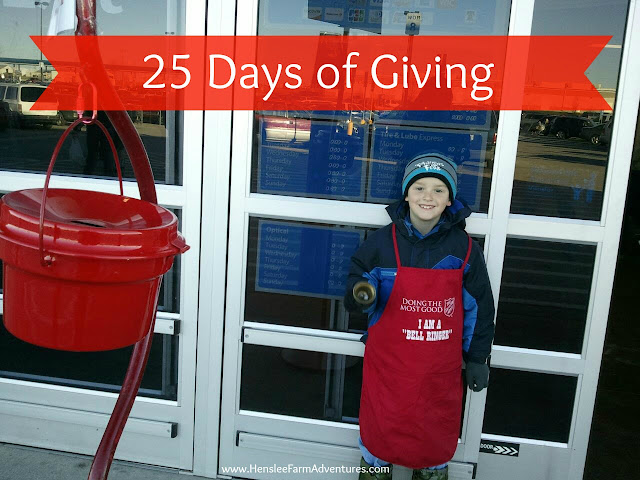
Salvation Army Bell Ringer

December is always a special time for me.  Not only is it Christmas but it is also my birthday month.
Steve asked the other day what I wanted for my birthday and Christmas. I started thinking what I would want.  I looked around me and I saw my family, my home, plenty of food in the kitchen, and for the first time, there wasn't really anything that I wanted, and to be honest there isn't anything that I need.

I told Steve that what I really want for my birthday is a night out on the town with him.  Of course to us a night out on the town pretty much consists of going out to eat (I'm hoping for my favorite steak place), and a trip to Barnes and Noble to drink coffee and look at books.  It may sound pretty boring to some of you, but to us, it is a wonderful time to reconnect with each other.  

Christmas Family Photo
My favorite Christmas family picture...in all its glory!
But it was my answer to what I want as a Christmas present that really threw him for a loop.  I told him that what I wanted for Christmas was to downsize.  I didn't want more things, I wanted to get rid of things.  We have more than we need and more than we will ever use.  All of our stuff is causing stress.  It is making it hard to clean and get organized.  I would rather have less stuff and more time with my family.  I want to start giving away what I can, and what better day to start this on than today, #GivingTuesday.  

Christmas babies
My Christmas babies...they were so little there.
I love that there is a day especially devoted to giving.  To remind us to give to those who are in need.  But our giving should not be relegated to just one day.  I have my friend Rene to thank for the next challenge that we are going to embark on.  This one shouldn't (I hope) be too hard.  During the Christmas season, we are going to be doing a 25 days of giving challenge.  This is one challenge that I really hope that you will do with me.

Christmas Parade
Carly and me at our hometown Christmas parade.
The idea is that everyday we will do one thing that ends up giving to others.  It could be as simple as donating clothes, donating your time, or donating money.  Each week I will report back on what my family and I did for each day that week to give to others.  I also want to hear anything that you may have done as well.

So who is with me?  Comment below if you are up for this December giving challenge.

In Every Thing, Give Thanks

Thursday, November 26, 2015
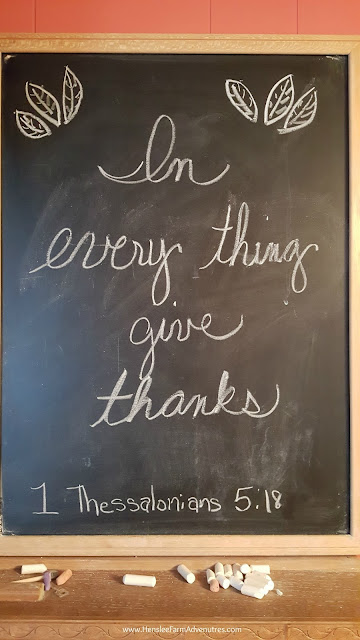
Give thanks

In every thing give thanks: for this is the will of God in Christ Jesus concerning you. 1 Thessalonians 5:18 (KJV)

The verse above is a good reminder that we need to give thanks for every thing that comes into our lives.  I recently listened to a sermon that talked about living a grateful life.  So many times we focus solely on the things that are going bad, and we forget to remember the blessings that God has given us.

I was doing this.  I was focusing on the little things, the things that didn't seem to be going right.  The fact that our siding was not getting up as fast as we hoped, the stress from my job, the fact that I am putting on a few pounds.  Instead what I should have been focusing on is the fact that we have a home to live in, I have a job that pays the bills and provides for my family, and we have plenty of food to eat.

Thanksgiving turkey
Turkey ready for the oven
God has blessed my family, and what better day to give thanks, than on Thanksgiving.  Today is a day to remember the wonderful blessings that we all have.  And if we have an over abundance of blessings?  Then, share with those who do not.

Making dressing for Thanksgiving
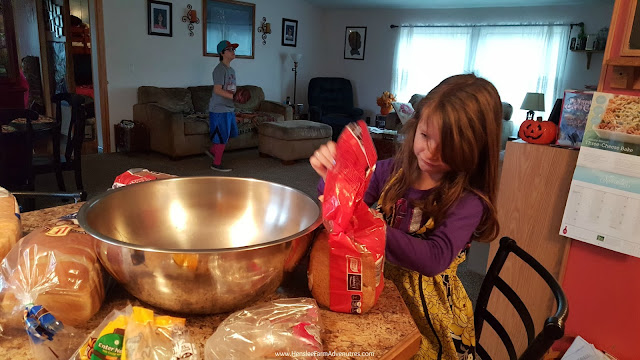
Carly getting the bread ready for the dressing
I started down that same old road this morning as I was getting the turkey ready to put in the oven and having Carly start on the dressing for me.  I didn't get all the ingredients that I wanted for the turkey, but that's okay.  It will still taste wonderful.  And I forgot to make the cornbread for our family's traditional dressing, but we have plenty of bread and it will still be good.

Remember God has blessed us.  I give all the glory to God for the family I have, the house we live in, and the food we eat.  He will always provide for his children.

O give thanks unto the Lord; for he is good; for his mercy endureth for ever. 1 Chronicles 16:34 (KJV)

From our family to yours, have a very happy Thanksgiving!

DIY Teacher Gift for Christmas!

Wednesday, November 18, 2015

I am so excited that I finally get to share with you a DIY Christmas gift!  I had really wanted to start sharing my gift series with you sooner, but it seems like life always has other plans.

For the first Christmas gift post, I thought I would share one of my favorite ones to make. It is a cool gift for a teacher.  This is something that I have given to my kids' teachers in the past and they always love it!

I have family members that are teachers, and their usual gift they receive is something like hand lotion, soaps, or a coffee mug. Instead of giving them the usual items, give them this wonderful little goodies box that can be personalized in a way that can include items that teachers need in their everyday use at school, as well as include some nice treats.  So without further ado, here is how I made these.

Teacher Gift Boxes Items
Items I used to make the boxes


You'll want to start with the box.  In the past I have purchased small tackle boxes from Wal-Mart that are around $3.00 per box.  They are great because you can customize the size of the compartments inside.  The boxes are sturdy, and they can continue to use them for small desk supplies.

Then one day while I was at Target and I found these great plastic boxes for only $1.00!  I loved these and picked up a couple, one rectangular, and one square.  Of course you can't change the size of the compartments inside, but for the price, these are perfect!

The magnets and the pretty alligator clips I got from Wal-Mart, the rest of the supplies I purchased from Dollar Tree.  I loved the fact that our Dollar Tree had some pretty paper that I could use to decorate the lid of the box and the best part is that it had an adhesive backing!  How easy!  Before I had always used scrapbook paper and a glue runner.

Adhesive Scrapbook Paper
Adhesive paper.  If you look real close, you can see where I scored it to put on top of a box.
The first thing I did was to make a mark, or score the paper to the size of the top of the box I was using.  You can see in the picture above the crease of where I need to cut the paper to size.  You could also be more exact and measure, and I even thought about getting out my rotary cutter, but to be honest, I was a little lazy.

After I cut the paper to size, I peeled off the backing and stuck it onto the lid of the box.  Here is where I had some trouble.  I found out that once it sticks, it sticks!  There is no re-positioning this paper, so you have to be very careful.

Once I got the paper on the box lid, I then decorated it with stickers and glitter letters.  This is where to get the kids involved so they can customize their own teacher's box.  I usually put the teacher's name on the lid as well as some stickers.  For this project, I used what I already had on hand.  It just so happens that I had leftover glitter letter stickers and some 3-D stickers that I had purchased from the Dollar Tree for the Back to School Backpack Craft.

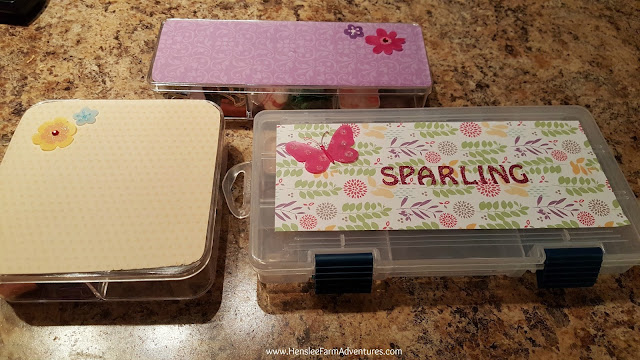
Decorated Teacher Gift Boxes
Here are all three boxes, decorated.
Next, comes the fun part of putting the goodies inside.  I used some items that I already had on hand, paperclips, staples, and pencil lead, and then added in the decorative magnets, alligator clips, and of course the candy!

Goodies inside the smaller decorative boxes
Inside the smaller boxes
You can see that in the square box, there were four compartments.  Besides the school supplies and candy, I decided to add in some tea.  For the rectangular box, there were only three compartments so I wasn't able to add as much.  The one good thing about these compartments though is that they are deep, so I can double up on items and fit more things in.

Goodies inside the bigger decorative boxes
Inside the bigger box
As you can see the bigger box has more compartments and they are adjustable as well.  I have several different things that a teacher may need.  You can customize this however you like.  If you know there is something special that the teacher needs or likes to use, then you can throw that in there as well.  I do plan on adding a few more items before I give these to our teachers this year.

Ideas on what to add to the compartments (provided by my Aunt Linda, a retired teacher...thank you!)
  • Post-It Notes
  • Chapstick
  • Nail File
  • Nail Clippers
  • Stamp pad
  • Emergency Sewing Kit
  • Safety Pins
  • Gift Card (Amazon or iTunes)

One thing to remember when you are making teacher gifts, don't forget the special teachers!  That would include music, art, gym, computer, and whatever else your school might have.  They too deserve a great Christmas gift!

Decorated Teacher Goodies Box


I hope you all enjoyed the first in a series of DIY Christmas gifts.  Let me know in the comments below what you think of this idea.


Canning Ring Pumpkins - A Craft Project!

Thursday, September 17, 2015

I am really excited about today's post.  I know, it isn't my usual recipe post, but it is a cool and easy craft post. And since I've been asked to do more craft posts, I thought this would be perfect.

I have seen something similar to this on Pinterest, and last night my sister texted me a picture of canning rings put together like this, but decorated for Christmas.  She said she thought it would be cute and I should do one for my blog.  I thought, hey why not?

The best part about this craft is that it cost me a whopping $0.10 per pumpkin to make. The only thing that cost were the decorative leaves and the zip ties. We actually already had the zip ties, but I thought I would go ahead and throw in their cost as well.

What helped with the cost was getting canning rings from my parents.  I had a feeling that they might have some and boy did I hit the jackpot.  What I love about them is that they are rusty and old looking.  But it wasn't my intention to leave them that way.

Bag full of wide mouth and regular mouth canning rings.
My plan was to spray paint the rings orange, in fact I had orange spray paint that I had bought for another project, but after I got home I realized that it had been used on a pine wood derby car.  So I looked through my spray paint, and decided to paint them a brown color.

My wonderful hubby helping out!
I thought that the brown would work and I really didn't want to have to wait another day, or spend more money on this.  I really wanted to be able to use what I had at home.  One thing I did purchase, was a bag of sparkly decorative leaves from the local Dollar Tree that I thought would go perfect as part of the decoration on the pumpkins.  After spray painting the rings, I started looking at the ones we had left.  And I kind of liked the way they looked.  Steve talked me into making one with the rings as is.

Wide mouth rings sans paint
That is when he took over the project and let me snap some pics.  It was kind of nice for a change! He made both a wide mouth sized pumpkin and a regular mouth sized pumpkin.  For the wide mouth size you will need between 18-20 rings.  For the regular mouth sized pumpkin you will need 15 rings.

Putting the rings together
You will want to put the rings together like the picture above.  Don't try to fan them out yet.  That will come later.

Once you have them together, the best thing to hold them is a zip tie.  Steve used two zip ties to make it large enough to go through all the rings.  You will need a pretty long zip tie.
Zip tying the rings together
Once you have the zip tie in place, you will need to work with the rings and get them to interlock with each other.
Make sure the rings are interlocking 
You may need to also adjust the zip tie and pull it tighter as you are interlocking and fanning out the rings.  Once you get it the way you want, then you should have a beautiful pumpkin shape.

My soon to be pumpkin.
I believe the one that I saw on Pinterest used a cinnamon stick for the pumpkin stem.  I looked through my cabinets and didn't find any cinnamon sticks, so again Steve came to my rescue and found me some actual sticks from our yard that I used as the stem.  I believe that I actually like the use of a real stick which adds to the rustic look of the rings.  I also added in one of the sparkly leaves for color and voila!
Super cute pumpkins!
After making these and leaving the rings as is, I really like them.  In fact I think that I like them better than the painted ones.  I actually haven't made a painted one yet, but I will just to see.  I also love that these are old and rusty and antique looking.  I think that they are perfect!

So comment below and let me know what you think about this easy and cute craft. 

We Put the Labor in Labor Day!

Wednesday, September 9, 2015
I hope you all had a wonderful Labor Day weekend!  We had quite the weekend and with all the projects we tackled, we put the labor in Labor Day!  I thought I would share some of the projects that we did.

After the doors came out.  There's a lot of work ahead for Steve!
Our first (and biggest) project we tackled was pulling our french doors at the back of the house, replacing both the header and footer, building a new door frame and reinstalling the doors.  It took the entire holiday weekend to get this project done and for two nights we had a gaping hole in the back of our house.  Luckily Steve was able to put a tarp up to half-way keep the critters out (that will be another story for another time).

Still need to paint and put up trim, but at least we have a back door!
While I did help Steve with this project there were times that he didn't need my help.  So that left me free to tackle a couple of other things that needed to be done.

The first and the only thing that I did this weekend that was not a necessity, was to paint our front door.  The door itself is solid wood and a beautiful door.  However the sun had damaged the outside of the door over the years.  Last year I tried to sand it and stain it, but because of the damage the stain did not go on even and so we had a two-tone door.  It was not pretty.

Our two-tone door. 

I finally talked Steve into letting me paint it.  But more than that, I was able to paint it red!  I love the color that I ended up with.  I purchased Valspar Posh Red.  It is not a bright cherry red, neither one of us wanted to go down that road.  It is more of a brick red and looks great with our tan house color...otherwise known as Canyon Ridge. :-)

Our beautiful red door!
I'm not sure if the picture does it justice, but I painted it in a way where you can still see the browns from the door stain coming through.  You can also see the grain of the wood which Steve loved.  All-in-all I thought it turned out great!

Another fast project I did was spray paint our back outdoor light, sorry no pic. :-(  It was originally black, but was extremely faded.  I had some metallic oil rubbed bronze spray paint that I had used for another project.  It was perfect and took less than five minutes to spruce it up!  Before I did that I had been ready to buy a new one!

The third project that we started but didn't get to finish was replacing our rotted trim boards around the house.  While Steve was working on installing the back door, I primed and painted the trim boards so that our last day before going back to work we could put them up.  Well, as I was removing our rotted trim boards, I realized that there were several places where our siding was also rotted.  So guess what?  The trim boards did not get put up, and now we have to purchase siding and replace what we need to.

Not a pretty site...bad trim boards and lots of weeds!
After tackling the door this weekend, another big project was not what either of us wanted.  We were ready to throw in the towel and just call some one to put vinyl siding on it, but money-wise it is cheaper (although more labor on our part) to replace the rotted pieces, so we will be doing that as soon as we can.

While I was taking off the bad trim, I was also trying to weed, which was just ridiculously out of control!  We really let our place go this spring and summer, but we had good reasons.  Now, we just have to get it back in shape before winter comes!

So our next projects (besides the siding and trim of course) will be to move the stairs on our front and back decks and to replace the railing on our decks.  I also bought some cool fabric which I will be making curtains, recovering a footstool, and recovering some bar stools.  I can't wait!  I will keep you updated on how that all goes.

Can't wait to use this fabric!
Keep an eye out for my homemade Christmas Gift series.  I will start posting that very soon.  I am getting so excited about it as I get everything together and start working on it.  I know you guys will love it!

Let me know in the comments below, what did you do for Labor Day?  Rest or labor?

Happy No Rhyme (Nor Reason) Day!

Tuesday, September 1, 2015
Today is national No Rhyme (Nor Reason) day.  I'm sure you are all going to be celebrating this wonderful holiday!  In case you aren't in the know, and have never heard about this holiday, it is the day that we celebrate those words in the English language that do not rhyme with any other word.

Have you thought of any yet?  If not, let me give you a few:
  • orange
  • bulb
  • month
  • amongst
  • fifth
  • flange
  • pierced
  • false
There are actually quite a few and the list above is just a very small list.  Did you think of any others?  Comment below and let me know if you can add to the list.

This past weekend we had some friends come to the farm that we hadn't seen in quite awhile.  We had a great time just visiting with them, and they were able to see all the new additions that we have.  We got out the dutch oven and made campfire chili and fry bread over an open fire.  It was delish!  Our friends happen to be YouTubers just like we are.  The funny part is that there was hardly a time when something happened that there wasn't at least one person yelling out "get your camera!" or "why isn't anybody filming this?"  After awhile we all started laughing about it.

However because of us wanting to film just about everything we did, we got some great videos.  Some will be posted soon to my channel at Henslee Farm Adventures .  In the meantime, you can watch this great video from RobThePirate about their time at the Henslee Farm.  Once your done, please check out his other videos, they are cool and funny!


In other news, I will be starting my Christmas gift making series.  I will be showing you some things you can make for Christmas gifts.  After all there are only 114 days  or only a little less than 4 months until Christmas!
 

A Great Father's Day!

Tuesday, June 23, 2015

I hope that you all had a great father's day!  I know that we did.  I can't begin to tell you how lucky I am to have such a wonderful husband who is also an amazing dad.

I am also lucky to have such a great dad who was a positive influence on me during my childhood.

My dad circa 1960
Waking up on father's day, our son wanted nothing more than to cook breakfast for his dad.  So I let the kids take over the kitchen and thanks to what my son has learned in scouts, and my daughter has learned from helping me in the kitchen, they needed very little help from me when it came to the actual cooking.

Drew and Carly preparing to cook
 Of course I was there for moral support and to rescue them if they needed it, but I was pleasantly surprised that they had this handled!

Drew cooking scrambled eggs
Even though everything went well, my first thought was to say no.  I knew that they would make a mess, and I knew that I would probably have to help clean up.  Sometimes it is just easier to do things yourself.  But what kind of a lesson would I be teaching my children if I didn't let them try things, especially on their own?

Yes my kitchen was a mess, and yes I did have to help with the clean-up.  But what my children gain was a sense of accomplishment and a bit of self-esteem as they told grandparents and aunts and uncles that they were able to fix breakfast by themselves.

It was worth every bit of that mess to see how happy it made them.  And it was nice to see how impressed my husband was with the special breakfast that he got from his kids.  So go ahead and let your children help.  Take the time to make a little mess, and encourage them.  After all it is the only way they will learn.

Happy Father's Day!


©HensleeFarmAdventures.com. Powered by Blogger.

Search This Blog

Back to Top