A Good and Sad Christmas

Monday, December 28, 2015

I hope your Christmas was a good one. We did have a good Christmas but we also had something sad to happen as well.  I'll get to the sad part a little later.  I know it has been a week since my last post, but I spent the last week with my kids (in some cases taking care of sick tummies), getting ready for Christmas and watching the days fly by.  Before I knew it, Christmas was here and gone, and I didn't even get all my Christmas cards mailed!  It was just one of those years.

As for our Christmas we started off with the kids being sick a couple of days before. I was afraid that it might spill over into the holidays but we were lucky, they did get well before the Christmas festivities started. We started our celebration with a trip to Grandma's house where the tradition is to make homemade cashew chicken. I was helping with cooking the chicken when I accidentally broke a coffee mug  (I was drinking coffee while cooking) and I sliced my finger on one of the broken shards. 

I cut it pretty deep and it wouldn't stop bleeding. I had been putting pressure on it and holding it above my heart, but it didn't help. I knew I needed a stitch or two but that meant driving 30 miles and missing the first of three family Christmas celebrations. Luckily Steve came to my rescue and looked up on Pinterest ways to stop bleeding. The one we chose to try was sugar. We found out that sugar is an antiseptic and also helps the blood with clotting. To our relief, it actually works! I held my finger in some sugar that Steve had in his palm and while it didn't completely stop the bleeding it did slow it down enough to bandage it. And though I was in pain,  I did get out of doing the dishes.

I thought I would share some of our Christmas traditions with you. We always open our presents with our kids on Christmas morning but about four years ago I started taking one gift for the kids to Grandma's house for them to open. That gift is new footie pajamas. The kids have come to expect it and in fact they ask to make sure that I have bought them new pajamas and they can open them Christmas eve. I think even if we didn't go to Grandma's house I would still have pj's for them to open and of course they love to put them on immediately.

We have also cut down on the gifts we get for our kids. I try to follow the rule of one thing they want, one thing they need, one thing to wear, one thing to read.  What I have noticed is that with less presents, we can spend a little more and get quality and the kids can focus more on what they received, since they aren't as overwhelmed.

After Opening Christmas Presents
The aftermath of unwrapping presents.
For both of our extended families we have ceased buying gifts for each other, instead we made a rule several years back that we would make gifts. These have been some of my favorite gifts to receive. 
This year I received homemade vanilla from my oldest sister, homemade bath products from my middle sister, a beautiful hand embroidered team towel from my oldest niece, and a hand painted picture from my youngest niece courtesy of her 18 month old.  We also received a hand painted picture from our grandsons, and once I get it framed both paintings will be hung in our house. I love artwork from the kids. 

Handmade Christmas Gifts
Handmade gifts we received.
My sister-in-law who usually makes me something from scrapbook items (she has made me a photo book and other things in the past) broke with tradition and bought me a set of silver measuring spoons with the initial H in the middle. I didn't mind, as they are beautiful! 

Initial silver measuring spoons
I really do love the homemade gifts and if you haven't tried it with your family, I would suggest you do.  We made candles our of vegetable shortening this year.  We used crayons to color them and essential oils to make them smell good.  They honestly didn't work out as I had planned, so I am working on improving them so I can share with you what works and what doesn't in case you want to try making them.

making candles for Christmas
Making candles for Christmas
Now for the sad part. We lost a member of our family.  My cat Tippy passed away the day after Christmas.  I knew this time was soon to come.  Her health was not the greatest and she was 18 1/2 years old.  That made her 90 in cat years.  I got her as a stray when she was a little kitten in August of 1997 and she has been with me ever since.  The kids were sad of course and Carly used one of her Christmas gifts, a book writing kit, to write a book about Tippy.  I thought it was very sweet.  My heart was sad at losing Tippy, but I know she does not suffer and we will always have great memories of her.
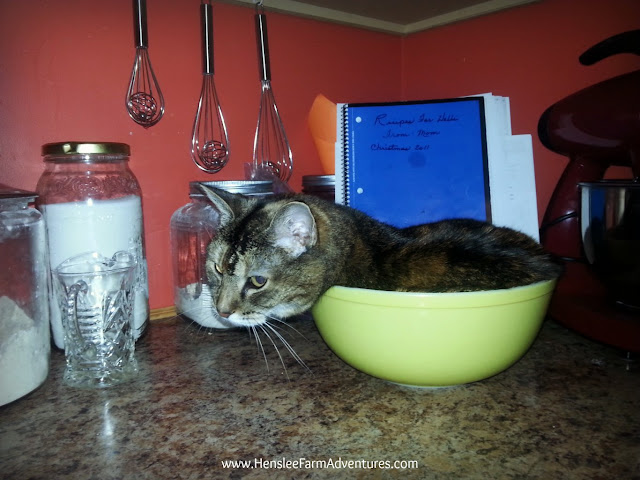
Tippy the cat
She loved to lay in boxes, bowls, or anything she could squeeze herself into.
I hope that you all had a fabulous Christmas.  I hope you kept the old traditions and made new ones. I hope that you hugged your family tight and enjoyed the greatest gift of all, Jesus.  

Let me know in the comments some of your family traditions.

Building Shutters!

Friday, December 18, 2015
Our house, not only has new siding (check out the video here), but now new shutters!  The place looks so much better and we are so excited with how things are working out.  The weather has been cooperating and we have actually had time to be able to work on our place.

The next stop is inside to update some things in the house during the cold days of winter.  I know we will share all of those projects with you, but first I wanted to share our video on how Steve built the shutters for us.  (I love that the thumbnail is of our sweet little Abby!)


Here are some pictures of the finished project.

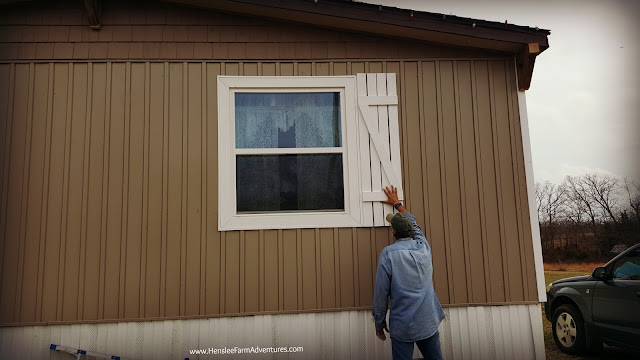
Checking the Shutters
Seeing what it will look like.
We of course had to see what it would look like before actually attaching them to the house.  I think it looks pretty good.

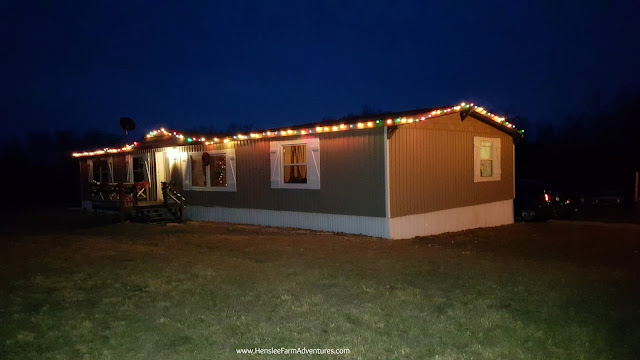
Christmas Lights
All done!
Here is a picture with the shutters done.  I love how it makes the place look!  A far cry from our old siding and shutters!

Close-up of Shutter
Close-up
This is my favorite picture.  A close up of the shutters, with the Christmas tree in the background.  We are so happy with how it turned out!

So check out our video above and see how we made these shutters.  And let me know in the comments below what you think.

25 Days of Giving Update and a Cookie Recipe!

Wednesday, December 16, 2015
Well my December challenge has been more of a challenge for me than I originally thought.  I mentioned in one of my previous posts that the giving part was not going as planned.  To be honest I'm not sure what I really thought would happen with this challenge.  I guess I was thinking that everyday I would be volunteering or donating items to a charity, giving money, and making the world a better place.

What I have found is that it is the small giving that can mean so much.  I do believe that it is important to donate food and gifts to families in need, and that I have done.  I also believe that it is important to support your favorite charities with monetary donations.  That I have done also, but it is the little things that sometimes we forget to do that can make giving easy, and life so much better.

Some of these things I am talking about include:

  • Allow someone to go in front of you in the check-out line for absolutely no reason.
  • Pay for the person behind you in the drive-in lane at a restaurant.
  • Volunteer to help when asked.
  • Hold the door open for the person behind you.
  • Smile and say hello to people you don't know.
  • When your child has to bring money in for a class party, give extra in case a student can't afford it.
  • If you shop at ALDI, give your cart to someone without asking for the quarter.
  • Instead of yelling at the person who just cut you off in traffic, pray for them instead to get to their destination safely.
Doing all of these and more can really make a difference.  This is giving of the best kind...the giving of kindness and it can make someone's life a little brighter.

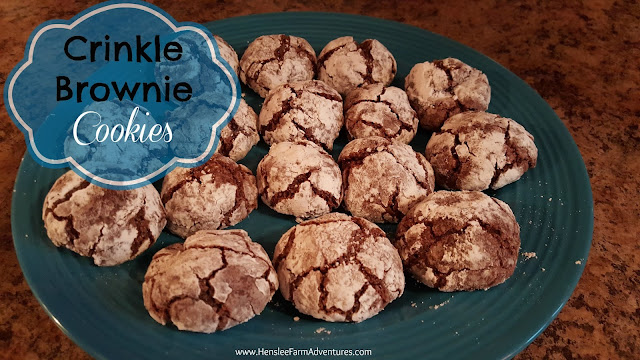
Now for the cookie recipe.  This recipe is one that I made based on a recipe that I found at Eating on a Dime.  I needed a good recipe for our church's cookie reception and it needed to be quick, easy, one that I had all the ingredients for, and something different than chocolate chip.

Crinkle Brownie Cookies

This recipe I found sounded great! Plus they were quick to make and easy.  The one problem is that it called for a brownie mix, and I don't normally use store bought mixes.  In fact I make my brownies from scratch (I see another recipe post in the near future).  So I decided to use my brownie recipe to make a "mix" and I had to tweak a few other things, but I was able to make these delicious cookies from scratch and they were just as easy as using a store bought mix.  

So this is what you have been waiting for the ingredients:
  • 2 1/2 cups of flour
  • 1/2 cup of cocoa
  • 2 cups of sugar
  • 1/2 teaspoon of baking powder
  • 1/2 teaspoon of salt
  • 3 eggs
  • 1/3 cup of oil
  • 1 teaspoon vanilla 
  • 1/2 cup of 
First sift the dry ingredients together.  If you don't have a sifter (really you should) just put the dry ingredients in a bowl and whisk together well.  Next add in the wet ingredients.  I did not add the wet ingredients together and then combine, I just threw the eggs, oil, and vanilla right into the dry ingredients.


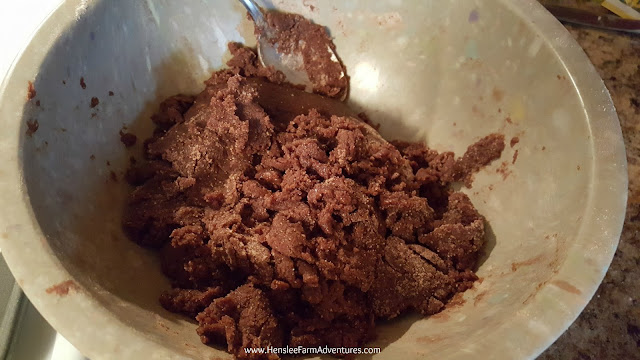
Cookie batter
You can see how thick it is!
Then mix this all together.  I will say that I started mixing this with a spoon.  I knew it was going to be thick, but this is super thick.  I soon abandoned the spoon and dove right in with my hand.


Rolling the dough
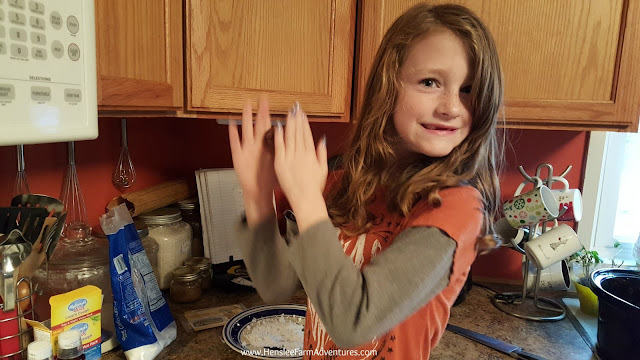
Carly making the cookie balls...please forgive my messy kitchen!
Once it is mixed well, start making balls with the dough.  I used my cookie scoop to get uniform cookies.  Then roll the dough ball into powdered sugar.  This is where my little girl helped.  She loved making the dough into balls and rolling them into the powdered sugar.  And I love being able to cook with her and pass on my knowledge!

Rolling the dough balls in powdered sugar
Carly rolling the balls in powdered sugar.


Once you are done, then bake them in a preheated 350°F oven.  The original recipe said for 8-10 minutes, but her cookies must have been much smaller than mine, or perhaps my oven temperature is a little off.  Not sure, but I had to bake my cookies for at least 18 minutes before they were done.  I would suggest to start checking them around the 10 minute mark.

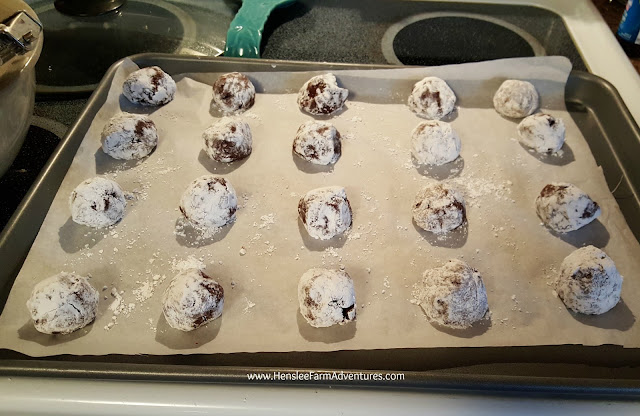
Cookies ready to bake
Ready for the oven.
 The cookies were a huge hit at our church function and they were soon gone.  I was so glad that I saved a few for us at home.  I will definitely be making these cookies again.  They would be perfect for a cookie exchange or if you are planning on making some treats as gifts during the holidays.

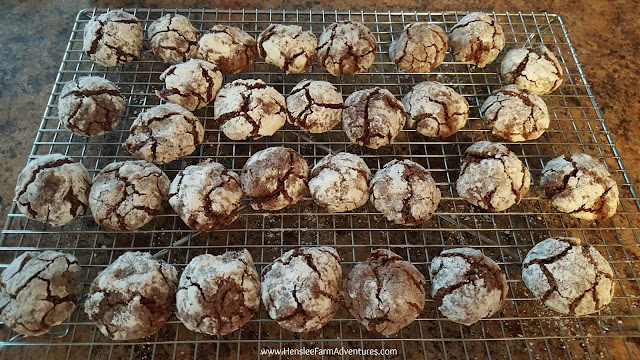
Crinkle Brownie Cookies cooling
Cooling on the rack, it was hard to keep everybody out of them!


I hope you enjoyed this recipe and if you try it, please let me know in the comments below what you think.

If you would like a printable version of the recipe, click HERE.


Throw Back Thursday: Taco Soup

Thursday, December 10, 2015
taco soup

My kids and I love soup.  My husband does not.  But we have been able to compromise and find some soups that he is willing to eat, so I don't have to spend the rest of my days not being able to eat soup. :-)  One of these compromises is taco soup.  Actually that is not the name for it.  I could never remember the name for this soup, so I named it taco soup because of the taco seasoning that goes in it.  I believe it is called something like Mexican Soup.  But for the life of me I really can't remember.

I actually got this recipe from my mom about 25 years ago, so it fits perfectly with my throw-back-Thursday recipes.  It was a nice change from the regular chili that we always had and for awhile this recipe became one of our family's staples while I was in high school and college.

One of the things that I love about this recipe is that you don't have to follow it.  So long as you stick to the basic flavorings, then you can mix up those ingredients with whatever you have on hand in the pantry.  And I have done that on many occasions. 

Here are the ingredients:
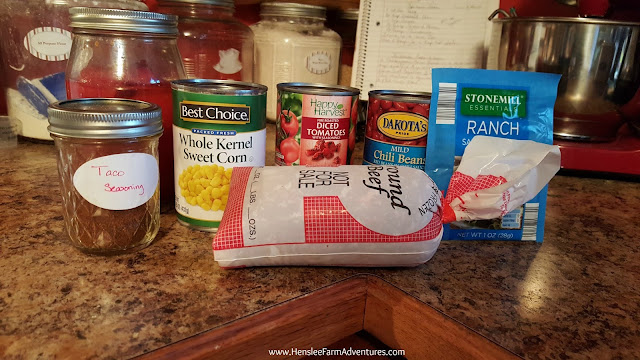
taco soup ingredients
This really isn't all of them, I would add another can of beans. 
Here is what my mom's original recipe called for (she didn't follow it to the letter either)
  • 1 pound hamburger meat
  • 1 can diced tomatoes
  • 1 can diced tomatoes and green chilies
  • 1 can corn
  • 1 can kidney beans
  • 1 can black beans
  • 1 packet taco seasoning
  • 1 packet dry ranch seasoning mix
As you can see from my ingredients that I have pictured I don't follow the recipe.  I like to use a jar of home canned tomatoes along with a can of chili ready tomatoes.  If I have a can of diced tomatoes and green chilies in my pantry, then I will throw that in.  It gives it some nice heat. 

I also like to use chili beans rather than kidney beans and if I have black beans I will use them and if not, I just throw in another can of chili beans. If you don't have either you could really use any beans that you have (except green beans...yuck!)  On the meat, if you are a vegetarian you could leave that out altogether, or use ground beef, deer, or turkey.  All would be good! 

For the seasonings, I make my own taco seasoning that I like to use.  I have yet to find a homemade version of ranch seasoning that is flavorful enough for me, so I buy the packets from ALDI because they have no MSG in them which is almost unheard of for ranch seasoning!

This meal is so easy to make.  Brown your meat (if using), then once it is done, combine all the ingredients in a pot.  This is where I use my dutch oven so I can brown my hamburger meat and then add in all the ingredients and only have one pot to wash at the end.  Let simmer for as long as you can stand it...the longer the better to allow the flavors to come together.  And then enjoy!

You could also make this in a slow cooker.  Once you have browned your meat, dump all the ingredients in a slow cooker and cook on low for 3-4 hours.

taco soup
Nice and thick...just like Steve likes it!
You can see above that when I make the soup I try and make it thick.  That is for Steve's benefit.  Since he does not like soup, he doesn't like anything soupy!  Of course depending on how much tomatoes you add in, you can make this thinner if you prefer.

This really is a great, quick, and easy meal.  It can be very budget friendly when you use items that you already have on hand.  And can make a great vegetarian meal by omitting the meat!

I hope you try one of our favorite soups, and let me know in the comments what you think.


To get the printed version of the recipe, click HERE.

Sickness Has Hit!

Tuesday, December 8, 2015
Sickness has officially hit our household.  We have experienced a stomach bug and all the lovely symptoms that brings with it.  And we have experienced and are experiencing colds.  I have made our cough and cold tea (recipe to come soon) and have been drinking that.

homemade cold and cough tea
Homemade cold and cough tea

I have also gotten out the homemade vapo rub that I made last year.  That recipe will come soon...I hope.  I say I hope because I didn't follow a recipe, so I hope I can remember what I used!

homemade vapo rub
Homemade vapo rub

I love being able to use homemade recipes whenever sickness hits.  But don't get me wrong.  I have no problem with going to the doctor if the need arises.

I was planing to have an update on the 25 days of giving, but I think that I will wait on that.  Yes I have been giving, but it has gone down a different path than what I had originally envisioned.  I will have to share that with you later in more detail.

For now, I am going to sip my tea and slather my neck and chest with the vapo rub.  I'm also going to take this time to relax and read and recuperate.  That is something that I never seem to find the time for!

I hope you are all staying well.  And keep watching for a cool Christmas craft that is coming up later this week!

Throw Back Thursday: Loaded Baked Potatoes

Thursday, December 3, 2015
Loaded Baked Potatoes

One of our favorite, easy, and budget friendly meals to make are baked potatoes.  In the winter time, this is the perfect comfort food, and can be a meal in itself.  In the summer, we love to throw a couple on the grill with our steaks or pork chops.  Either way, you can't go wrong.

Several years ago, we were in one of our favorite (locally owned) grocery stores and we saw that they had potatoes already to cook.  They were seasoned and wrapped in foil so you could either bake them in the oven or throw them on the grill.  We decided to try them (even though they were a little pricey) and man were they the best potatoes I have ever had!  I'm not exaggerating.  They. Were. The. Best.

Every time we went by the store, we always picked some up to bake.  I had played around with trying to make them myself, but I didn't really get serious about it.  Then the price increased and we were paying $1.00 per potato.  I know that doesn't sound like much, but when you can get a 5 lb. bag or even a 10 lb. bag on sale for a couple of dollars the price of $1 per potato is expensive.

So it took me awhile, but I think that I have the recipe figured out.  At least, I have it figured out so that my family loves them!  Of course I don't know what herbs and spices they use to help season the potatoes, but that's okay.  We have figured out what we like and I want to share it with you.

The first step is to pick out potatoes that are very similar in size and shape. That way they will cook evenly. I like to use Russet potatoes.  There is something about the starch content in them, that makes the perfect baked potato.  Once you have your potatoes picked out, you will need to scrub them  until they are clean, but don't scrub so hard the skin comes off, and then dry them (very important!)

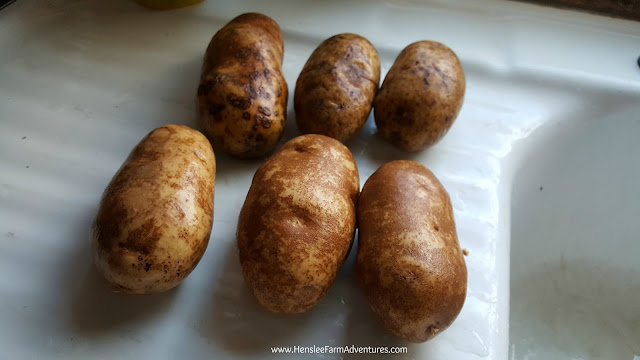
Scrubbed potatoes
My potatoes, all nice and clean and waiting for the next step.
When they are clean and dried, you can then season them.  I first get my foil ready by tearing off sheets that I need.  Then I get my other ingredients ready.

baked potato ingredients
Baked potato ingredients...super simple!
I first put a little bit of extra virgin olive oil (you can use regular olive oil) on a piece of foil.  Then I roll the potato around in the oil.  You can also use your hand and make sure that the oil is completely covering the potato.  Then comes your salt.  You want to use coarse salt.  DO NOT USE TABLE SALT.  You will end up with an extremely salty inedible potato.  Trust me! You can see my little baggie above is full of apple wood smoked coarse salt and other seasonings.  I got that from my local farmer's market and love it!  You can use just regular coarse salt such as sea salt, or kosher salt, or even Himalayan salt.  Make sure that the salt and seasonings completely cover the potato.

Oiled and seasoned potato
Oiled, seasoned and ready to bake!
As you can see from the picture above, it is not plastered with salt and seasonings.  You don't want to get too wild. :-)  Next just wrap up your potato and let it sit.  Try and let it sit for a couple of hours.  I made these in the morning and didn't bake them until the evening.  It allows the oil and seasonings to penetrate the skin and flavor the potato. 

Then bake in a 450°F oven for 1 hour, or until potatoes are soft when slightly squeezed.  You can also put these on the grill, or you can put them in your slow cooker on low and cook them for 6-8 hours.  I personally love the oven the best, but I have cooked them in my slow cooker and on the grill.

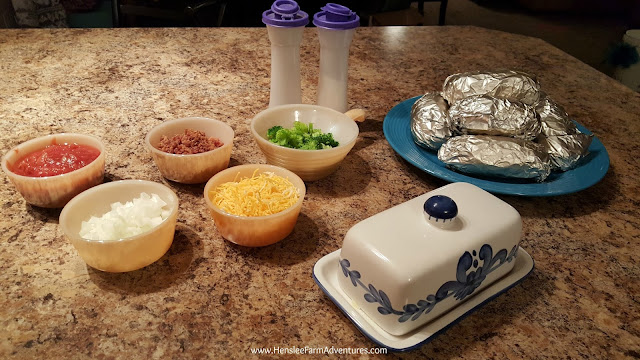
baked potato bar
Our potato bar
As you can see above, I got our toppings ready.  I tend to use whatever we have on hand or leftover.  For this meal, I steamed some broccoli, and also had some salsa, shredded cheese, onions, and bacon pieces.  And of course butter!  I love it when we have chili left over and I can use that as a topping for our potatoes. 

My baked potato!
Here is my baked potato ready to eat!  I made these during one of the no groceries during the month of November weeks.

I was able to use things that we already had in our pantry or fridge which accounts for the white onions rather than the green, and the addition of steamed broccoli.  These were so good!  This recipe is the only way that we make potatoes now.  I have microwaved them a couple of times since, but they just aren't as good.  They are definitely not as flavorful.  To us it is worth the time to season them up and bake them in the oven.  And you know what the best part is?  The kids will actually eat the potato skin!

If you would like a printable version of the recipe, click HERE.

Please let me know in the comments below what you think of the recipe!  I hope you enjoy it!

25 Days of Giving: A December Challenge

Tuesday, December 1, 2015
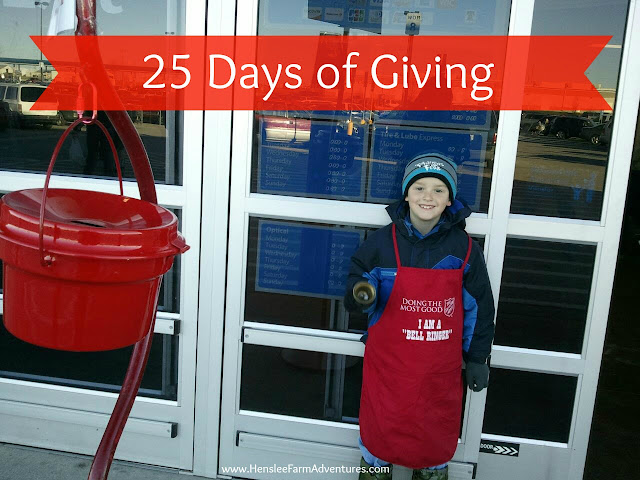
Salvation Army Bell Ringer

December is always a special time for me.  Not only is it Christmas but it is also my birthday month.
Steve asked the other day what I wanted for my birthday and Christmas. I started thinking what I would want.  I looked around me and I saw my family, my home, plenty of food in the kitchen, and for the first time, there wasn't really anything that I wanted, and to be honest there isn't anything that I need.

I told Steve that what I really want for my birthday is a night out on the town with him.  Of course to us a night out on the town pretty much consists of going out to eat (I'm hoping for my favorite steak place), and a trip to Barnes and Noble to drink coffee and look at books.  It may sound pretty boring to some of you, but to us, it is a wonderful time to reconnect with each other.  

Christmas Family Photo
My favorite Christmas family picture...in all its glory!
But it was my answer to what I want as a Christmas present that really threw him for a loop.  I told him that what I wanted for Christmas was to downsize.  I didn't want more things, I wanted to get rid of things.  We have more than we need and more than we will ever use.  All of our stuff is causing stress.  It is making it hard to clean and get organized.  I would rather have less stuff and more time with my family.  I want to start giving away what I can, and what better day to start this on than today, #GivingTuesday.  

Christmas babies
My Christmas babies...they were so little there.
I love that there is a day especially devoted to giving.  To remind us to give to those who are in need.  But our giving should not be relegated to just one day.  I have my friend Rene to thank for the next challenge that we are going to embark on.  This one shouldn't (I hope) be too hard.  During the Christmas season, we are going to be doing a 25 days of giving challenge.  This is one challenge that I really hope that you will do with me.

Christmas Parade
Carly and me at our hometown Christmas parade.
The idea is that everyday we will do one thing that ends up giving to others.  It could be as simple as donating clothes, donating your time, or donating money.  Each week I will report back on what my family and I did for each day that week to give to others.  I also want to hear anything that you may have done as well.

So who is with me?  Comment below if you are up for this December giving challenge.
©HensleeFarmAdventures.com. Powered by Blogger.

Search This Blog

Back to Top