My niece is expecting her second child, a boy, in May. For her first son, I was able to crochet a beautiful blanket. And I was thrilled when she used the blanket for her son's first professional pictures.
This time around however, I have not had time to crochet anything! In fact I wasn't even going to make her anything, I was just going to buy a present, but I started thinking that there must be something that I could make that was easy, cute, and practical.
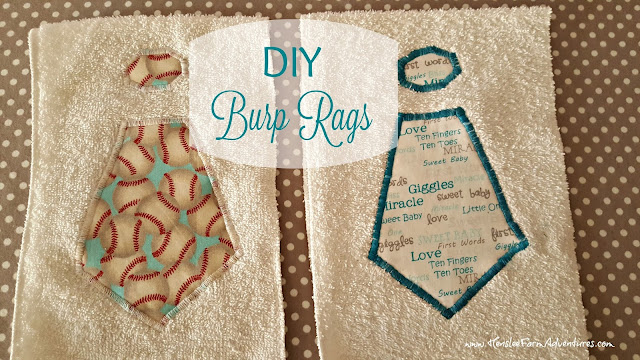
Searching through pins on Pinterest, I found a couple of ideas and decided on both. One was an idea for a burp rag, and the other was a swaddling blanket. They both looked easy enough, and I thought I would share what my version of the burp rags with you.
For my version of this project, I really wanted to use items that I already had on hand, so I decided that a white terry cloth towel would make a great burp cloth. The thing that I love about the towel is that it is absorbent, but not bulky and it fits perfectly over your shoulder.
Since my niece is having a boy, I love the idea of appliqueing a tie on one side of the towel. I could have also tried my hand at a teddy bear, but decided that the tie would be easier. For a little girl, a butterfly would be adorable.
So here is my towel that I cut into thirds. You can cut yours into however many you want, based on the size of the towel and how big you want your burp rags. I used my mother-in-law's serger on the sides that were raw. You could also zigzag stitch them, or you could hem them as well. For me I'm all about ease and I love using a serger!
Next you want to make your template for your tie or what you plan on appliqueing. Here is mine. I just grabbed a sheet of construction paper and free-handed it. The first one I made was too small. So I made a larger one and it worked better with the size of my burp rags.
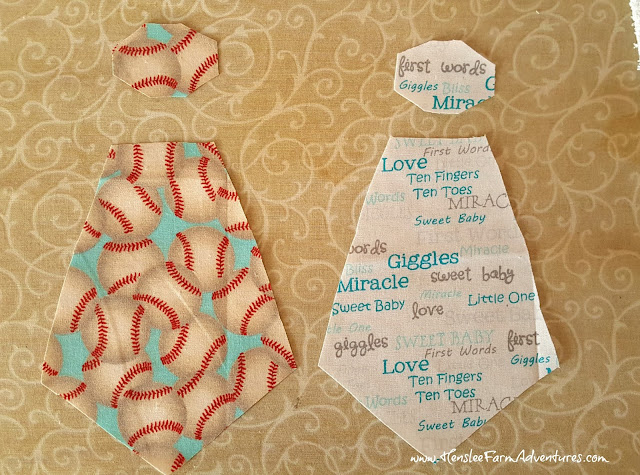
Then pick out your contrasting fabric. I was planning on using some that I already had, but I didn't have a lot of what would be considered "boys fabric." While I was at Wal-Mart, I found these cute fat quarters and since they were less than a $1.00 each, I decided to get them. I could have bought just one fat quarter and made the towels the same, but I couldn't decide between the fabrics. So I decided to get both. If I had bought just one, it would have yielded me three ties. So that means I have leftover material to make more in the future!
Use the template to cut out your ties on your fabric and then use HeatnBond Lite to adhere it to the towel. Iron on the HeatnBond first to your ties. Make sure that you use the lite version, because you want to sew over it. All this does is stick it to the towel so it doesn't move, and it gives it a little substance as well.
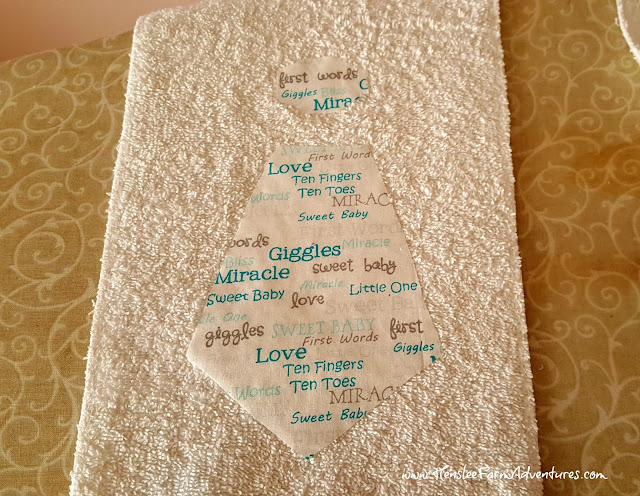
Once you have ironed the HeatnBond to your tie and you have it positioned onto the towel, then peel off the backing and iron the tie to the towel. If you are unsure about this, just follow the directions on the package, they are really easy. I positioned my tie, 2" from the bottom of the towel, and then left a 1" space between the bottom part of the tie and the top part. That gave me plenty of room for sewing around it.
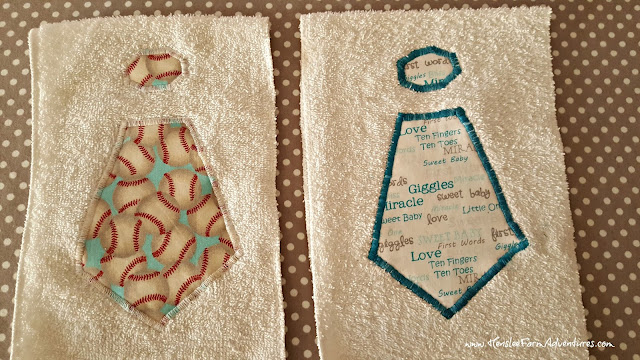
Once you have it ironed on, then you need to sew around the fabric using a zigzag stitch. The stitch was adjusted so that it is close together. The first one I did, which was the baseball one, was easy. In fact I should have known that it was too easy. My next one was of course the tie with the words on it, and I had some trouble with the thread catching. So while the second one isn't perfect, I finally finished it.
I thought they turned out pretty good. And they were easy enough a beginning sewer could definitely make these.
The best compliment that I got was from my sister-in-law. She said that they looked like they came from a specialty shop. That is really something coming from her, she is the craftiest person I know! She makes me some of the most amazing Christmas gifts!
So there you have it. A quick, easy, cute, and practical baby gift. I really wish I had found these before. Everyone would have been getting these great burp rags from me! :-)
Let me know in the comments below what you think about these.
This time around however, I have not had time to crochet anything! In fact I wasn't even going to make her anything, I was just going to buy a present, but I started thinking that there must be something that I could make that was easy, cute, and practical.
Searching through pins on Pinterest, I found a couple of ideas and decided on both. One was an idea for a burp rag, and the other was a swaddling blanket. They both looked easy enough, and I thought I would share what my version of the burp rags with you.
For my version of this project, I really wanted to use items that I already had on hand, so I decided that a white terry cloth towel would make a great burp cloth. The thing that I love about the towel is that it is absorbent, but not bulky and it fits perfectly over your shoulder.
Since my niece is having a boy, I love the idea of appliqueing a tie on one side of the towel. I could have also tried my hand at a teddy bear, but decided that the tie would be easier. For a little girl, a butterfly would be adorable.
So here is my towel that I cut into thirds. You can cut yours into however many you want, based on the size of the towel and how big you want your burp rags. I used my mother-in-law's serger on the sides that were raw. You could also zigzag stitch them, or you could hem them as well. For me I'm all about ease and I love using a serger!
 |
| My towel, cut apart and serged. |
Next you want to make your template for your tie or what you plan on appliqueing. Here is mine. I just grabbed a sheet of construction paper and free-handed it. The first one I made was too small. So I made a larger one and it worked better with the size of my burp rags.
 |
| My free-hand template...not too bad from someone who is not artistic! |
Then pick out your contrasting fabric. I was planning on using some that I already had, but I didn't have a lot of what would be considered "boys fabric." While I was at Wal-Mart, I found these cute fat quarters and since they were less than a $1.00 each, I decided to get them. I could have bought just one fat quarter and made the towels the same, but I couldn't decide between the fabrics. So I decided to get both. If I had bought just one, it would have yielded me three ties. So that means I have leftover material to make more in the future!
 |
| My ties, ready to be adhered to the towel. |
Use the template to cut out your ties on your fabric and then use HeatnBond Lite to adhere it to the towel. Iron on the HeatnBond first to your ties. Make sure that you use the lite version, because you want to sew over it. All this does is stick it to the towel so it doesn't move, and it gives it a little substance as well.
 |
| Make sure you use the "lite" version. |
Once you have ironed the HeatnBond to your tie and you have it positioned onto the towel, then peel off the backing and iron the tie to the towel. If you are unsure about this, just follow the directions on the package, they are really easy. I positioned my tie, 2" from the bottom of the towel, and then left a 1" space between the bottom part of the tie and the top part. That gave me plenty of room for sewing around it.
 |
| Ready to sew around. |
Once you have it ironed on, then you need to sew around the fabric using a zigzag stitch. The stitch was adjusted so that it is close together. The first one I did, which was the baseball one, was easy. In fact I should have known that it was too easy. My next one was of course the tie with the words on it, and I had some trouble with the thread catching. So while the second one isn't perfect, I finally finished it.
 |
| Finished project...not too shabby! |
I thought they turned out pretty good. And they were easy enough a beginning sewer could definitely make these.
The best compliment that I got was from my sister-in-law. She said that they looked like they came from a specialty shop. That is really something coming from her, she is the craftiest person I know! She makes me some of the most amazing Christmas gifts!
So there you have it. A quick, easy, cute, and practical baby gift. I really wish I had found these before. Everyone would have been getting these great burp rags from me! :-)
Let me know in the comments below what you think about these.


0 comments:
Post a Comment