Showing posts with label cooking. Show all posts

Why I Cook with Cast Iron and Why You Should Too

Thursday, January 12, 2017
My husband tends to give me Christmas presents that are practical. That isn't to say that I don't like them. In fact I love them! His gifts are always something that I want, and that I need. He knows my taste and knows what I will be happy with.

This year one of his presents to me was a cast iron pot with a cover that doubles as a pan. I have been eyeing this for sometime, and was ecstatic when I got it! I have slowly been transitioning to cast iron over the past couple of years. The other pans I have been using are a large stainless steel that can go into the oven, and a very small ceramic pan.


A couple of years ago I made the decision to toss out all my non-stick (read: Teflon) pans. I didn't like the fact that my family was ingesting the chemicals from the pans as I cooked the food, but I did love the idea of using little to no oil and having the food not stick to the pan, as well as how easy they were to clean-up. However health won out over ease of use and I decided to try stainless steel after that. The clean-up was easy enough, but the non-stick part was not there unless I used a ton of oil!  I decided I didn't want to add that many calories to the food we ate, so I tried ceramic. It did have non-stick properties at first, but the more I used it, the more the coating started chipping off and I didn't want that in my food either. I am sure some of you would tell me that I didn't use the ceramic pan right, I probably used too high of heat, or used too abrasive of cleaners, but if there is a coating on a pan, no matter what, it will come off at some point.

During this time, I had also started using a 12" cast iron pan. I like the idea of cooking with cast iron, and I like the benefits. It allowed iron to get into our diet in a healthy, non-toxic way. There are no chemicals on the pans, and they can last literally forever.  But there are some tips to using them to get the most benefit out of them.

I thought I would share with you why I am now solely using cast iron and why you should be too. I will also share with you some tips for using cast iron that gets the most benefit out of it.

Yes, you can fry an egg in a cast iron pan and not have it stick!


It Is Naturally Non-Stick
When I first started using cast iron, I would have absolutely disagreed with this statement. Yes, I was told it was non-stick, but my experience proved otherwise. What I didn't realize is that the pan must be well seasoned. Don't expect a brand new pan to be automatically non-stick. You will need to cook with it and build up the seasoning to experience it being non-stick. If the pan was pre-seasoned, then it won't take long for it to get to the non-stick stage.

Tip 1: Be sure and use some type of oil when you first start cooking with a new pan, or even a newly seasoned pan.  You will need to build up the seasoning of the pan and therefore its non-stick quality.

Tip 2: Keeping the temperature at a lower setting on your stove will also help keep food from getting too hot and burning/sticking to the pan.

The lid to the pot, which flipped upside down (as pictures) is now a frying pan!


It Adds Iron to Your Food
As I mentioned earlier, cast iron will naturally add iron to the foods that you cook in the pan. There are many people that are not getting an iron rich diet (think red meat, dark leafy greens, beans).  Not having enough iron in your diet can lead to anemia. While taking a supplement can help, the best way to get nutrients and minerals is through your food. And to think this pan helps with that!  If you are on the anemic side, don't think that you can immediately start cooking with cast iron and stop your supplements, it doesn't quite work that fast. You will need to cook with cast iron on a regular basis to see the benefits of the iron.

Cooks Somewhat Evenly and Retains Heat
I think this is probably my favorite benefit of cast iron. The pans I have used in the past (stainless steel, ceramic, non-stick) have had hot spots and cold spots. I do not have the luxury of having a gas stove and having control over the heat of the burner. With cast iron, I have experienced very few hot and cold spots, once it heats up, it is an even heat. What I have found with my electric stove is that I never want to raise the temperature of the burner more than medium. Once the pan is hot, it stays hot for quite awhile.

Tip 3: Be sure and preheat your pan! This really is a must to have even heating. I always put my pan on the burner and turn the burner to Medium (remember I have an electric stove). Once it is heated up (drop some water in the pan and if it sizzles and dances, it's ready) you can add your food (oil of your choice if you need it.)
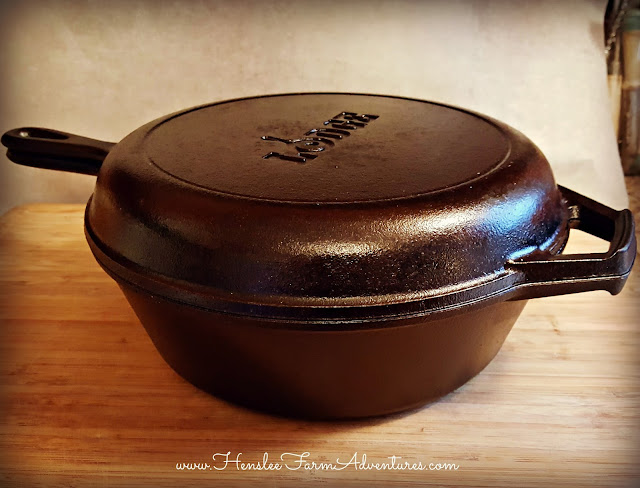
My Christmas present this year, and it is fast becoming one of my favorites!


It is Easy to Clean
Ok, you might disagree with me on this, but I have learned the secret to cleaning cast iron. Clean it while it is still hot. Remove the food and add a little water to the pan. Using a soft cloth (I love using the dish cloths that I have crocheted), clean off the food residue. You will not need soap this way, I promise you. Soap can take the seasoning off of the pan. Be sure and dry the pan with a clean soft cloth (lint free) and then I reseason mine. To do this, I add about a tablespoon of olive oil to the still warm pan and rub the oil all over. I then sit it back on the stove  for the oil to absorb into the pan. If you need to season a pan from scratch, this is not the way to do it.

Tip 4: Do not over oil your pan to season it. If you put too much oil on your pan, you will end up with a sticky gooey mess. Don't worry if this has already happened, you can always scrap it off and reason your pan.


You CAN Use a Metal Spatula (and you should!)
On one of my YouTube videos I show how we cook cowboy stew over an open fire in our dutch oven. One of the things that I used was a metal spatula to first cook the hamburger. I immediately received a comment that I shouldn't be using metal. Guess what? You DO want to use metal with cast iron. When you first purchase cast iron pans, they can be bumpy or have an uneven surface. The use of metal on them hones down the cast iron over time and makes it smooth, which helps with the non-stick process and cleaning process.

Tip 5: You do NOT want to use metal on an enamel clad iron pan. That will definitely scratch the surface.

My cheeseburger soup in my enamel clad dutch oven. That spoon in the pot is a ladle and was not used to cook with.


You Can Cook on Any Cook Surface
These pans can be used anywhere! Electric stove, gas stove, wood stove, camp stove, open fire, you name it! So if the zombie apocalypse ever happens? Well you can bet you can still cook a fantastic meal! ;-) I have used mine on my electric stove, a camp stove, and an open fire. Nothing beats chili cooked in a dutch oven over an open fire. It is one of our favorite things to cook.

This is our dutch oven that we use when camping. We use it over an open fire, in coals, and have also used it on a camp stove.


They Last Forever
This is the best part about these pans...they last forever! What I wouldn't give to have a pan that one of my grandmothers had. I have heard from other cast iron lovers that the older the cast iron, the better. There are pans out there that are over 100 years old and are still in service today. The more use they get, the better they become. Of course that is if you take care of them. And I have found that care of these pans can be easier than some of the other pans I have had in the past.

Tip 6: Take well care of your pan by using it as often as possible, keeping it in a dry place so it doesn't rust, seasoning it as needed, and you will have a pan that you can pass on through the generations.

Let me know in the comments below what your experience is with cast iron, and what your favorite cast iron pan is.
  

Food, Family, & Traditions

Tuesday, May 3, 2016
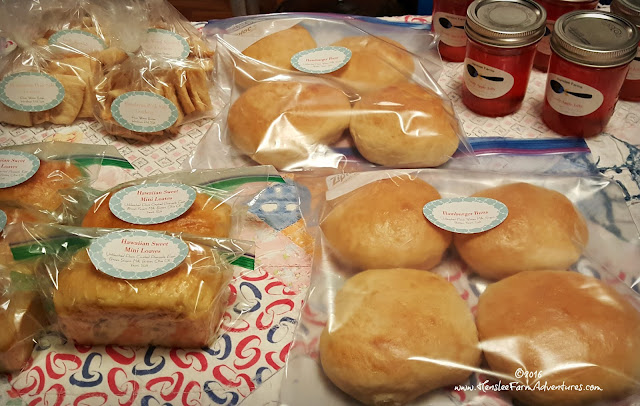
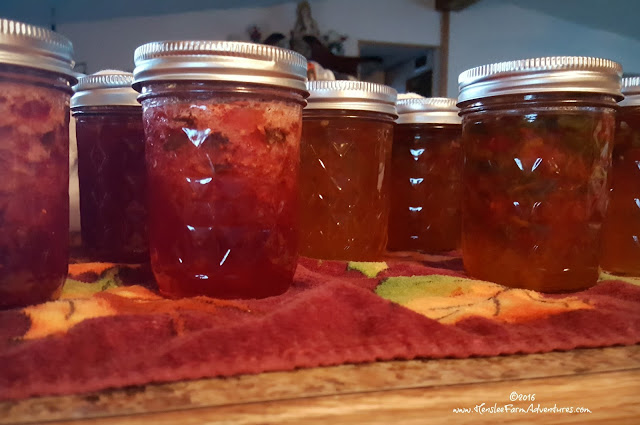
For the past couple of weeks, I have been baking and canning jellies and jams to take to our local farmer's market. Believe it or not, it has been a dream of mine to be able to bake and make items to sell. While I would really love to own a little restaurant, similar to what my dad owned, at this time the farmer's market is about all we can handle.

Food, Family, & Traditions www.HensleeFarmAdventures.com
Baked goods for the farmer's market

As I stood last night at my kitchen sink, looking out the window and stemming strawberries to make strawberry jalapeno preserves, I got a strong sense of déjà vu. I realized that the food itself was bringing back memories. Memories of my childhood, of when my mom and dad would can jams and jellies. When we would get together with my grandparents and make pies to go into the freezer for winter. The food connected me to my childhood. In fact if I stood there long enough I could imagine standing at my parents' kitchen sink, looking out their window, helping to get whatever produce was ready to either can or go into the freezer.

Food, Family, & Traditions www.HensleeFarmAdventures.com
Strawberry Jalapeno Preserves and Pepper Jelly

Tradition in our family and in many families can be found in the food that we eat and make. There are certain things that we always make on holidays. For Easter it is ham, deviled eggs, and my grandmother would always make angel food cake with strawberries. For the Fourth of July, growing up we always had watermelon and homemade ice cream. Thanksgiving of course means turkey, our family's special dressing (stuffing), and pumpkin pie. And of course on Christmas we would have homemade candies that was only made during that season.

Food, Family, & Traditions www.HensleeFarmAdventures.com
Homemade deviled eggs, a tradition at many of our family gatherings.

I try to carry on some of these traditions for my children, but I also try to start new traditions for them. They will grow up eating strawberries and pie crust for Easter, and for the Fourth of July, since my daughter is allergic to dairy, there is no homemade ice cream. Instead we stick to fruit kabobs and of course grilled hamburgers and hot dogs.  Thanksgiving we still have our traditional family meal, and for Christmas, I make several of the candies that I grew up with.

Food, Family, & Traditions www.HensleeFarmAdventures.com
Homemade buns using my dad's recipe that he used when he owned the Pastry Shop


One of the best gifts I have received was from my cousin Jim. To most people it would have no value, in fact it really has little monetary value, but to me it is worth everything. It is our grandmother's rolling pin. It still has the dough on it from the last time that she used it. She passed away in February of 1988, I was only 14 years old. When I look at that rolling pin, I think about her and her raisin pie and her stacked applesauce cake. I also think about how much she loved all of her grandchildren and how kind she was to us. I know that when Jim looked at the rolling pin, he had different memories of her, but still loving memories. He is older than me and while we didn't grow up together, we share what matters most, a grandmother, a rolling pin, and sweet memories.

Food, Family, & Traditions www.HensleeFarmAdventures.com
My grandmother's rolling pin.

So as I make the jams and jellies, as I bake my dad's famous hamburger buns that he served at his restaurant, I am making new memories and traditions, while still carrying forward the old. These memories are ones that my children can look back on and remember, fondly I hope. Memories that I hope they will carry on as they raise their children. Memories that are all founded in food.

What food traditions does your family have? Let me know in the comments below.

Homemade Grape Jelly (It's Easier Than You Think!)

Thursday, January 21, 2016
Our winter weather has finally hit.  After a very warm and rainy December, the snow and ice are here.  I guess I should have known that the warm weather was too good to be true.  And to be truthful, I really want a good snow and cold weather.  It will help with the garden come spring.  Snow will put nitrogen into the ground and the cold weather will help kill some of the bugs.

Even with the winter weather, I have been bitten by the canning bug.  I really didn't get to can much this past summer because of how horrible our garden did due to the massive amounts of rain we had. Our fall garden did very well, but not enough to can, just enough for us to eat as I picked it.

Some years back, my dad made the best apple jelly.  I asked him how he did it and he told me he used apple juice that he bought at the store.  I was shocked, I didn't even know at the time you could do that!  I was used to my parents making jellies, jams, and fruit butters from actual fruit that they either grew or bought from a farm.


Homemade Grape Jelly  www.hensleefarmadventures.com

Fast forward a few years and I have finally made jelly from juice.  I decided to make grape jelly because my family loves grape jelly and the kids eat a lot of peanut butter and jelly sandwiches.  I want to make sure that they jelly that they eat is as wholesome as a jelly can be.  So making it myself would not only ensure that, but would also save money in the long run.

I had all natural grape juice on hand and found the pectin I wanted to use which requires little to no sugar added.  I just can't fathom adding 7-8 cups of sugar to something that is already sweet!

So here it is, some of the easiest jelly I have ever made.

Ingredients Homemade Grape Jelly  www.hensleefarmadventures.com
Jelly ingredients
Pictured are the ingredients.  That's it.  That is all it took.  You can add in a cup of sugar if you like.  I didn't for my first batch.  Please note that I used Lite Fruit Pectin.  If you do not want to add sugar or very little sugar, or even a sugar substitute you must use a pectin that says it is for low to no sugar.

Put 4-5 cups of juice into a pot and bring to a gentle boil. I used 5 cups.

Grape juice Homemade Grape Jelly  www.hensleefarmadventures.com
Grape juice ready to cook.
Once boiling add in pectin.  Cook for 1 minute while stirring.  DO NOT OVERCOOK!  If you do, it breaks down the pectin and it will not jell.

Once you have cooked for 1 minute, skim off the foam that has formed on top.

Removed film Homemade Grape Jelly  www.hensleefarmadventures.com
This is the foam that I was able to take off the top.
Then ladle the juice into clean sterilized jars.  I used pints because we do use quite a bit of this at one time.  You could also use jelly jars.  I was able to get 2 1/2 pints from one batch.

Ready to can Homemade Grape Jelly  www.hensleefarmadventures.com
Ready to go into the water bath canner.
Put it in a water bath canner and process for 10 minutes.  Once processed, let sit for at least 24 hours to make sure that they have sealed.  If any have not sealed, put in the fridge immediately and use. We put the 1/2 pint jar in the fridge and are using that.

Like I said earlier the first batch I made was with no added sugar. The next batch I will make I will add sugar.  I decided that no sugar was going a little too far.  One cup of sugar should be enough to help give it some added flavor.

The jelly jelled very nicely.  I will absolutely use this method again.  In fact the pectin that I used has detailed instructions on how to make jelly using juice you have bought.  After grape, I will be making some apple jelly using store bought apple juice since that is one of my favorites!

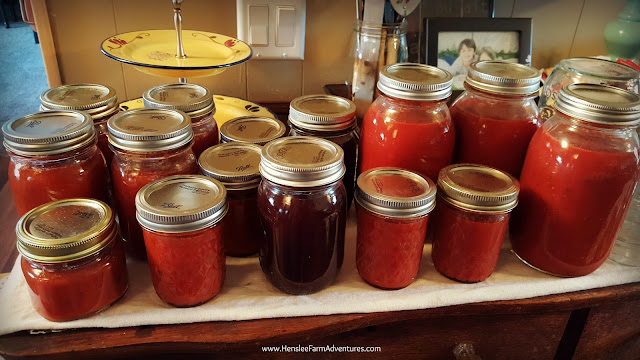
Since I had the canner out and I had several jars cleaned and sterilized, I decided to can some other items.  I ended up canning spaghetti sauce and pizza sauce.  I love using Mrs. Wages brand seasonings because it is so easy (just add canned tomatoes if fresh are not available) and the seasonings are really good!  (I am not getting paid to say that.)  I really would suggest trying them.  The only thing that I have not tried of Mrs. Wages is their pickle seasonings.  I like my own version of dill, sweet and spicy, and bread and butter, so I don't see a need to buy the premade seasonings.

Canned goods Homemade Grape Jelly  www.hensleefarmadventures.com
Pizza sauce, grape jelly, and spaghetti sauce.
Remember that canning does not have to be just a summer thing.  You can can food at anytime of the year.  I realize it might not be with food out of your garden, but it is still better than store bought canned versions.

Do you can in the winter?


Throw Back Thursday: Loaded Baked Potatoes

Thursday, December 3, 2015
Loaded Baked Potatoes

One of our favorite, easy, and budget friendly meals to make are baked potatoes.  In the winter time, this is the perfect comfort food, and can be a meal in itself.  In the summer, we love to throw a couple on the grill with our steaks or pork chops.  Either way, you can't go wrong.

Several years ago, we were in one of our favorite (locally owned) grocery stores and we saw that they had potatoes already to cook.  They were seasoned and wrapped in foil so you could either bake them in the oven or throw them on the grill.  We decided to try them (even though they were a little pricey) and man were they the best potatoes I have ever had!  I'm not exaggerating.  They. Were. The. Best.

Every time we went by the store, we always picked some up to bake.  I had played around with trying to make them myself, but I didn't really get serious about it.  Then the price increased and we were paying $1.00 per potato.  I know that doesn't sound like much, but when you can get a 5 lb. bag or even a 10 lb. bag on sale for a couple of dollars the price of $1 per potato is expensive.

So it took me awhile, but I think that I have the recipe figured out.  At least, I have it figured out so that my family loves them!  Of course I don't know what herbs and spices they use to help season the potatoes, but that's okay.  We have figured out what we like and I want to share it with you.

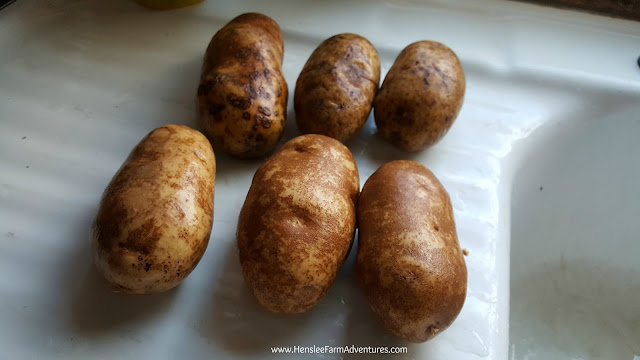
The first step is to pick out potatoes that are very similar in size and shape. That way they will cook evenly. I like to use Russet potatoes.  There is something about the starch content in them, that makes the perfect baked potato.  Once you have your potatoes picked out, you will need to scrub them  until they are clean, but don't scrub so hard the skin comes off, and then dry them (very important!)

Scrubbed potatoes
My potatoes, all nice and clean and waiting for the next step.
When they are clean and dried, you can then season them.  I first get my foil ready by tearing off sheets that I need.  Then I get my other ingredients ready.

baked potato ingredients
Baked potato ingredients...super simple!
I first put a little bit of extra virgin olive oil (you can use regular olive oil) on a piece of foil.  Then I roll the potato around in the oil.  You can also use your hand and make sure that the oil is completely covering the potato.  Then comes your salt.  You want to use coarse salt.  DO NOT USE TABLE SALT.  You will end up with an extremely salty inedible potato.  Trust me! You can see my little baggie above is full of apple wood smoked coarse salt and other seasonings.  I got that from my local farmer's market and love it!  You can use just regular coarse salt such as sea salt, or kosher salt, or even Himalayan salt.  Make sure that the salt and seasonings completely cover the potato.

Oiled and seasoned potato
Oiled, seasoned and ready to bake!
As you can see from the picture above, it is not plastered with salt and seasonings.  You don't want to get too wild. :-)  Next just wrap up your potato and let it sit.  Try and let it sit for a couple of hours.  I made these in the morning and didn't bake them until the evening.  It allows the oil and seasonings to penetrate the skin and flavor the potato. 

Then bake in a 450°F oven for 1 hour, or until potatoes are soft when slightly squeezed.  You can also put these on the grill, or you can put them in your slow cooker on low and cook them for 6-8 hours.  I personally love the oven the best, but I have cooked them in my slow cooker and on the grill.

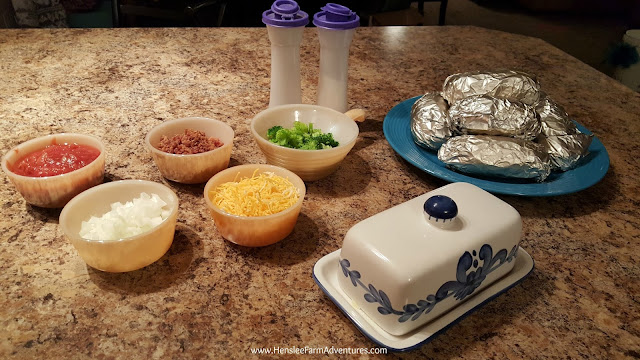
baked potato bar
Our potato bar
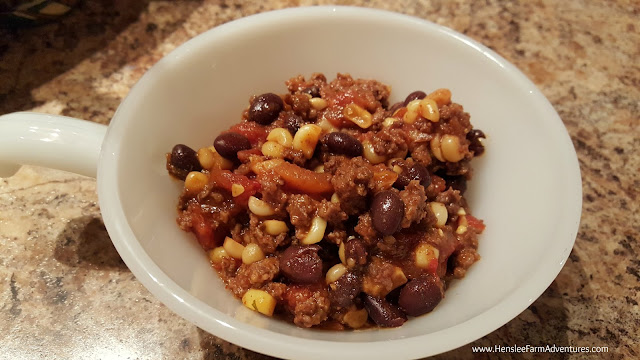
As you can see above, I got our toppings ready.  I tend to use whatever we have on hand or leftover.  For this meal, I steamed some broccoli, and also had some salsa, shredded cheese, onions, and bacon pieces.  And of course butter!  I love it when we have chili left over and I can use that as a topping for our potatoes. 

My baked potato!
Here is my baked potato ready to eat!  I made these during one of the no groceries during the month of November weeks.

I was able to use things that we already had in our pantry or fridge which accounts for the white onions rather than the green, and the addition of steamed broccoli.  These were so good!  This recipe is the only way that we make potatoes now.  I have microwaved them a couple of times since, but they just aren't as good.  They are definitely not as flavorful.  To us it is worth the time to season them up and bake them in the oven.  And you know what the best part is?  The kids will actually eat the potato skin!

If you would like a printable version of the recipe, click HERE.

Please let me know in the comments below what you think of the recipe!  I hope you enjoy it!

A Month of No Groceries: My November Food Challenge Week 3

Monday, November 23, 2015
No Groceries for a Month
Well, week 3 didn't go as planned.  I'll tell you more about that later.  The good news is that the meals we had were much better than week 2.  I was actually able to plan ahead and cook more!  Here is what we had.

Monday: Leftovers from take out we got on Sunday
Tuesday: Taco Soup (Recipe to come later)
Wednesday: Loaded Baked Potatoes
Thursday: Beans & Ham and Mac & Cheese
Friday: Beef and Bean Enchiladas
Saturday: Meatloaf, Mashed Potatoes, Peas, and Homemade Bread
Sunday: Clean out the Fridge Night!

I'm happy to report that the beef and bean enchiladas used the most leftovers of any of the meals.  I had leftover tortilla shells, leftover homemade enchilada sauce in the freezer, and leftover beans from the night before.

beef and bean enchiladas
Beef and Bean Enchiladas. Yummy goodness inside!

And then you can see our Sunday evening meal was a clean out the fridge night.  I wanted to make sure that all the leftovers from the meals we had this week were eaten and not taking up valuable space in the fridge since in just a couple of days it will be Thanksgiving!  Already the turkey (that my mom so graciously gave me) is in the fridge thawing and getting ready to be roasted on Thursday morning.

loaded baked potatoes
Our Wednesday night meal


Now for the bad news.  I did buy groceries this week.  I broke down and got some things that we really needed for meals and for Thanksgiving.  Here is a run down of what I ended up buying:
  • milk - $2.87
  • celery - $0.49
  • 2 lbs. carrots - $0.99
  • 10 lbs. potatoes - $1.49
  • corn - $2.00 (4 cans)
  • sharp cheddar cheese - $1.79 (block)
  • sliced ham - $3.29 (all natural)
  • cream cheese - $0.89
  • coffee creamer - $1.69
  • Cranberries - $0.99
  • mandarin oranges (I gave in to the cryings of my children, they love these!) - $3.56 (4 cans)
  • 3 lbs. sweet potatoes - $0.99
  • pumpkin - $1.78 (2 cans)
So for under $25.00 I was able to get a few groceries that helped supplement our meals, and will help make the recipes that I plan to serve for Thanksgiving.  While I was really hoping that I could get by without buying any groceries at all this month, I think this is pretty good.  Remember I did spend some the first week, and while I didn't give you a total on what I had spent that week, I will tell you now.  It was $18.00 for 4 items.  Those 4 items were purchased at Wal-Mart.  The items above I purchased at Aldi.  It makes a big difference.  So while I'm not happy that I bought groceries, at least I did save money on them.

taco soup
Tuesday's meal, taco soup, yummy!

This week is going to be tricky with making meals.  I don't want to make big meals that we will have lots of leftovers due to Thanksgiving coming up.  I don't want to take up space in my fridge now that it is cleaned out, but I do want to continue to cook our meals.  I guess you will have to wait and see how we do this week, and see what kinds of meals I can come up with for my family, and hopefully resist the urge to buy any more!

So tell me, how did you guys do this week?

Throw Back Thursday: Goulash

Thursday, November 19, 2015
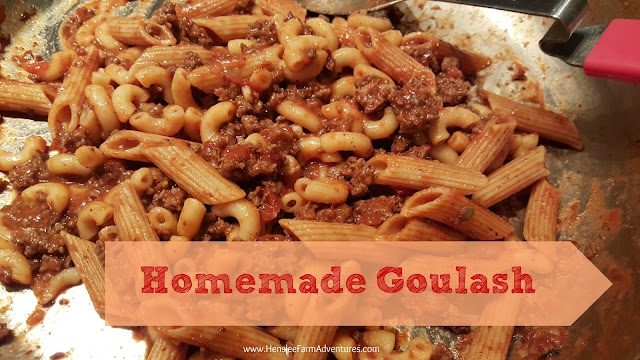
Homemade Goulash

I love today's post, because I get to share with you one of my family's favorite meals.  In fact, I believe this is probably the most requested meal that I get from my family.  It is also a dish that I grew up with, and one that is easy to make, and budget friendly!

My mom always called this goulash.  I know that there are other variations of goulash and I have tried a couple of those recipes, but I always come back to the variation that I grew up with. Well, kind of.  My mom made her goulash with hamburger meat, diced onions, elbow macaroni, and home canned tomato juice.  For us, I use my home canned pasta sauce so that there is a thicker sauce that already has spices added.

goulash ingredients
Goulash ingredients, yep that's all there is!
You can see from the picture above that there really isn't much to it.  The ingredients I use are:

  • 1 pound hamburger meat (this would be good with ground deer meat for you hunters out there)
  • 1 to 1 1/2 cups dry pasta, we prefer elbow macaroni, cooked according to package directions
  • 1 jar pasta sauce of your choice

For this recipe, we like to use elbow macaroni, but when I made it this time, I didn't have enough. You can see in my picture of the finished recipe that there is also penne pasta thrown in as well.  Remember this is my no grocery month, so I had to use what I had on hand.  The bowl in the picture has my homemade pasta sauce in it.  I opened a jar to use some for pizza, and needed to use the leftover sauce for something else.  This was the perfect dish to do that!

To make the goulash:

  1. Cook pasta according to package directions 
  2. While the pasta is boiling, brown 1 lb. of hamburger meat.
  3. After the hamburger meat is cooked through and chunked - my husband loves bigger chunks - add any spices you like.  I add a little minced onion (remember I'm using already seasoned sauce).
  4. Pour the pasta sauce in with the hamburger meat and let it simmer on low heat.
  5. When the pasta is done (I cook it to al dente), drain the pasta and add it to the sauce.

 And that's it!

Goulash
There almost wasn't any left to get a picture of it!
Once I finished cooking this batch, I set the pan on the table and went to get my camera to take a picture.  When I came back, there was hardly any left!  I had to scrap together a small pile just to get a picture. That is how much my family loves this dish!

I like to serve this with a salad and homemade french bread.  Of course some nights, we don't even bother with a veggie or bread, we just grab a big bowl of this pasta dish and enjoy.  This is comfort food at its finest!

Let me know in the comments below what you think of this recipe, and let me know if you have made this recipe before!


Mushroom Swiss Burger

Tuesday, October 20, 2015

Mushroom Swiss Burger

I know it has been a little while since my last post.  Life has happened and unfortunately some things had to be put on the back burner.  However, at Henslee Farm Adventures, we are trying very hard to get back to where we need to be, especially since winter will be here before we know it.

It seems strange to be talking about winter when we have had some absolutely beautiful days.  In fact the temp is supposed to be up to 80ºF today!  It is days like these that we like to take advantage of the nice weather and grill outside.  Steve's favorite meal happens to be burgers and fries.  Well this day he decided he wanted a mushroom swiss burger.  It sounded good to me, so I thought I would share with you how we make our mushroom swiss burgers.

First, I am going to let you in on a little secret of how I make my hamburgers.  I don't even tell Steve how I make them because he swears that plain is best.  So I secretly season the meat before cooking and of course he loves it!

Hamburger Ingredients
Burger ingredients
We use ground beef that we have had butchered.  Seriously folks, if you haven't tried grass-fed beef you need to.  Of course you can use just regular hamburger from the store.  And another kind that is really good is what my grocery store calls Boston Burger.  It is 60% beef and 40% pork.  This makes wonderful burgers and meatloafs!

To make the patties, I put 2 lbs. of hamburger in a bowl and add in 4 splashes of worcestershire, 2 tablespoons of mined onions, and 1 tablespoon of seasoning salt.  I mix this with my hand until just incorporated.  You don't want to over mix.

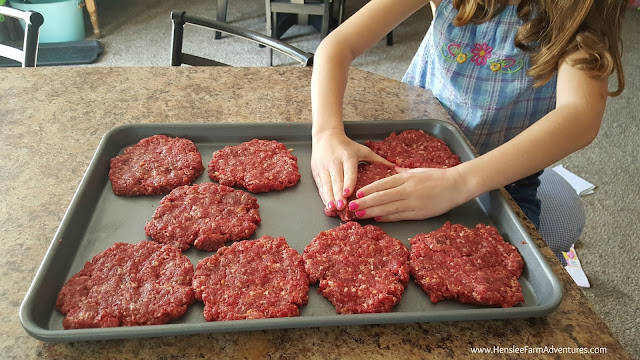
Making Hamburger Patties
Carly loves to help me cook!
You can see we make some pretty big patties.  There will be some shrinking, but if you make an indention in the middle, there will be minimal shrinking (I forgot to get a picture of the indention).  Then you grill to your taste.  We like ours medium well.

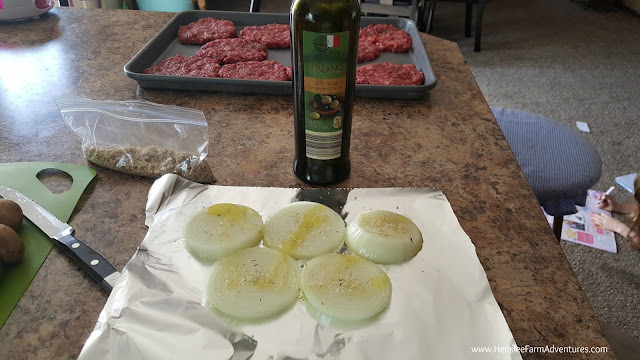
Usually while we are grilling, we take the opportunity to grill onions as well.  We love grilled onions!  I slice them pretty thick, put them on some foil and drizzle them with some extra-virgin olive oil.

Onions ready for grill
Onions ready for the grill
I also found some great seasoning at our local farmer's market.  The lady that makes it smokes her salt with applewood.  Man is it ever good!  She calls it Stove-Side seasoning.  You can use it on just about anything.  Besides the salt there are other things she puts in there.  It is definitely yummy!  You can also use just plain kosher salt, or a seasoning blend of your choice.  After I season the onions, I wrap them up in a foil packet and put it on the grill.  We do flip the packet after they have cooked about 10-15 minutes on one side.

Now for the mushrooms.  I have seen many recipes for the mushroom sauce for burgers, but I concocted one of my own with what I normally have on hand.

Mushroom sauce ingredients
My ingredients for mushroom sauce.
I know what you are thinking, it doesn't look like it would be that good, but trust me on this.  I lucked out and was able to get some mushrooms on sale at ALDI, one of my favorite places to shop!  Also the brown gravy mix I get at ALDI as well and love it because it does NOT have MSG in it.  I love this gravy mix for when I want a quick gravy, it is always so good and cooks up easy.

First I washed my mushrooms by wiping them off with a damp paper towel.  You do not want to submerge them in water because they will absorb the water and you will end up with mushy mushrooms (ha ha!) in the end.

After washing them, just slice them, not to thin because they will cook down.

Mushrooms in pan
Fresh mushrooms in the pan.
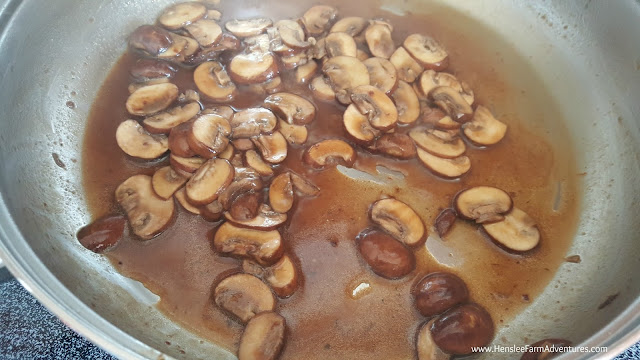
I add a little extra-virgin olive oil to my pan and put the sliced mushrooms in.  Then I took advantage of that smoked salt and seasonings and added a little bit of that.  I cooked this on medium heat.

Mushrooms that have been sauteed
Cooked mushrooms
After they have cooked down to where they are soft (again I don't want mushy ones), then I am ready to season them.  I add in two splashes of worcestershire sauce, then I take about a 1/2 teaspoon of the brown gravy mix and sprinkle it over the mushrooms.  I cook it for just a minute more and then I have my mushroom sauce!  So easy!

Mushroom sauce for hamburgers
My mushroom sauce!
All that's left is to build my burger.  I of course got the swiss cheese at ALDI as well, I love their selection of cheeses!  Steve put the slice of cheese on the burger while it was still on the grill so that it would be nice and melty.

Mushroom Swiss Burger
My burger, nom nom nom
Here is my burger.  I of course had to add some grilled onions to it as well.  And let me tell you, it was so good!

Steve wanted me to share with you his burger so here it is...

Mushroom Swiss Burger with Tator Tots
Steve's burger, looks pretty good!
We decided to go with a side of tator tots instead of fries this time.

The burgers were awesome!  The mushroom sauce was perfect.  I hope you try it and let me know what you think in the comments below. 


Old Fashioned Apple Butter - A Family Tradition

Tuesday, October 6, 2015

Have I told you how much I love fall?  Enjoying the cold, crisp days.  Fresh apples from the orchard.  Corn mazes, and pumpkin carving.  What's not to love? 

Another reason I love the fall is due to a family tradition that was started by my niece and her husband.  Actually it is a family tradition that his family started and they decided to carry it on.  Making old-fashioned apple butter!

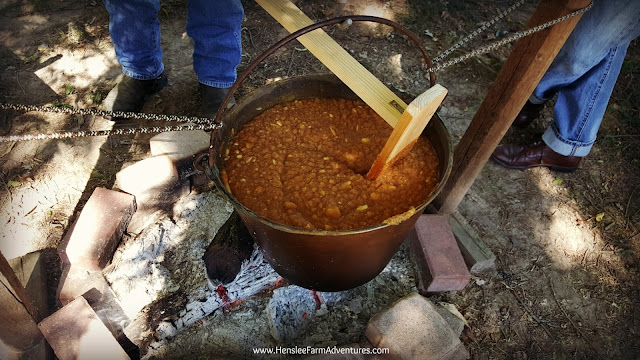
Stirring the pot...literally!
When I talk about making old-fashioned apple butter, I am not talking about using an old recipe, but about the process of making the apple butter.  We make it outside, over an open fire, in a big kettle.  I have a picture in my head about how pioneers must have done something very similar. 

Our apple butter making day includes a gathering of family and friends.  We use this time to visit with each other and tell stories.  We also catch up on what is going on in our lives as well as relive the past.  And of course we each take a turn stirring the pot. ;-)

Carly's turn!
It is a true group effort.  I wouldn't want to try and stir this all by myself.  It does get tiring after a while.  And before the apples break completely down, it can be quite hard to stir.  While the apple butter is cooking, we eat a potluck lunch, and continue visiting with each other. At the end of the day, when the apple butter is cooked, we each get to take home a pint jar to enjoy. 

I talked to one of the men that was there and we discussed how people used to come together to help each other out.  They would have a big barn raising, or help each other butcher, make soap, etc.  It was a way to lighten the load of work that was very taxing.  For us in this process, we helped each other out by taking turns to stir to make the process easier.

Drew's turn!
To the pioneers this was their social time.  To be honest, it is my kind of social time as well!  It is a great way to pass down the traditions of the old ways of doing things.  To be able to pass down these types of traditions to our children is the whole reason why we moved to the country and started our farm in the first place!  We wanted our children to learn the "old" ways of doing things.

Steve's turn stirring!
When it comes to a recipe, our family doesn't have one written down for the apple butter.  Each year it is slightly different, and each year it keeps getting better.  I can tell you that my niece uses apples from a local orchard, apple cider for the liquid to help break the apples down, and spices which consists of sugar, cinnamon, and cloves. 

I will tell you my niece's secret to making the apple butter over the fire.  She starts it on her stove first and then puts some of the apples in the blender.  To be honest, if we had to cook down the apples from slices, it would take all day!  This helps to hurry things up a bit, which I can't blame her for doing.  Once it goes into the pot, it simmers for several hours before its ready to be eaten. 

Steve would say I'm always stirring the pot! ;-)
I always enjoy these times.  I love creating new family traditions and continuing on the traditions of our ancestors.  I hope to be making apple butter with my family and friends for many more years to come!

Let me know in the comments below what types of traditions your family has.


Throw Back Thursday: Cast Iron Skillet Cornbread

Thursday, September 10, 2015
A while back I promised you a recipe for my cast iron skillet corn bread.  Well now the time has come to deliver on that promise, but before I share that recipe with you, I thought I would tell you a story.

My dad was born in the middle of the great depression.  He was child number 9 out of 12 for my grandparents.  Can you imagine trying to feed that many mouths during good times, let alone during one of the longest economic downturns that our country has ever seen?

I know what helped was the way that they lived.  They had a vegetable garden, and raised their own meat.  They had a milk cow for milk and butter, chickens, and hogs and they had land they could farm. During the toughest of times, my grandfather and the eldest son went away to find work at a logging camp out west.

Growing up, I heard many stories about my dad's childhood.  Those stories would come from various family members and it gave me a real insight into how life must have been during that time.

During one visit with my grandmother's sister, I remember discussing cornbread.  That family was known for their good cooks, and great recipes, so talking about food was not uncommon.  My dad mentioned making cornbread with milk and eggs.  His aunt just looked at him and in the way she would always draw out her words she said "oh honey, you weren't brought up that way."  She went on to explain that they were too poor to make cornbread with anything other than water and cornmeal.  My dad just smiled and gave me a wink.  He didn't argue with her.  He knew that there was a time that cornmeal and water was probably the only way they could make cornbread, but he also knew that when the ingredients were to be had on their farm, milk and eggs were added as well.

I haven't tried my great aunt's version of cornbread, I'm thinking that it is probably a hot water cornbread.  This recipe is going to be more than just cornmeal and water and I can tell you that this version is very tasty!  Even my cornbread hating husband loves this one.

Simple ingredients make for a delicious and cheap recipe!

So here are the ingredients.  You might be asking yourself, "what is in that jar?"  Well that is my secret ingredient and what my grandmother always used, to make her cornbread.  Bacon grease.  I know what you are thinking...heart attack waiting to happen, but the bacon we use is from grass fed pigs.  When I save the grease, I strain it so it is "clean."  And honestly, it gives the cornbread so much flavor.  Trust me.

Not sure about the bacon grease?  Well, I guess you can use oil, whichever one you prefer.  It will still do the job (just not as tasty). :-)

See, that bacon grease doesn't look so bad!

Turn the oven on to 350°F.  Put two spoonfuls of bacon grease, or about 1/4 cup of oil in your cast iron skillet and then put the skillet in the oven.

Next mix together 2 cups of cornmeal, 2 eggs, and 1 1/2 cups of milk.  You can use sweet milk or butter milk, whatever you have on hand.  Mix well.


Once the oven has preheated and the skillet is nice and piping hot, take it out of the oven and pour a little bit of the grease or oil into your batter and stir.
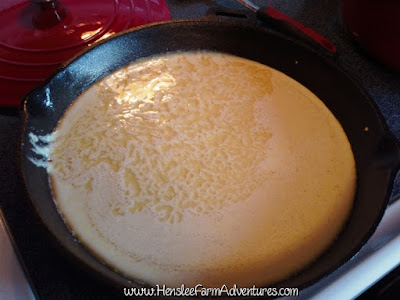
This is the batter ready to be baked.  Thanks to the hot pan, it has already started to brown around the edges.

Then pour the batter into the skillet.  It should sizzle as it hits that pan.  Turn the oven up to 400°F and put the pan back in the oven.  Bake for 15-20 minutes or until golden brown.

Yum, yum!
And here is the finished product! This was so good!  I love cornbread, especially with chili, or beans, or a hearty soup.  I even love it as a dessert with honey drizzled on top.  Want to know what we ate with this cornbread? 

Cheeseburger soup!  I'll share that recipe with you very soon!

This was unbelievably good!  One of our family's favorites!
I hope you enjoyed this easy iron skillet corn bread.  If you want the printed version of the recipe, then click HERE.

Let me know in the comments how you make your cornbread.


©HensleeFarmAdventures.com. Powered by Blogger.

Search This Blog

Back to Top