I just love Throw-Back-Thursday or otherwise known as tbt. I love seeing all the pictures on Facebook and at times I will get tagged in pictures from my younger days. I thought it would be a great idea to make every Thursday here a tbt with a great recipe from my parents or grandparents.
So today I am sharing with you a very simple recipe for yeast bread. This recipe comes from my mom who uses it for her homemade rolls. When I made this yesterday for my family, I made it into two loaves of bread.
I thought I would share a picture of my mom. In fact this is my mom and dad circa 1960. They were not married yet, but I believe that they were engaged at this time. They were on their way to my dad's brother's wedding. I just love the clothes, the hat, the gloves. Ah, why can't we dress like that anymore?
 |
| My mom and dad circa 1960 |
Anyway, back to the bread. Have you ever gotten recipes from your family and just by looking at it you know that not all the steps are included? Well this is how this recipe was. Luckily I love to bake and I knew the steps to making the bread. I will of course include the steps here for you.
So the recipe that my mom gave me was this:
Yeast Bread
2 cups warm water
1/3 cup sugar (a little more)
1/4 cup melted shortening (not oil)
1 egg
2 pkgs yeast
1 1/2 t. salt
6 cups flour
Mix first 6 ingredients together. Place in a greased bowl and cover. This will also keep in refrigerator.
That's it. That's all she wrote. Literally. Now if you follow these directions, you add in all the ingredients except for the flour. Then place in a greased bowl and cover. So like I said before I think there might be a few steps missing. ;-)
So here are my ingredients that I have ready for the bread. I just have to say that I love my little baking corner that I have set up in my kitchen. It makes it so handy to bake, and cook for that matter!
 |
| My ingredients |
I do mix the first 6 ingredients together and that is what you see next. Actually you see them before I mix them together.
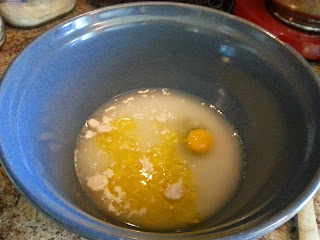 |
| First 6 ingredients |
Next I add the flour. I first add 3 cups and mix it up. Then I add another 2 cups and mix that. That is what you see below. It is a sticky dough and it still needs more flour, but I like to add that last cup as I am kneading the dough.
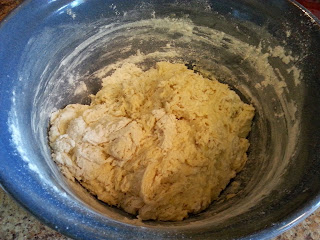 |
| After 5 cups of flour added |
So here is my dough after I have kneaded the last cup into the dough. You want a nice and soft smooth dough.
 |
| Kneaded dough |
Now this is where you will put it in a greased bowl and cover. From here you have two options. You can let it rise which is what I did. You want it to rise until doubled which for me was about an hour. Or you can put it in the refrigerator overnight and take it out the next day to get it ready for the second rising.
 |
| After first rise |
So here you see how my dough has doubled. I need to take out the dough and divide it in two equal parts.
 |
| Ready for second rising |
I form each of those parts into loafs and put them in a greased loaf pan. Now they are ready to rise for the second time. This time it will only take about 30 minutes to rise. Be sure and keep an eye on your dough. I know from experience that I have let it risen too long (because I forgot about it) and they fell. :-(
 |
| Ready for oven |
Now they are ready to bake in a 350°F preheated oven. They will need to bake for 25-30 minutes. See my beautiful loaves below! Now the hardest part of the whole recipe is waiting until they are cool to slice into them.
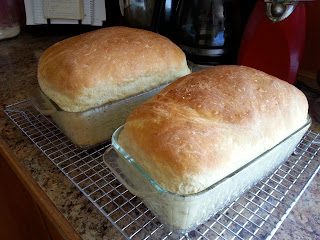 |
| Beautiful baked bread! |
What a beautiful soft bread! Tastes so wonderful and I love this bread toasted with some homemade jelly on top! To get the printable version of this recipe, go
here.
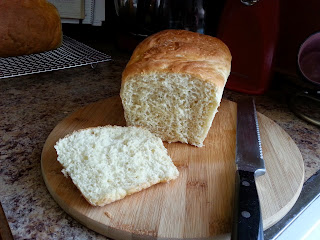 |
| Pass the jelly, please! |
Tell me in the comments below what you think of this recipe and let me know if you have a favorite bread recipe.


Awesome! Great #diy #howto #recipe for #tbt Thanks! :)
ReplyDelete