Showing posts with label tbt. Show all posts

Homemade (Easy!) Creamy Coleslaw

Thursday, July 14, 2016

I love when my garden starts producing.  There is nothing better than making delicious, wholesome recipes from food that you have grown yourself.  The next best thing is making those recipes from food that I have received as gifts from friends and family.

I was lucky enough to get some wonderful cabbage from my aunt and uncle the other day.  I did not grow any cabbage this year, so it was a treat! I decided to make some coleslaw and thought I would share with you my easy creamy coleslaw recipe. It is delicious!

Homemade (Easy!) Creamy Coleslaw  www.HensleFarmAdventures.com


Growing up, our family had a slight disagreement on the best way to make coleslaw.  It seems that when it comes down to it, there are two camps.  One is that the best slaw is made with mayonnaise, and the other is that the best slaw is made with vinegar.  My grandmother and mom almost always made the vinegar slaw, in fact that is the recipe that is in our family cookbook.  But my sister and I both like the mayonnaise version which is the recipe that I am sharing with you today.

Speaking of my sister, I remember when she was still living at home and she used to make slaw for a snack.  It was one of her favorite foods.  She wasn't much of a sweet eater.  She always did prefer homemade pickles, tomato juice, and slaw to any cakes or pies we had.  To this day, she still makes great slaw. 

So here is my version based on how my sister used to make it.

Homemade (Easy!) Creamy Coleslaw  www.HensleFarmAdventures.com
Ingredients, well almost all the ingredients
You can see from above that the ingredients are few, and include your basic staples. Okay, I know what you are thinking, there is vinegar in that picture. Well, there is a little vinegar in this dressing, but not as much as you would put in the vinegar-based slaw. 

While we are on the subject of vinegar, let's have a little chat about what kind of vinegar to use for your slaw. You can see above that I used my Brag's ACV. I absolutely love the flavor and love how good it is for you. If it was any other brand of ACV, I probably wouldn't use it in this recipe. You really do want a good tasting vinegar. What also would be good in this recipe would be a white wine vinegar. It is light and tangy and great in recipes such as these.

Also missing from this picture is a carrot. I like to shred a carrot up to put in my slaw. You don't have to, but if I have it on had, why not? And it seems that the dry mustard is also missing. Oh well.

The first thing you want to do is make your dressing and let it sit while you are shredding your cabbage. It lets the flavors come together. In a medium bowl, mix together:
  • 1 cup of mayonnaise
  • 3 tablespoons of sugar
  • 2 tablespoons of vinegar
  • 2 teaspoons of celery seed (not salt!)
  • 1 teaspoon of season salt
  • 1 teaspoon of dry mustard
Homemade (Easy!) Creamy Coleslaw  www.HensleFarmAdventures.com
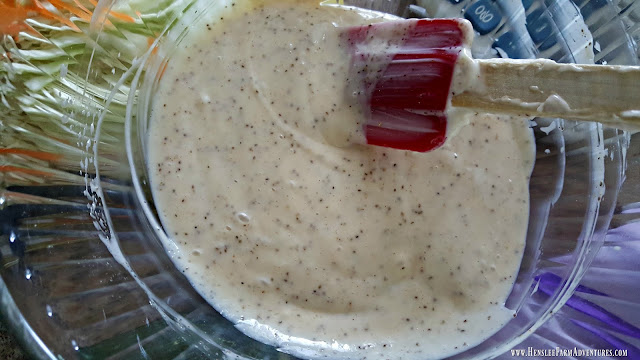
Coleslaw Dressing, so much better than store bought!
Once you mix the dressing ingredients together, put in the fridge.  Next, shred your cabbage. You can do this the old-fashioned way which is what I did, or you can use a food processor. For me, if I am just cutting up one head of cabbage, it isn't worth getting my food processor out. 
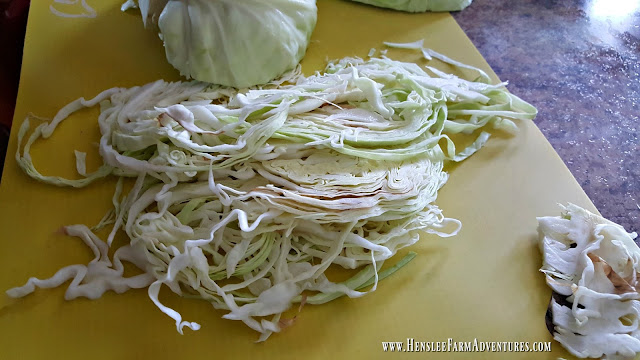

Homemade (Easy!) Creamy Coleslaw  www.HensleFarmAdventures.com
Long shreds, this is how I like it!
You can see above that I like to cut my cabbage in long pieces. I love it when it has been sitting in the dressing and you get a big fork-full and it is hanging off the fork. There is nothing better! I also like those long shreds because it stays on my sandwiches better. That's right, I love to use this slaw as a condiment! Feel free to slice or shred the cabbage the way you like it.

If you are using a carrot and/or onion this is the time to shred and dice those as well and put them in with the cabbage.

Next pour the dressing over the cabbage and toss so it is all coated, and put it back in the fridge to let the cabbage get a little wilted, from the dressing and soak up all the flavor. Don't worry, it will still have a little crunch to it!

Homemade (Easy!) Creamy Coleslaw  www.HensleFarmAdventures.com
This slaw is just screaming summertime!
You can see the yummy goodness. It truly is the right mix of sweet and tangy.  I love to eat this as a side, and as I mentioned above, I also love to put it on my hamburgers, my BBQ pork sandwiches, and of course brats!

Homemade (Easy!) Creamy Coleslaw  www.HensleFarmAdventures.com
This is what I call a slaw dog, with a side of grilled corn!

That's all there is to this delicious slaw recipe.  Looking for a printable version of the this recipe? Click HERE.

Let me know in the comments below what team you are on when it comes to slaw, Team Mayo or Team Vinegar.

Throw Back Thursday Recipe: Quick Egg Custard

Thursday, March 3, 2016
Quick Egg Custard  www.HensleeFarmAdventures.com

Growing up, we had dessert almost every night.  It could be something as extravagant as a rich chocolate cake, or something as simple as fruit.  One of the easy desserts that my mom would make would be a quick egg custard.  It was a dessert that my dad loved so she tried to make it for him whenever she could.

When I was little I really didn't care for egg custard.  I think it was more about the texture than the taste.  But as I got older, I grew to love it.

When I was 20 years old, I had my tonsils out.  I remember people saying how I would be able to eat all the ice cream I wanted. After the surgery, I was in more pain than I had ever been in up until that time.  I was looking forward to eating ice cream, but the first time I took a bite, the cold hurt my throat to the point I couldn't eat it at all!  What I realized was that both cold and hot food hurt my throat.  Also I couldn't swallow.  I had to find something that would slide easily down my throat.

I went a couple of days without eating because of the pain, and my mom knew she needed to do something to get some nourishment in me.  She decided to make an egg custard.  Once it had cooled to room temperature, I was able to eat it.  It had protein I needed as well as some nutrients and the best part was that I was able to let it just slide down.

To this day, I love egg custard and enjoy eating it as a special treat.  However I will never forget the time that it was the only thing that I could eat.

So let me share my mom's recipe with  you so that you too can enjoy this special dessert.

Quick Egg Custard  www.HensleeFarmAdventures.com
Love it when the ingredients are made up of pantry staples!


Ingredients

  • 2 1/2 cups of milk 
  • 4 eggs
  • 1/2 cup sugar
  • 1 teaspoon of vanilla
  • pinch of salt
  • nutmeg
As you can see, there aren't a lot of ingredients needed for the recipe.  And I always have these items on hand in my pantry!  I love recipes that have simple ingredients and nothing fancy!

First you need to preheat the oven to 475°F.  This is important to have a preheated oven!

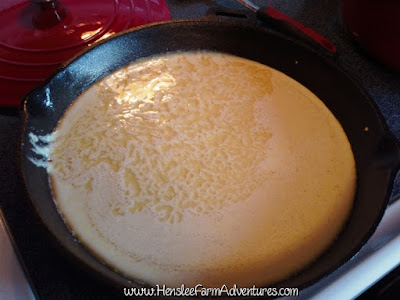
Next you will need to scald the milk over medium heat.  Scalding is heating the milk till it is almost to the point of boiling.  Just make sure that you don't let it boil!

Scalded milk for Quick Egg Custard  www.HensleeFarmAdventures.com
I used to think that scalded milk meant it was burnt!
While you are heating the milk, beat the eggs and add in the pinch of salt.

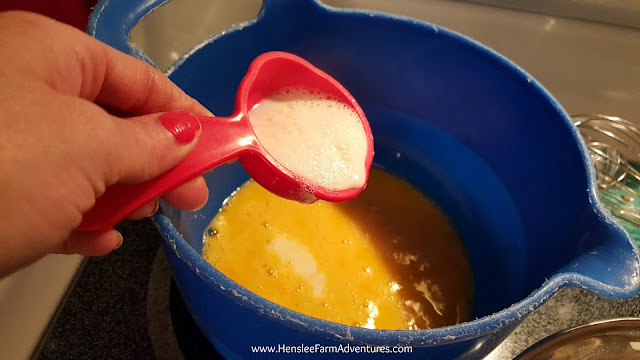
Once the milk is scalded, add a little of the milk to the eggs in order to temper them.  Tempering allows the temperature of the eggs to rise to meet the temperature of the milk.  If you didn't do this, then you would end up with scrambled eggs!

Quick Egg Custard  www.HensleeFarmAdventures.com
My trusty mixing bowl.  It is almost 20 years old!
When you have tempered the eggs, mix together all ingredients.  Pour into an oven safe dish and sprinkle with nutmeg.

Quick Egg Custard  www.HensleeFarmAdventures.com
All ready for the oven!
Bake at 475°F for 5 minutes.  Turn temperature down to 425°F and bake for 10 minutes.  Then turn temperature back up to 475°F and bake for 10 minutes.  Then turn temperature down to 425°F and bake for the last 10 minutes.

Quick Egg Custard  www.HensleeFarmAdventures.com
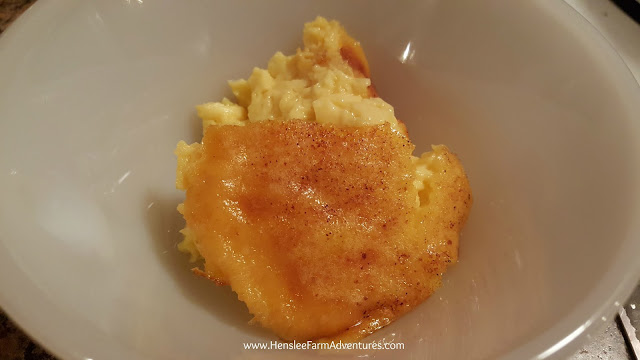
I love the golden color of the custard!
Remove from oven and let cool.  Then enjoy.

Quick Egg Custard  www.HensleeFarmAdventures.com
All I need is a spoon!
This dessert really does bring back memories for me.  Good memories.  Not only did my mom make this recipe, but my grandmother as well.  In fact when I was making the recipe for this post, just the smell of it brought memories of my childhood back to me.  I was almost transported back to my mom's kitchen as a young girl.  I love it when food can do that!

I hope that you try this out and please let me know in the comments what you think.


Want the printed version of the recipe?  Then click HERE.

Throw Back Thursday: Taco Soup

Thursday, December 10, 2015
taco soup

My kids and I love soup.  My husband does not.  But we have been able to compromise and find some soups that he is willing to eat, so I don't have to spend the rest of my days not being able to eat soup. :-)  One of these compromises is taco soup.  Actually that is not the name for it.  I could never remember the name for this soup, so I named it taco soup because of the taco seasoning that goes in it.  I believe it is called something like Mexican Soup.  But for the life of me I really can't remember.

I actually got this recipe from my mom about 25 years ago, so it fits perfectly with my throw-back-Thursday recipes.  It was a nice change from the regular chili that we always had and for awhile this recipe became one of our family's staples while I was in high school and college.

One of the things that I love about this recipe is that you don't have to follow it.  So long as you stick to the basic flavorings, then you can mix up those ingredients with whatever you have on hand in the pantry.  And I have done that on many occasions. 

Here are the ingredients:
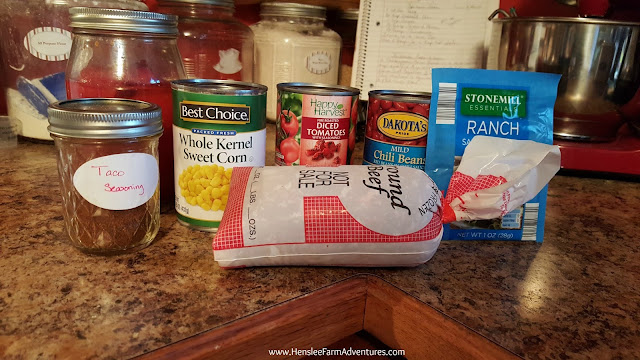
taco soup ingredients
This really isn't all of them, I would add another can of beans. 
Here is what my mom's original recipe called for (she didn't follow it to the letter either)
  • 1 pound hamburger meat
  • 1 can diced tomatoes
  • 1 can diced tomatoes and green chilies
  • 1 can corn
  • 1 can kidney beans
  • 1 can black beans
  • 1 packet taco seasoning
  • 1 packet dry ranch seasoning mix
As you can see from my ingredients that I have pictured I don't follow the recipe.  I like to use a jar of home canned tomatoes along with a can of chili ready tomatoes.  If I have a can of diced tomatoes and green chilies in my pantry, then I will throw that in.  It gives it some nice heat. 

I also like to use chili beans rather than kidney beans and if I have black beans I will use them and if not, I just throw in another can of chili beans. If you don't have either you could really use any beans that you have (except green beans...yuck!)  On the meat, if you are a vegetarian you could leave that out altogether, or use ground beef, deer, or turkey.  All would be good! 

For the seasonings, I make my own taco seasoning that I like to use.  I have yet to find a homemade version of ranch seasoning that is flavorful enough for me, so I buy the packets from ALDI because they have no MSG in them which is almost unheard of for ranch seasoning!

This meal is so easy to make.  Brown your meat (if using), then once it is done, combine all the ingredients in a pot.  This is where I use my dutch oven so I can brown my hamburger meat and then add in all the ingredients and only have one pot to wash at the end.  Let simmer for as long as you can stand it...the longer the better to allow the flavors to come together.  And then enjoy!

You could also make this in a slow cooker.  Once you have browned your meat, dump all the ingredients in a slow cooker and cook on low for 3-4 hours.

taco soup
Nice and thick...just like Steve likes it!
You can see above that when I make the soup I try and make it thick.  That is for Steve's benefit.  Since he does not like soup, he doesn't like anything soupy!  Of course depending on how much tomatoes you add in, you can make this thinner if you prefer.

This really is a great, quick, and easy meal.  It can be very budget friendly when you use items that you already have on hand.  And can make a great vegetarian meal by omitting the meat!

I hope you try one of our favorite soups, and let me know in the comments what you think.


To get the printed version of the recipe, click HERE.

Throw Back Thursday: Goulash

Thursday, November 19, 2015
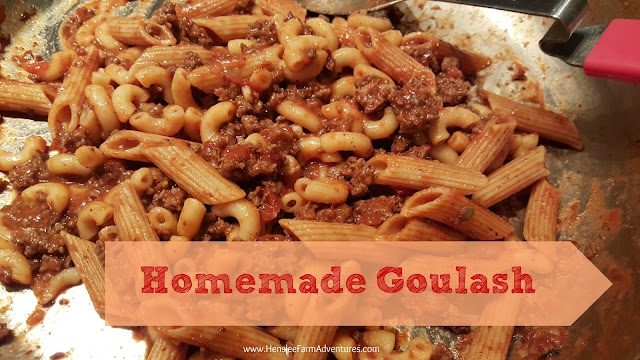
Homemade Goulash

I love today's post, because I get to share with you one of my family's favorite meals.  In fact, I believe this is probably the most requested meal that I get from my family.  It is also a dish that I grew up with, and one that is easy to make, and budget friendly!

My mom always called this goulash.  I know that there are other variations of goulash and I have tried a couple of those recipes, but I always come back to the variation that I grew up with. Well, kind of.  My mom made her goulash with hamburger meat, diced onions, elbow macaroni, and home canned tomato juice.  For us, I use my home canned pasta sauce so that there is a thicker sauce that already has spices added.

goulash ingredients
Goulash ingredients, yep that's all there is!
You can see from the picture above that there really isn't much to it.  The ingredients I use are:

  • 1 pound hamburger meat (this would be good with ground deer meat for you hunters out there)
  • 1 to 1 1/2 cups dry pasta, we prefer elbow macaroni, cooked according to package directions
  • 1 jar pasta sauce of your choice

For this recipe, we like to use elbow macaroni, but when I made it this time, I didn't have enough. You can see in my picture of the finished recipe that there is also penne pasta thrown in as well.  Remember this is my no grocery month, so I had to use what I had on hand.  The bowl in the picture has my homemade pasta sauce in it.  I opened a jar to use some for pizza, and needed to use the leftover sauce for something else.  This was the perfect dish to do that!

To make the goulash:

  1. Cook pasta according to package directions 
  2. While the pasta is boiling, brown 1 lb. of hamburger meat.
  3. After the hamburger meat is cooked through and chunked - my husband loves bigger chunks - add any spices you like.  I add a little minced onion (remember I'm using already seasoned sauce).
  4. Pour the pasta sauce in with the hamburger meat and let it simmer on low heat.
  5. When the pasta is done (I cook it to al dente), drain the pasta and add it to the sauce.

 And that's it!

Goulash
There almost wasn't any left to get a picture of it!
Once I finished cooking this batch, I set the pan on the table and went to get my camera to take a picture.  When I came back, there was hardly any left!  I had to scrap together a small pile just to get a picture. That is how much my family loves this dish!

I like to serve this with a salad and homemade french bread.  Of course some nights, we don't even bother with a veggie or bread, we just grab a big bowl of this pasta dish and enjoy.  This is comfort food at its finest!

Let me know in the comments below what you think of this recipe, and let me know if you have made this recipe before!


Throw Back Thursday: French Breakfast Puffs

Wednesday, November 11, 2015
French Breakfast Puffs

It's finally recipe time again!  I wanted to share with you a quick and easy breakfast recipe for two reasons. The first is that I love muffins or in this case puffs for breakfast.  They are easy to make and they taste so good.  It is a quick breakfast that you can eat on the go, which is usually what I have to do.

The second reason is because we are in the middle of a no buying grocery month (read about my November Food challenge), and I am in need of something for breakfast.  Lunch is usually left-overs from the night before, and supper is planned and taken care of, but breakfast is another story!

I remembered that my mom used to make these muffins that were spicy.  Not spicy in the sense that they were hot, but spicy in the sense that they were very flavorful with cinnamon and nutmeg.  And during fall, these are two of my favorite flavors.

I found her recipe and whipped up a batch so that finally, I will have something besides toast for breakfast! Here is the super easy recipe.

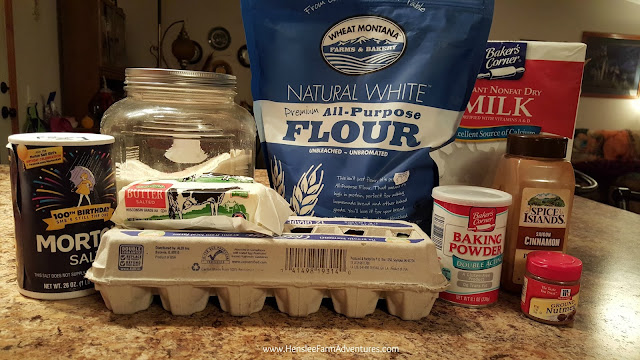
French Breakfast Puffs Ingredients
French breakfast puff ingredients

You can see the ingredients above. They are your basic staples.  I thought about throwing in a banana, but I was just too tired to start experimenting.  So maybe next time I'll mix things up a little.  Notice that also I am using powdered milk instead of regular milk.  This again goes back to the no buying groceries this month and we are out of milk.

First mix together 1/3 cup melted butter, 1/2 cup sugar, and 1 large egg until well blended.

My butter, sugar, and egg mixture, all mixed up!

Next, in a separate bowl, mix together 1 1/2 cups all purpose flour, 1 1/2 teaspoons baking powder, 1/2 teaspoon of salt, and 1/4 teaspoon of ground nutmeg. 

Alternately add the flour mixture and the milk into the butter mixture, starting and ending with the flour mixture.  This is where I goofed.  I didn't read far enough down on my mom's recipe and just dumped the whole flour ensemble into the butter mixture.  There was nothing I could do, but just pour in the milk and mix it all together.  Don't do what I did, because as you can see in my finished muffins, they didn't have a nice rise to them.  They tasted great, but they weren't as pretty.

My goof, don't just throw the flour mixture in there.  I meant to put it in a separate bowl.

Then beat at low speed until blended after each of the flour/milk additions.  Spoon batter into greased muffin pan filling 2/3 full.  I filled a large muffin pan a little less than this so I could stretch the batter and get 12 muffins out of it.  You can also make mini muffins as well.

Before you put these little gems in the oven to bake, don't forget the topping.  Mix together, 2 tablespoons of melted butter, 1/4 cup of sugar, and 1/2 teaspoon of sugar.  After putting the batter into the muffin pan, spoon the topping on top.
French Breakfast Puffs Ready to Bake
Ready for the oven!

Bake in a 350°F preheated oven for 20-25 minutes for large muffins or 14-16 minutes for mini muffins.

These are so good.  If you like nutmeg, you will love these!  They especially go well with a cup of coffee or hot breakfast tea.  They actually remind me of a coffee cake, a nice moist cake-like consistency, with a sweet crunchy top, which I love!
These were so good for breakfast, with my coffee.

If you want a printable version of the recipe, you can get it HERE.

I hope you try these!  Please let me know in the comments what you think about this recipe!

Throw Back Thursday: Chocolate Chip Coffee Cookies

Thursday, October 22, 2015

The throw-back Thursday recipe post is back!  I know some of you have missed it and to tell you the truth, so have I.  I really enjoy making these recipes and I enjoy remembering the story behind them as well.

Today's recipe comes from my husband.  When we were dating 12 years ago, he decided to try and impress me with his baking ability.  At that time his cooking abilities were just ok at best and so I was a little leery of him cooking me anything.  He went through several recipes and instead of sticking with one (which I thought he should do), he combined several recipes together to make chocolate chip coffee cookies, because he knew I loved chocolate and coffee.

I can admit know that I was worried about tasting them when they were done.  But boy did he surprise me!  He made the most wonderful cookies.  One bite and I was hooked...on the cookie and the man!

I thought I would share that recipe with you today and hope you enjoy it as much as we do.  He still makes them for me, in fact he really wanted to make them for this post, but I asked if I could try my hand at it.  While these cookies turned out really good, I think I should have let him make them.  He definitely has that special touch.

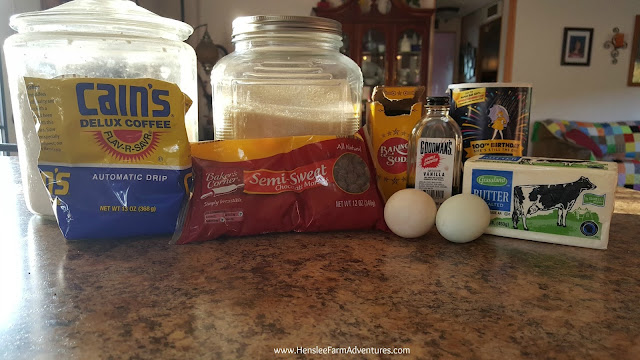
Chocolate Chip Coffee Cookie Ingredients
Cookie Ingredients
So let me say a little something about the ingredients.  It calls for instant coffee.  I normally have instant coffee at home.  Not to drink of course, blech, but to use in various recipes.  Of course when I went to retrieve it, I found out that I was out.  So I decided to try it with regular coffee, but still follow the instructions.  THEN I found out that my husband just makes extra strong coffee and uses that!  Geez! I wish I would have known.  So in the coming pictures you are going to see coffee grounds in the cookies.  Guess what?  It ain't so bad!

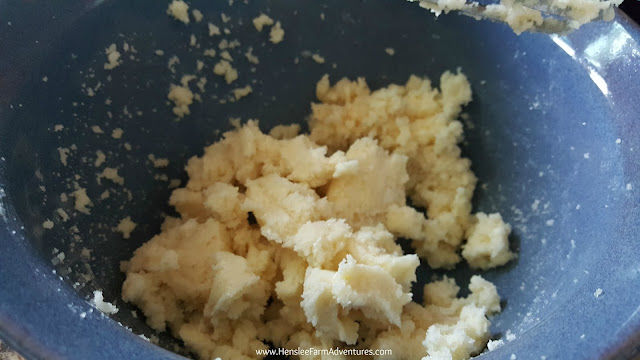
First you want to dissolve 1/3 cup of instant coffee in 2 tablespoons of hot water.  Then while it is dissolving (and cooling at the same time), cream together 1 cup of butter and 1 1/4 cups of sugar.

Butter and sugar creamed together
Butter and sugar creamed together.
Once the coffee has cooled, add it to the butter and sugar mixture along with 2 eggs and 1 teaspoon of vanilla and mix well.

Batter with coffee added
See? Coffee grounds.
Then in a separate bowl, mix together 2 2/3 cups of flour, 3/4 teaspoon of baking soda, and 1/2 teaspoon of salt.  Add that to the coffee ground mixture. Once you have that mixed well.  Add in 2 cups or one 12 ounce bag of chocolate chips.

Chocolate Chip Coffee Cookie Batter
Cookie batter, yum, yum!
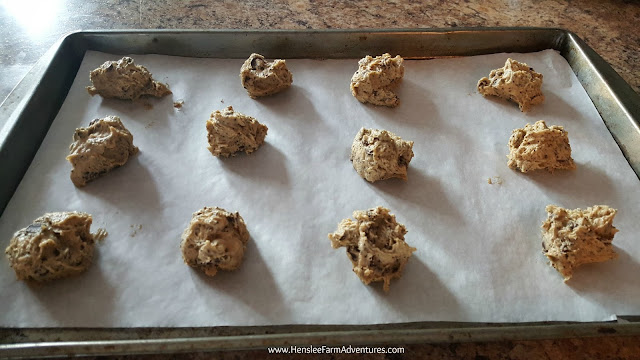
Drop by spoonfuls onto a greased cookie sheet, or in my case a parchment lined cookie sheet and bake at 350°F for 10-12 minutes or until golden brown.

Chocolate Chip Coffee Cookies Ready to Bake
Ready to go into the oven.

Once they are done, let them cool on the cookie sheet for a couple of minutes before transferring them to a cooling rack.

Chocolate Chip Coffee Cookies
Yummy cookies!
These are so good, even with the coffee grounds.  I love the flavor of coffee and chocolate together and these were perfect.  Well almost perfect. ;-)

If you want a printable version of the recipe, then click HERE.

Try this recipe out and let me know in the comments below what you think.

Throw Back Thursday: Cast Iron Skillet Cornbread

Thursday, September 10, 2015
A while back I promised you a recipe for my cast iron skillet corn bread.  Well now the time has come to deliver on that promise, but before I share that recipe with you, I thought I would tell you a story.

My dad was born in the middle of the great depression.  He was child number 9 out of 12 for my grandparents.  Can you imagine trying to feed that many mouths during good times, let alone during one of the longest economic downturns that our country has ever seen?

I know what helped was the way that they lived.  They had a vegetable garden, and raised their own meat.  They had a milk cow for milk and butter, chickens, and hogs and they had land they could farm. During the toughest of times, my grandfather and the eldest son went away to find work at a logging camp out west.

Growing up, I heard many stories about my dad's childhood.  Those stories would come from various family members and it gave me a real insight into how life must have been during that time.

During one visit with my grandmother's sister, I remember discussing cornbread.  That family was known for their good cooks, and great recipes, so talking about food was not uncommon.  My dad mentioned making cornbread with milk and eggs.  His aunt just looked at him and in the way she would always draw out her words she said "oh honey, you weren't brought up that way."  She went on to explain that they were too poor to make cornbread with anything other than water and cornmeal.  My dad just smiled and gave me a wink.  He didn't argue with her.  He knew that there was a time that cornmeal and water was probably the only way they could make cornbread, but he also knew that when the ingredients were to be had on their farm, milk and eggs were added as well.

I haven't tried my great aunt's version of cornbread, I'm thinking that it is probably a hot water cornbread.  This recipe is going to be more than just cornmeal and water and I can tell you that this version is very tasty!  Even my cornbread hating husband loves this one.

Simple ingredients make for a delicious and cheap recipe!

So here are the ingredients.  You might be asking yourself, "what is in that jar?"  Well that is my secret ingredient and what my grandmother always used, to make her cornbread.  Bacon grease.  I know what you are thinking...heart attack waiting to happen, but the bacon we use is from grass fed pigs.  When I save the grease, I strain it so it is "clean."  And honestly, it gives the cornbread so much flavor.  Trust me.

Not sure about the bacon grease?  Well, I guess you can use oil, whichever one you prefer.  It will still do the job (just not as tasty). :-)

See, that bacon grease doesn't look so bad!

Turn the oven on to 350°F.  Put two spoonfuls of bacon grease, or about 1/4 cup of oil in your cast iron skillet and then put the skillet in the oven.

Next mix together 2 cups of cornmeal, 2 eggs, and 1 1/2 cups of milk.  You can use sweet milk or butter milk, whatever you have on hand.  Mix well.


Once the oven has preheated and the skillet is nice and piping hot, take it out of the oven and pour a little bit of the grease or oil into your batter and stir.
This is the batter ready to be baked.  Thanks to the hot pan, it has already started to brown around the edges.

Then pour the batter into the skillet.  It should sizzle as it hits that pan.  Turn the oven up to 400°F and put the pan back in the oven.  Bake for 15-20 minutes or until golden brown.

Yum, yum!
And here is the finished product! This was so good!  I love cornbread, especially with chili, or beans, or a hearty soup.  I even love it as a dessert with honey drizzled on top.  Want to know what we ate with this cornbread? 

Cheeseburger soup!  I'll share that recipe with you very soon!

This was unbelievably good!  One of our family's favorites!
I hope you enjoyed this easy iron skillet corn bread.  If you want the printed version of the recipe, then click HERE.

Let me know in the comments how you make your cornbread.


Throw Back Thursday: Stuffed Peppers

Thursday, September 3, 2015

My #TBT recipe post is back!  I hope you all are as excited as I am.  The recipe I am sharing today used to be made by my grandma and my mom  when I was little.  My mom always loved it, but to be honest, I really never cared for stuffed bell peppers.  I just didn't like the cooked peppers.  Also the filling had rice in it and as a kid I didn't care for rice either.

So you might be asking yourself why am I sharing a recipe that I didn't like growing up?  Well because my tastes have changed and a couple of years ago, I came up with my own recipe for stuffed peppers that I loved.  In fact even the kids loved it! 

What I did different is halved the peppers and laid the halves cut side up and stuffed them that way.  I liked that because there wasn't as much pepper to eat.  I also omitted the rice and instead used some black beans and corn along with hamburger meat that I flavored with my taco seasoning blend and then added a little salsa.  I topped that with cheese.  It was wonderful!

Even though I love that recipe, it is not the one I am going to share with you today.  These stuffed peppers were actually made out of leftovers and more closely resemble my grandma's recipe that she used.  HINT: Once the peppers are assembled they can be frozen for later. 

So now on to the recipe.  Actually there really is no recipe for it.  I could have sworn that I had a written recipe for my grandma's peppers, but when I went to look for it I couldn't find it.  I do know that she would stuff them with browned hamburger, cooked rice, and homemade tomato juice.  Then she would cook them until the peppers were done.  So I based my recipe on that.

My ingredients...so glad I could make over my leftovers!

Here are my ingredients.  I had some leftover meatloaf that wasn't enough to feed all of us, but it was perfect for this dish.  Plus I thought the way the meatloaf was flavored would give the peppers a great taste.  I also had tomato juice left over.  This of course is my family's homemade version.  It is better than any tomato juice you can buy! If you don't have tomato juice on hand, you can always use tomato sauce, or even marinara sauce would be yummy.  I used a 1/2 cup of dry rice and three sad looking big peppers that I knew needed to be used very soon.

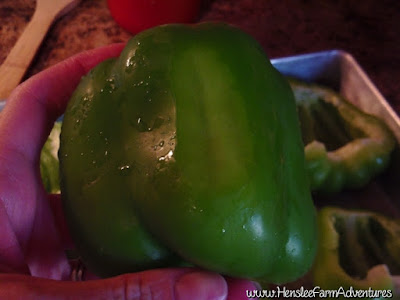
I started by preparing my peppers.  I cut them in half long-ways and removed the seeds and membrane.  I put them in a greased pan. 

Here is where I shaved off a piece on the backside so it would be stable.
Some of the peppers didn't want to "sit" very well, so I sliced off just a little of the underneath side so that they would be stable and wouldn't slide around or tip over. 

As I was preparing the peppers, I had already started cooking the rice.  After the peppers were ready and before the rice was done, I chopped the leftover meatloaf into a bowl.  Once the rice was done, I added it to the meat and then poured in some tomato juice, and mixed well.  You can see the consistency below.  I didn't want it too soupy, but moist enough so that when it baked, it wouldn't dry out.

Stuffed and ready to bake!

I then put this mixture into each of the peppers.  I just spooned it in and made sure not to fill it too full.  Once they were all full, I put the peppers into a 375°F preheated oven for 20 minutes.

After about 20 minutes, I removed the peppers and put a generous helping of grated cheese on top of each one.  Then I put them back in the oven and let them cook for another 10 minutes.

Depending on the size of the peppers and also how done you like them you may need to cook them a little longer.  I do not like the peppers mushy.  Thirty minutes was perfect for me.

These were even better than I thought!

The family loved these!  They were super easy to make AND I was able to use up leftovers which is always a plus in my book.  These lasted us two meals (supper and lunch the next day) which is also a big plus. 

So usually I have a recipe link that you can click on and print out, but for this one I don't have a recipe.  If you wanted to make it from scratch for a family of 4, here is what I think you could use:
  • 3 large or 4 medium size bell peppers
  • 1/2 pound hamburger, browned
  • 1/2 cup dry rice, cooked according to package directions
  • 1/2 cup tomato juice
  • 3/4-1 cup shredded cheese (however much you like)
Besides using leftover meatloaf like I did, leftover taco meat would be great as would leftover sloppy joe meat.  You could also add in a few veggies like I did in my original version (the mexican one)  to suite your tastes or to use up any leftover ones you may have. No matter what you do, these are sure to be yummy!

So let me know in the comments, have you had stuffed peppers and if so how did you make them?

Throw Back Thursday: Embracing the "Lasts"

Thursday, August 27, 2015


 I'm taking a one week break from my regular throw back Thursday recipe post. I'm sorry to those who look forward to seeing it each week, but I promise I'll have one next week. 

Mama's birthday and Drew at nine months

There has been something that has been weighing on my heart and I just had to write about it.  In fact just thinking about it, I can already feel the tears start to well in my eyes. I'm sure at one time or another all moms go through this but I just didn't expect it to happen to me this soon.

Mama tickling Drew at two-years-old
So here it goes. My son is growing up. There. I said it. Yes I know that all kids grow up, but this is different. I was okay with him growing up into a toddler.  I was okay when he started preschool. I was okay when he started kindergarten. Alright, that last one is a lie. I was a complete basket case when he started kindergarten, but you catch my drift.  I knew he had to grow up, and I was going to be a strong mom.  I just knew it wouldn't bother me one bit! 

Mama kissing Drew at three-years-old
I used to imagine what kind of a man my son would become.  While I definitely did not want to wish my life or his away, I was excited to see the kind of person he would grow into.  I didn't think that him growing up would actually affect me.  I wasn't going to be like those other moms, the ones that cry and lament that their baby is gone.  No, I was going to relish the wonderful young man my son was becoming.  After all, it is just a fact of life and it has to happen!

Drew missing his two front teeth at four-years-old
Then things started happening this summer. Things I weren't prepared for.  I had to stop using the child-size hangers for his clothes and had to buy the adult-sized ones so his shirts would not fall off.  I began to notice that when I folded the laundry it was getting harder to tell the difference between his socks and his dad's socks.  I went to put on a pair of his flip flops he left beside the door so I could run out to the car. And they fit!  I looked at him sitting beside his dad on the couch one evening, and I noticed there wasn't as much of a size difference anymore.  But where it really hit me was when I took him to the dentist right before school started, and I was told that he had no more baby teeth.  It was all I could do to keep it together right there in the dentist's office!  The hygienist took one look at my face and knew I was about to lose it.  She had sympathy in her eyes for me and told me it was going to be okay. 

Drew at six-years-old right after a soccer game

That's when I knew. No longer am I just experiencing the "firsts," but now I have started experiencing the "lasts" with him. Before I had always thought about beginnings, and new things that my kids discovered, never the last thing they would do. And that is why this mother's heart is breaking.

Drew at seven-years-old having a shake with his aunt

I can no longer pick him up and carry him...when was the last time for that, how did I miss it?  No more tooth fairy...what night was the last time for that, why didn't I realize it?   I know he doesn't believe in Santa anymore from the things he says, but he keeps it quiet because of his little sister...when was the last time he believed? Last year? The year before that?  Where was I?  Why didn't I see this happening?

Drew at eight-years-old gearing up for football season

My heart aches and my eyes are stinging with tears.  My baby has grown.  He is growing.  And there is nothing I can do about it. Nothing.  I'm not sure how I am going to handle this.  I'm not sure I'm going to be able to keep it together.  So I might have to reckon with myself that I have become one of those moms.  And you know what?  I'm okay with that. 

Drew at nine-years-old with a new haircut
Even though he is growing up fast, and he will soon be an official "tween," he still comes and gets in bed with me every morning.  He still asks "Mama will you hold me?"  And as I put my arm around him, I can't help thinking, will this be the last time? I know that day is coming. I'm not sure how I will handle it when I wake up one morning realizing that it has come.  But for now I am just going to cherish each one of those mornings...until the last

©HensleeFarmAdventures.com. Powered by Blogger.

Search This Blog

Back to Top